- REVIEWS
Camera Reviews 
More Reviews Mobile Reviews Photography Reviews - GALLERIES
- VIDEOS
- BUYER'S GUIDES
Exposure Blending: The Secret to Landscape Photos with Maximum Impact (VIDEO)
Landscape photographers who've spent enough time shooting in the field, especially after the sun drops below the horizon, know that it's often impossible to capture what they through the viewfinder with a single shot in the camera. This tutorial from the PHLOG Photography YouTube channel explains how to get the job done to perfection with a technique known as exposure blending.
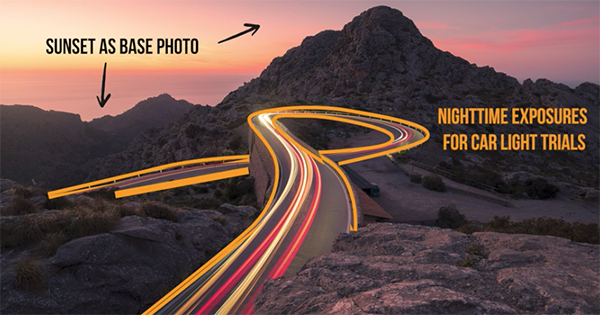
Instructor Christian Mohrle is one of Germany's best landscape photographers, and he equally adept behind the computer. Today's challenge involves a sunset scene shot at night with a dark peak in the background, a beautiful golden sky, and car trails running through the middle of the frame. And it's the perfect situation to demonstrate how exposure blending is the ideal solution for balancing out the varied colors and tones required for optimum results.
Mohrle's original image is dull and uninspiring, so he begins with several global adjustments to enhance it as much as possible, before the awe-inspiring steps that follow. You can download his Raw file with a link beneath the video, and then follow along as the process is revealed.
The technique involves shooting multiple images of the same scene (with the camera mounted atop a tripod) at different exposure settings, and then combining them in Photoshop to create one magical image. The preliminary adjustments start by changing the Profile from Adobe Color to Adobe Landscape which helps achieve the vibrant look that Mohrle desires.
Other basic enhancements require modifying White Balance, increasing the Tint for more warmth, and bumping up Exposure while dropping Highlights to help fix the bright sky. Mohrle also boosts Whites and brings down shadows to enhance contrast throughout the frame. Adding Texture and dropping Clarity is also important for the reasons explained.
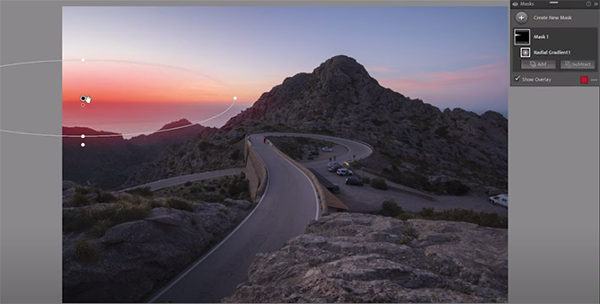
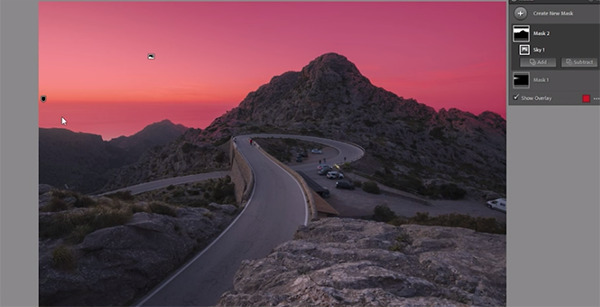
With the base image now looking as good as possible the fun part begins with some simple masking to selectively enhance specific portions of the scene. A Radial Gradient over the horizon is the first step in this process, followed by a sky selection with a Linear Gradient.
Color grading comes next and Mohrle walls you through the steps he employs to really make the colors pop. A bit of careful sharpening also helps. Then it's time to work on the vehicle light trails which require enhancements of their own.
The process concludes with the coup de gras; namely, Mohrle's transformative Photoshop exposure-blending technique—proving once and for all that it is possible to make a silk purse out of a sow's ear! After watching this eye-opening lesson pay a visit to Mohrle's instructional YouTube channel where there much more great landscape photography advice.
We also recommend watching the earlier tutorial we posted from another top pro who explains how to shoot and edit landscape and wildlife photographs when harsh midday sun is the name of the game.


![]()
Get the Latest Photo Tips, News & Reviews from Shutterbug!
| Camera Reviews Other Reviews | Mobile Reviews Photography Reviews Columns | News | Features | How-To | Resources |
 © 2025 Shutterbug
AVTech Media Americas Inc., USA
All rights reserved