- REVIEWS
Camera Reviews 
More Reviews Mobile Reviews Photography Reviews - GALLERIES
- VIDEOS
- BUYER'S GUIDES
Five Easy Ways to Upgrade Your Computer For Digital Photography
You don’t need three magic wishes to make your Mac or PC more digital photography-friendly. Here are five ways anyone can upgrade their computer to improve the speed and efficiency of Photoshop, expand storage space for all those Raw image files, add room for unlimited back-ups of your photo archive and make the whole shebang more secure—without touching a screwdriver.

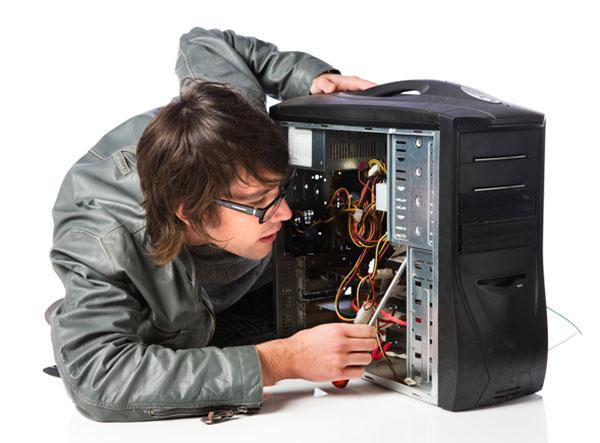
1) Attach an external hard drive
Why start here? It’s smart to safely back up all images and data before proceeding with other do-it-yourself upgrade projects—it minimizes the risk of data loss. And this is an upgrade that desktop, laptop, PC and Mac users can all perform with no difficulty.
Skill required
Can you plug in a toaster?
Hardware considerations
If you have an available USB 3.0, eSATA or Thunderbolt port, you’re half-way home. USB 2.0 works too, but it’s slower. If you do not have an open port, you need a USB hub or—better yet—a port expansion card that fits in one of the PCI slots inside your computer. If PCI, or “Peripheral Component Interconnect” means nothing to you, go with the USB hub. If you’re a Win PC user and a bit more adventurous, a very useful option is the combination memory card reader/USB port expansion component that sits in an empty drive bay. Good units like the Rosewill are very inexpensive ($15) and easy to install.
External drives can be sorted into three buckets for simplicity. All are good choices in their own way. The smallest capacity, the ultra portable, is about the size of a thin paperback book, which is a benefit if you need to take a ton of files with you when you travel. They’re also the lowest priced, generally. However, they don’t use an external power supply—they’re powered by the computer—and for that reason do not work with some USB hubs. Desktop units, which offer capacities up to 6TB, are for stationary use and cost commensurately more. If you frequently need to connect to more than one computer—or even to every computer in your home—you need a NAS, or Network Attached Storage drive. These are harder to install and configure unless you are network savvy, but they’re invaluable if you want to keep all of your image, music and downloaded video collection online and on the same drive.
There are added benefits to performing this easy-to-do upgrade. Having any sort of external HDD facilitates moving files from a notebook to desktop, computer to computer or between Macs and PCs. Also, for obvious reasons, an external is a good choice for folks who plan to replace their computer soon. External drives are brainlessly simple to install and sufficiently inexpensive for anyone to own enough of them for redundant backup.
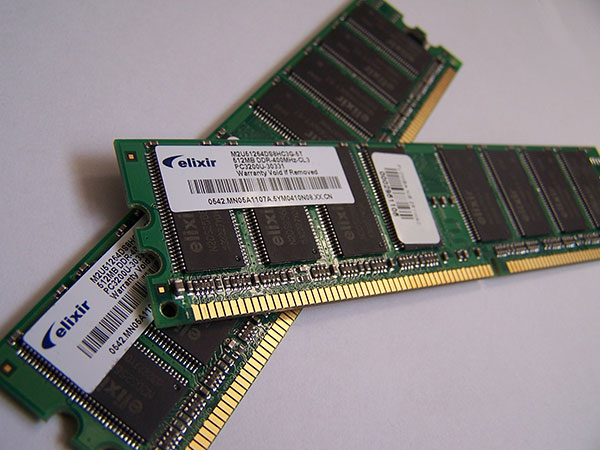
2) Add RAM
Why is this important? Photoshop, video editors and other memory-intensive programs run faster, and more images can be open at the same time without stalling the system.
Skill required
Medium. If you can change a fuse in your car or the battery in your garage door opener, you’re a safe bet.
Hardware considerations
The maximum RAM your computer supports is determined by motherboard limitations, available physical memory slots and your operating system. Before proceeding, check with the computer’s manufacturer to learn the amount and type of RAM you need. The websites operated by memory manufacturers like Crucial are the best sources for information. Some will even scan your PC and gather the specs you need to continue.
Kingston Memory’s website is a great resource, too. Their searchable database contains the following info for nearly every brand of PC and every generation of Mac:
a) maximum RAM supported
b) exact module requirements
c) memory bank configuration
d) helpful installation tips
e) price
If you have a fairly new PC and are running a 64-bit OS like Windows 8.1, you’re in good shape. Mac users who keep their OS up-to-date are likewise safe. It may be necessary to replace small modules that are already installed with larger ones because modules are always installed in matching pairs. If there are four banks and each contains a 4GB module, to install more than 16GB at least one pair of 4GB modules must go. To get to 32GB, it would be necessary to dump all the old RAM and install four identical 8GB modules—unless, of course, you already had two 8GB pieces in place.
Installing the new modules is very simple. Locate the empty banks. Unlock the retaining mechanism. Carefully press the gold-gilded edge of the RAM module into the slot making sure that the obvious notch matches the bump in the slot. Visually confirm that it’s fully seated and relock the retainer. Needless to say, handle the RAM by the edges of the card and don’t get greasy fingerprints on gold contacts.
For best performance, confirm that you have allocated sufficient memory to Photoshop (or your favorite photo editor). This setting is usually found under the Preferences tab. Even if you use your machine primarily for editing images, there are added, hidden benefits to this upgrade, too. Other software will run faster, and you can have more applications open at the same time.

3) Install a high capacity internal hard drive as a second drive
Why—when you already have a primary drive that seems ginormous and you just plugged in a whopping huge external drive? Because no matter how big your primary drive is, sooner or later it won’t be big enough. Install another drive now before you find yourself running about like your hair is on fire, screaming because you are running out of space for all of those humongous raw image files and HD video. Second, having a fast, internal second (or even third or fourth drive) makes it much easier—not to mention more likely—to back-up your images and other files. Warning: what we’re covering in this story is adding an extra drive. Replacing your primary Drive C: is a whole different sport.
Skill required
Much less than you may think if you own a PC. Mac users, sorry to say, this upgrade is generally impossible. Nowadays many PCs are equipped with drive bays that don’t require screws. At the very worst you may have to attach thin metal rails to both sides of the drive and secure them into the drive basket with small screws. And you must plug in both ends of a cable. Yes, you must open the PC, and if that causes trepidation, skip this section.
Hardware considerations
First and foremost, do you have an empty drive bay? Sadly, many desktop PCs and even some tower configurations come from the factory “full.” Keep this fact in mind when you buy your next PC. And, as stated previously, most Mac owners are shut out completely—which simply means you should add more external drives. Newer Macs equipped with Thunderbolt inputs are great because Thunderbolt daisy chains can support up to six devices per port. That’s a nice round number of external HDDs.
Should you consider an SSD, Solid State Drive, instead of conventional spinning media? The advantages are superior speed and no moving parts, but the capacities are low and the cost is high. These two disadvantages will disappear in time, but for now they’re not the best choice unless you are adding one as the third or fourth drive.
The interface matters. Although you may encounter an older PC that’s EIDE, the tide of popularity recommends SATA. Maximum data transfer rate is higher. Also, SATA connecting cables are considerably narrower and that allows increased airflow and less mess inside the PC case. WIN PC computer system motherboards that do not have SATA ports can be updated by adding a PCI SATA controller card. Some cards provide external SATA (eSATA) ports on the back, making them doubly versatile.
Once a hard drive is secure in the drive bay, installation is just a matter of plugging in the power Molex connector (it fits only one way in one place) and the SATA cable. It too fits only one way and in only one place, and the other end plugs into either the motherboard or the PCI card (if you added one). After installation, reboot and Windows 8.1 will find the drives. If formatting is necessary, that will be made clear in the directions that come with the drive.
Added benefits? There’s more room for other files, too. That is, until you accumulate a few hundred hours of video and find yourself once again out of space.
![]()
4) Engage a serious cloud-based storage and back-up system
You mean I still need cloud storage, even with all these new drives I just installed? Yes. In addition to providing online storage, cloud-based storage enables mobile access (very important), the ability to easily send large files to friends and clients, online collaboration, file synchronization, simplified file sharing and—most important of all—secure backups.
Skill required
Can you spell Box? This upgrade could be summed up in a single word: Box. Not to be confused with another good system that has “box” as part of its name, Box is used by many Fortune 500 corporations. Start with a free 10GB account.
Hardware considerations
The beauty of cloud-based storage is that it’s platform independent. It’s compatible with just about anything that can connect to the internet. That said, make sure that the system you choose has mobile applications suitable for the portable devices you prefer. In the case of Box, they’ve taken the nonpartisan approach and pushed all of the compatible applications into one corral they call OneCloud Mobile Apps. There you find 1,200 apps that speak Android, iOS, etc.
The added benefit of adding cloud storage, especially storage that can boast enterprise-grade security, is the comfort that your files are safe and accessible even in the face of the worst imaginable disaster.

5) Get some protection
Mac users are sometimes lulled into a false sense of invulnerability when it comes to viruses and other malware, and that’s a shame. Do you want to be the exception that proves the rule? Not me, not when decent protection is free. Bitdefender does a good job and is a free download. If you love it, or are really paranoid, splurge on Bitdefender’s Virus Scanner Plus for $29.
If you use a PC and a version of Windows older than Windows 8 (like Vista for example) and do not use a high quality antivirus software, don’t send us any e-mail—you’re probably already infected. In Windows 8 and Windows 8.1, Windows Defender is already built in and provides full protection against viruses, spyware, and other potentially unwanted software. But if you have an older version, download Microsoft Security Essentials—it’s free—and protect your PC.
Skill required
None.
Hardware and software considerations
If you are already using McAfee, Norton’s or another good protection package and are vigilant about staying up-to-date and scanned, good for you! You don’t need anything else—in fact, most free medicine does not work in tandem with other brands. But if you’re looking to protect a PC that’s running an older version of Windows, use Microsoft Security Essentials. For Mac users there are about two dozen products available in the App Store for protection against viruses, spyware and other malicious software.
It’s hard to believe that in this day and age there are people who use unprotected computers, but it’s a fact. Sometimes parents neglect shielding their kid’s computers for whatever reason, and thereby invite bad stuff onto the home network. Don’t be that person.
—Jon Sienkiewicz


![]()
Get the Latest Photo Tips, News & Reviews from Shutterbug!
| Camera Reviews Other Reviews | Mobile Reviews Photography Reviews Columns | News | Features | How-To | Resources |
 © 2025 Shutterbug
AVTech Media Americas Inc., USA
All rights reserved