- REVIEWS
Camera Reviews 
More Reviews Mobile Reviews Photography Reviews - GALLERIES
- VIDEOS
- BUYER'S GUIDES
Affinity Photo Software Review: Has Photoshop Met Its Match?
I’ve worked with Adobe Photoshop since it was first introduced. While it wasn’t my favorite image editing software initially, Photoshop grew on me as its capabilities grew, and it has become my go-to editor outside Lightroom.
In fact, Photoshop has led the field among image editors for as long as I can remember. It’s a robust package with an array of tools that far surpasses what many of us would normally use—although, granted, it’s nice to know they’re there when needed. And no pro photographer I know would consider abandoning Photoshop in favor of a fledgling software application. Not just yet, anyway.
However, for the many photo enthusiasts who have yet to dabble in Photoshop or who find it too unwieldy or intimidating, or downright too expensive, something new is always an enticement. This is especially true in light of Adobe’s recent and controversial subscription-based Creative Cloud service, which many photographers balk at. Even some pros I know prefer to stick with the tried-and-true, standard desktop versions to the Cloud-based subscription versions.
Well, Affinity Photo from Serif Labs is here to address the naysayers among us. First of all, it’s available at a one-time price, and a very inviting one at that: for $49.99, you get not only the software, but also all future updates and releases. Affinity Photo is available from the Mac App Store—currently (and likely for the foreseeable future) Mac OS X only, 10.7 or later, 64-bit processor—courtesy of Serif Labs.
This is just a short and crisp list of key features of Affinity Photo:
• Mac-only image-editing software
• Raw file development, plus support for all popular file formats
• Complete Photoshop-like, pixel-level editing environment
• Support for layering, blending, selections, masking, and hefty photo compositing
• Healing and clone tools; numerous brushes; graduated filters (called “gradients”)
• Soft proofing (generated as a layer)
• Third-party plug-in support (still buggy)
• History panel
• Full text support
• Full support for Wacom and other graphics tablets, including pressure, tilt and shortcut buttons (not tested)
• $49.99 street price (via Mac App Store)

A Different “Persona” from Photoshop
Affinity Photo sought to make itself distinct from Photoshop and the Photoshop-wannabe’s out there with a unique language and working methodology. I may not agree with it all, such as the use of “persona” in place of module or workspace, but you may find these touches endearing. If you’re new to photo editing, you’ll see nothing wrong with them, of course. With that said, we’ll be focusing on the two modules that do most of the work, outlining important features and offering targeted critique and suggestions for use.
For Raw development, there’s the (you guessed it) Develop Persona, which is essentially non-destructive. All the pixel-level editing is housed under the Photo umbrella (pun intended). They, of course, complement each other. And, keep in mind, unlike Photoshop and Adobe Camera Raw, all these modules are housed under one roof, facilitating back-and-forth movement, as needed.
The two other modules—Liquify (which is discussed briefly below) and Export—are extraneous, in the sense that they belong under the main Photo menu, at least in the eyes of this reviewer. Liquify should be under Filters. In fact, you’ll already find Export in the Photo menu, under File—to be used when saving files. There is a separate Print option, listed under File—in all modules but Develop. There is no directed support for special print formats or contact sheets, however.
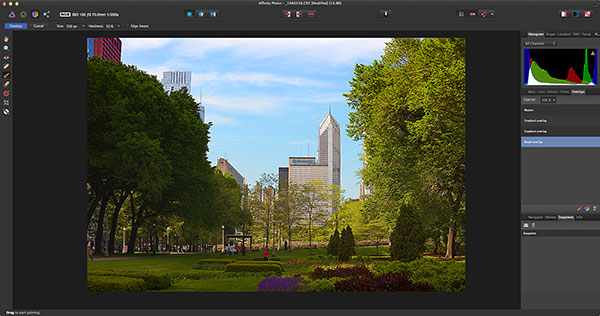
Develop Persona
Open a Raw file and you’re whisked to this Develop Persona (module) automatically. Raw processing here encompasses the basic tonal, contrast, and exposure adjustments; lens corrections; sharpening; and noise reduction. Think of it as Adobe Camera Raw (ACR), except that you can always return to it without interrupting your workflow.
The Develop Persona is non-destructive. However, once you exit this module and then return to it, you’ll note that all settings return to their default positions, which means that the process is no longer non-destructive in the fuller sense of the term. (I understand that this may be corrected.)
My chief complaints revolve around several issues. Currently there are no camera and lens profiles to automatically implement lens corrections. What’s more, white balance lacks those all-important presets and a Kelvin scale (providing percentages only), although there is an AWB option, but you have to search for it (it’s an icon at the top). Oops, my bad. The AWB icon is found in the Photo Persona (module). It should also be in Develop.
One serious glitch I found involved removing lens vignetting, under the Lens tab. Enable this feature and a white veil infuses the image, even at 1%. A workaround I discovered is this: when you’re done processing the Raw image (and you may simply want to do this at the outset), click “Develop” and proceed to the Photo Persona.
Now before doing anything further, return to Develop and enable this feature. It will now work properly. (I was assured that this bug is being addressed.) I also found that defringing, which is separate here from the one-click chromatic aberration correction, produces residual artifacts (be sure to view the image at 100%).
While able-bodied, with enough settings to put your images on the right path, the Develop module lacks many of the refinements of Lightroom CC, especially image library management. It also falls well short of DxO Optics Pro as a Raw developer.
TIP: the first time you find yourself in this module, make sure to click “DEVELOP” before exiting, which will then immediately take you to the Photo Persona for some really deep, down-home editing. If you click “Cancel,” all your changes will not only be lost, but the program will force-close the image. If you re-enter Develop at a later stage, however, and decide to exit and cancel any editing, you just return to the Photo module with no undue consequences.
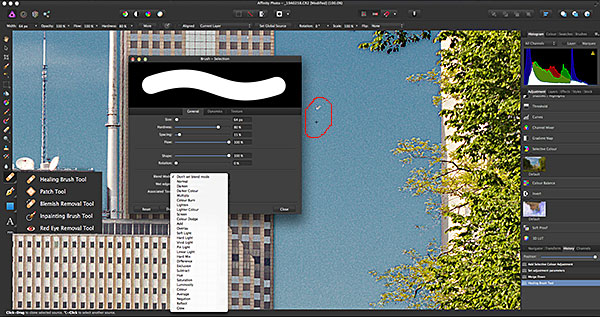
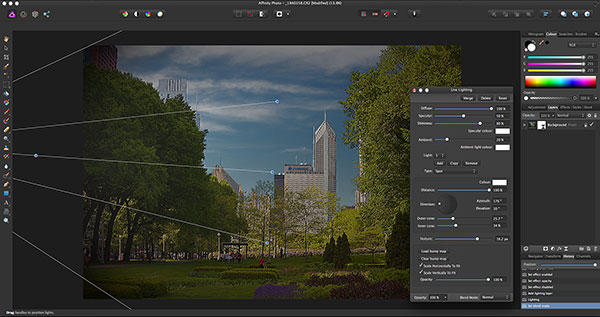
Photo Persona
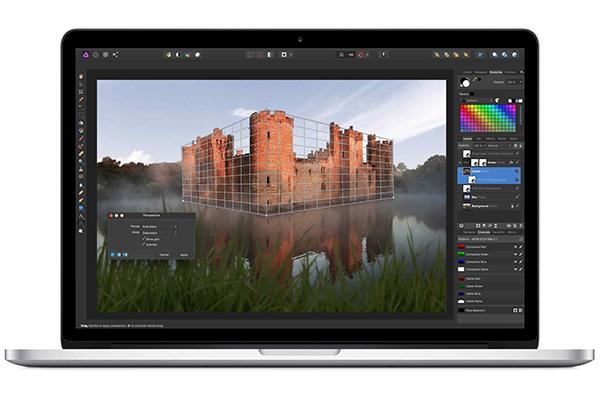
This is essentially Photoshop, but with less polish, while still offering some very powerful features, including soft proofing (which inexplicably is committed in the workflow as a new layer—so watch for that). In addition to the usual fare, this module adds “gradients” (graduated filters in everyday-speak), selections and masking, countless brushes, layers, and numerous, flexible blending modes, but doesn’t go as far as HDR, panorama stitching, or focus stacking (but they may be added in future updates, I’m told).
Unbeknownst to the user, Affinity Photo has a tendency to add layers for practically each action or set of actions you perform. And that can lead to confusion. When I attempted to use Liquify to warp parts of the image, it failed to work. When I examined the Layers tab and noted several layers were generated, I discovered the culprit was all these added layers. Selecting the Background layer was a quick workaround, as was merging the layers. (Note: Liquify can also be used to widen the pupils in a portrait, to give a face a more inviting appearance.)
The Photo Persona module maintains a History of all actions. That’s also true of the Develop and Liquify modules. The Export module appears to share the same History panel as Photo. Now here’s the rub. When you exit Develop and Liquify, the History is erased, and the only record of it is stored broadly as “Develop” or “Liquify” in Photo’s History panel. Which means there’s no going back to fine-tune Raw settings or any image warping.
If you move one step prior to Develop or Liquify in the History panel, you undo all the work you did in the Develop or Liquify panel, respectively, in one broad stroke. And you can’t go back in to Liquify to otherwise reconstruct (which is Liquify-speak for undo, in a sense) any warping, as would have been possible when you first entered Liquify. The warping has been carved in stone the moment you hit “Apply” (unless undone as a whole in the main menu or in the History panel).
There is support for third-party plug-ins, but don’t smile just yet. This aspect of the program is buggy to the hilt. One plug-in crashed Affinity Photo; others failed to launch. (I’m told they’re working on improving this feature.)
Some monikers attempt to be too clever and other terms, along with the main menu design, are foreign to most of us and prove to be counter-intuitive. But get past that and you can go far with this module.
Conclusion
“To Affinity and Beyond” is, no doubt, the secret (or maybe not so secret) rallying cry behind this photo editing software. For Affinity Photo to go beyond its current constraints, however, there are numerous glitches that need to be fixed and features that must be ironed out or added, not least of which is ensuring full and unfettered third-party plug-in support.
It would also help if Serif Labs, the company behind Affinity Photo, added context-sensitive pop-up wizards to explain the various functions, especially the more esoteric settings and monikers. To make matters worse, the online Help is woefully inadequate and there’s no downloadable instructional PDF, although online tutorials do help to some degree. What is especially promising and inviting, however, is the willingness of the developers to listen to and act on suggestions and critique, especially when it comes to fixing bugs.
Still, for its price alone, this is one image-editing app worth owning. But more than that, Affinity Photo is worth using for its plethora of features, even if the application is not as intuitive as some might like us to believe. More to the point, with this application, countless photo enthusiasts and aspiring pros can now afford to learn and master complex digital photo retouching and compositing without compromise.
I will readily admit that the longer I work with Affinity Photo, the greater my affinity towards it. I may not be a convert just yet, but, as the application sees further movement in the direction I’d like it to go, I may move with it. So for now, take the plunge and you too will go to Affinity and beyond.
(If you’re interested in photo editing software, you should also check out my recent review of Adobe Photoshop Lightroom CC.)
Jack Neubart (www.jackneubart.com, www.pixelPERFEXION.net) is a photographer, photo-technical writer, educator, photo industry consultant, and author with over 35 years of experience, covering practically every aspect of photography.


![]()
Get the Latest Photo Tips, News & Reviews from Shutterbug!
| Camera Reviews Other Reviews | Mobile Reviews Photography Reviews Columns | News | Features | How-To | Resources |
 © 2025 Shutterbug
AVTech Media Americas Inc., USA
All rights reserved