- REVIEWS
Camera Reviews 
More Reviews Mobile Reviews Photography Reviews - GALLERIES
- VIDEOS
- BUYER'S GUIDES
Adobe Camera Raw: 5 HIDDEN Features with FREE Presets & LUTS

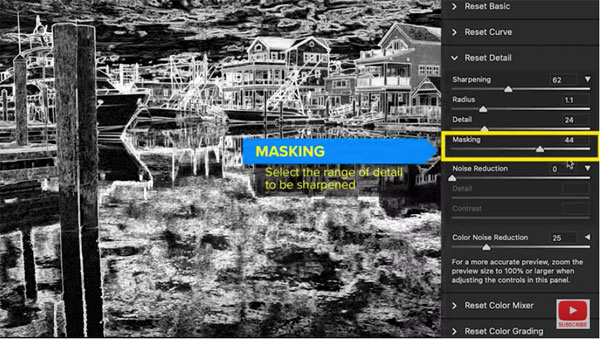
Adobe updates software so frequently that it’s difficult to keep track of all the new features and remember favorite tools from the past. The quick tutorial below from Photoshop Café is a great refresher, explaining five easy-to-use features in Adobe Camera Raw (ACR) that make a big difference in your results.
Instructor Colin Smith demonstrates “five absolutely helpful tips” in both ACR and Lightroom that you need to start using to edit your images if they’re not already part of your workflow. He ACR hacks are super useful when process your files.
This episode opens with a batch-processing technique that enables you to apply adjustments to dozens, hundreds, or thousand of images at once. This trick only requires a couple clicks and, like other tips he offers, saves an incredible amount of time. And it ensures consistency among photos of a similar style.
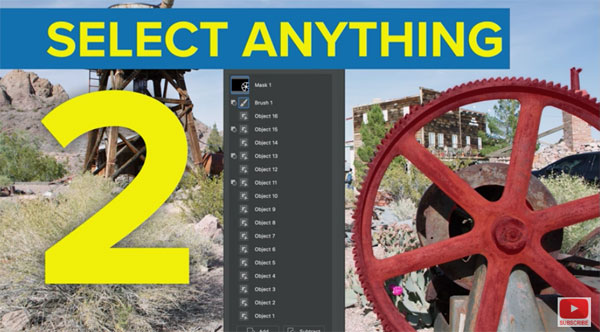
Tip number #2 is all about making selections. Most users know that ACR and Lightroom can automatically select objects using artificial intelligence (AI) but Smith says, “They don’t always select the right object. And that’s where you may have to use your own intelligence, with the quick tricks Smith recommends to “select anything” with precision.
Photographers who shoot both video and stills will learn a really helpful trick for color-grading videos in ACR. And there are also a few of what Smith calls “hidden helpers” for accomplishing a variety of tasks really fast.
Smith also discusses the power of Look Up Tables (LUTS), describing what they are and how to open and use them in ACR and Lightroom. He also provides a link to where you can get free LUTS from the vault at Photoshop Café.
There’s also a link to where you can obtain Smart Presets for free. Bottom line, this is a very helpful episode that’s worth much more than seven minutes of your time.
There’s plenty more great stuff on all things Adobe on Smith’s instructional YouTube channel, so pay a visit when you have time.
We also recommend watching an earlier tutorial we posted from another expert, explaining how to use Lightroom’s Healing tools to remove ugly junk from your photos.


![]()
Get the Latest Photo Tips, News & Reviews from Shutterbug!
| Camera Reviews Other Reviews | Mobile Reviews Photography Reviews Columns | News | Features | How-To | Resources |
 © 2025 Shutterbug
AVTech Media Americas Inc., USA
All rights reserved