- REVIEWS
Camera Reviews 
More Reviews Mobile Reviews Photography Reviews - GALLERIES
- VIDEOS
- BUYER'S GUIDES
5 Tips for Shooting Beautiful Portraits with Minimal Photo Gear
(Editor's Note: Amanda Stevens is an internationally published photographer based in NYC and Las Vegas specializing in weddings, events, and portraiture. She's a member of Datacolor's Friends with Vision. In the below portrait photography how-to, Stevens shares five tips to help you get the best out of your shots when using only minimal photography gear.)
1. Communication: Planning Your Shoot
The first step for me is to always have a conversation with my subject about what they hope to get from our shoot and time together. I get to know what they’re going to use the photos for and why they even want to do this shoot to begin with. Having a clear goal will help you determine what gear you’ll need to bring with you and what you can leave behind.
Part of this conversation should then be location. For me, being in NYC, the location will sometimes heavily determine what I can and cannot use in a shoot.
Once you’ve picked a location the next question is timing. Will it be at noon where the sun is directly overhead? Will it be after dark? Will it be sunrise or sunset? All of these can heavily determine what you’ll need and not need in your gear bag come shoot time.
2. Lens Selection

My gear bag is basically a Tetris game to get it to close. For me, my most used lenses are the Canon 16-35mm f/2.8 L and the Canon 70-200mm f/2.8 IS L. If I have to only take two lenses with me, those would be them. If I had to only pick one, it’d be the 70-200. If you’re going to invest in one lens and you want your business focus to be portraits, this is the way to go. The compression in this lens is the most flattering.
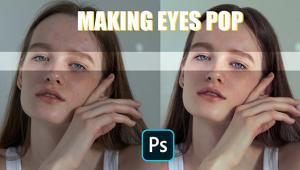
My next two most used for portraits would be the Canon 50mm f/1.2 L and Canon 85mm f/1.2 L. Personally, unless I’m shooting groups of people, I’m almost always in the f/1.2 - 2.8 range to get that nice creamy background and really focus on my subject. Shooting at f/1.2 isn’t easy and isn’t always recommended but if you do have a lens capable of it, I highly recommend choosing just one focal point and making sure that’s on the eyes of wherever you want your viewer to look. Too many active focal points will result in more misses than hits when it comes time to cull and edit.
The Canon 16-35mm f/2.8 L isn’t traditionally a portrait lens, however I shoot a ton of portraits where the environment is almost as - if not more - important than the person in it. With this lens you have to be very careful when framing your subject. At 16mm, if you place a person on the outside edges of the frame, they’ll look quite distorted and not in a flattering way most of the time.
3. Lighting

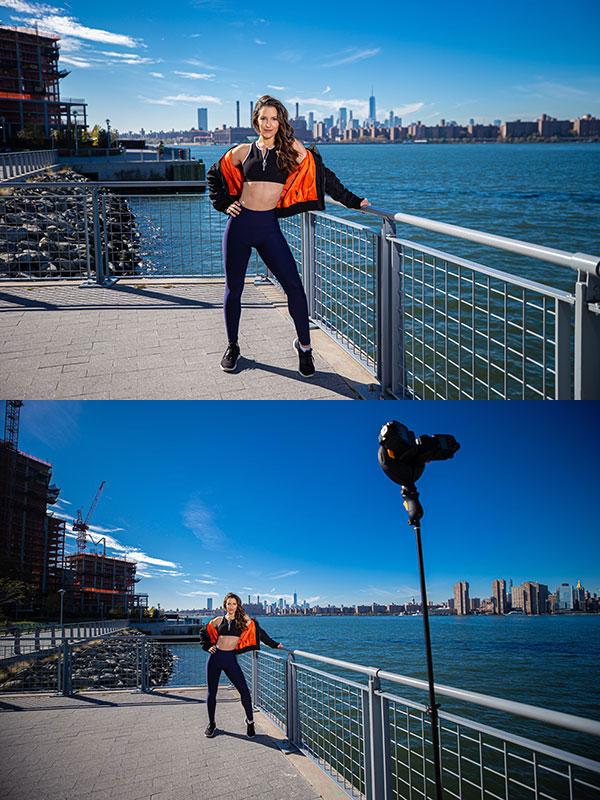
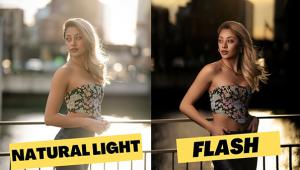
Lighting, to me, is the most important aspect to creating a portrait. I personally love at least one flash to be involved, but if flash isn’t your friend right now, the sun will be - if you know how to use it.
Sun should only be placed behind the subject if you’re a) wanting a silhouette, or b) using a flash or two to combat it and use the sun as a rim light.
Some of my favorite portraits were taken with just one flash. Most of the time that flash is off camera on a light stand high and to the side of my subject, but there are times where I’m restricted by clients or locations and have to keep that flash on my camera for safety and to deal with space restrictions.
When it comes to flash, I personally love the MagMod modifiers. When I’m required to use an on-camera flash the MagSphere is magnetically glued onto the front of my Canon 600 to soften the light, which makes the image much more flattering. When I'm able to take my flash(es) off camera, I rely on the MagBox softbox to really soften up and spread out the light.
I almost never use a reflector. I think they’re bulky and absolutely require an assistant. They definitely do help with bringing light to your subject, but if you want to pack light and be more independent and mobile I recommend speedlites all day, every day.
I could talk forever about lighting, but the best thing I can recommend is to practice. Try different angles and modifiers. Make sure you’re trying new techniques on friends and not paying clients unless you know you’ve nailed at least the minimum they’re expecting delivered.
The first shot you should take is with your client holding a color checker, such as the SpyderCheckr. This will ensure your colors and white balance will be true to real life when it comes time to edit. This is imperative if you’re shooting for a company or product that needs to sell said product. If Coca-Cola red doesn’t show as Coca-Cola red, that editor or photographer won’t be called back and that shoot won’t be used.
4. Posing

Posing for me is the most challenging. I’d say 75% of my client base are comfortable in front of the camera and know their angles. The other 25% though, does not. My numbers are a bit skewed from what most people are as I work with professional dancers and celebrities who usually are familiar with cameras and having their photos taken.
For the ones that aren’t comfortable however, I love to have a solid five poses that are my go-tos. This allows me to set them up and then subtly alter hands, eyes, chin, arms, etc from there, creating far more than five dynamic poses in the delivered images.
You want and need to be seen as the professional and the authority figure when posing your client(s). Most people are not in front of a camera very often and are going to look to you to relax them and tell them their best and most flattering angles. I always start off by asking if they have a favorite side of their face. If they don’t know, ask to see a few selfies or a few of their favorite photos of themselves. Most people will put the same eye or side of the face closer to the camera.
Hands and fingers may seem like a small detail, but they can make or break a portrait. Try layering, hands at different heights, framing their face, arms crossed, thrown in the air; anything so that they’re not stiff and showing that tension which we want to avoid.
Try and avoid shooting people head on, always ask them to put weight on their back leg. With women, you want a slight hip pop to create a curve to the body. Men, for the most part, may look for a more masculine pose, however, it will still be more flattering to distribute their weight unevenly.
Joke around with your client. It will make time go faster and bring real smiles to their faces (and yours). This will also further relax them, and you’ll be able to get that solid connection.
Play with your physical angles. I love getting close, getting low or climbing on things. I look crazy but the results will surprise you and your clients in a positive way.
We’re living in weird times right now and now more than ever you should be careful of making physical contact, but always ask for permission to fix a hair out of place or adjust someone’s hands or clothes. Most of the time they’ll allow it as you can see what they look like where they can’t, but always make sure to get permission to do so.
5. Post Production

You’ve now finished your shoot. What’s next? My first step before even leaving the shoot location is to take the memory cards out of the camera and put them on my person before packing up the cameras. I highly recommend this as gear can be replaced if stolen/lost but those photos cannot.
Once you get back to your computer, I recommend investing in a color calibration tool. Many new photographers will often struggle with getting that perfect white balance or skin tone. I personally have been using the Datacolor Spyder line for around seven years now.
I work on a MacBook Pro and often have to edit on location, and while Apple’s colors are fairly solid, they’re not perfect and so I make sure to calibrate when I change my editing environment. The donut shop will have different lighting than my home office which will affect the way I see my screen and the photos on it. You’ve spent so much time perfecting your shooting style, you want to make sure what you see and work hard to create is what the client sees when they view it on their devices.
To view more of Amanda’s photography check out her Instagram page.


![]()
Get the Latest Photo Tips, News & Reviews from Shutterbug!
| Camera Reviews Other Reviews | Mobile Reviews Photography Reviews Columns | News | Features | How-To | Resources |
 © 2025 Shutterbug
AVTech Media Americas Inc., USA
All rights reserved