- REVIEWS
Camera Reviews 
More Reviews Mobile Reviews Photography Reviews - GALLERIES
- VIDEOS
- BUYER'S GUIDES
5 Cool Tips for Better Winter Photography: Cold Weather Makes for Great Images
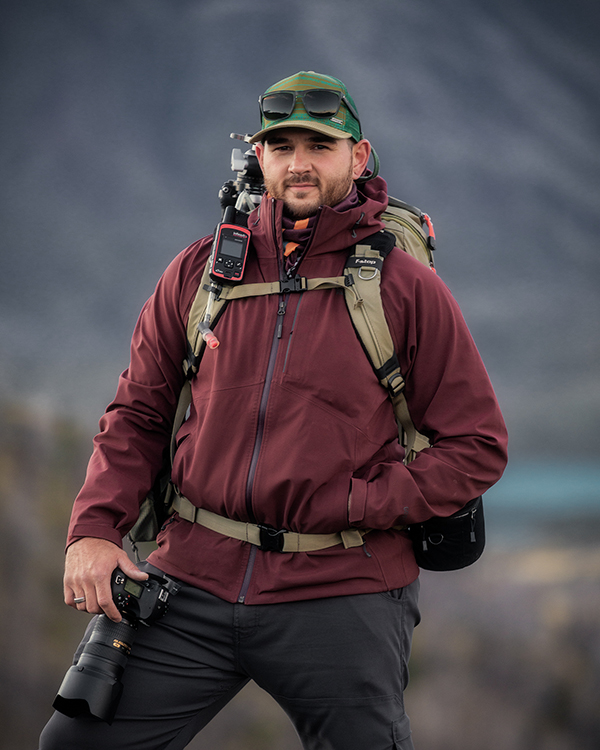
(Editor's Note: Joshua Snow is an outdoor photographer and a member of Datacolor's Friends with Vision.)
Growing up in the Northeastern United States, surrounded by the Great lakes and the Finger lakes, winters were always brutally cold and wet. That is, until I experienced real winter; gale-force winds, dangerously low temperatures, and snow. Lots of snow…
I found shooting in those conditions incredibly challenging but very, very rewarding. Winter landscape photography might mean something different to you if you live in a warm climate, and something else entirely if you don’t. In this article, I am going to share five top tips that will help you to focus on the challenge of capturing winter landscapes in bone chilling, snow blinding conditions. These winter photography tips will help ensure your effort isn’t in vain and that you make some great images the next time you head out to capture some winter landscapes.
Capturing wintery scenes can be challenging for so many reasons. It’s cold, it’s snowy, and it’s windy, but these are the winter conditions that I love shooting in because of the atmosphere they create. Add in a little light and you’ve got winter magic. I think that when you see a great winter landscape photo, you feel the chill and the wind, leaving the viewer feeling immersed which is very powerful. Most people aren’t crazy enough to go out in these conditions, which makes capturing them that much more special to yourself and the viewers of your work, too.
Here are five cool tips that have helped me in various winter photography situations.
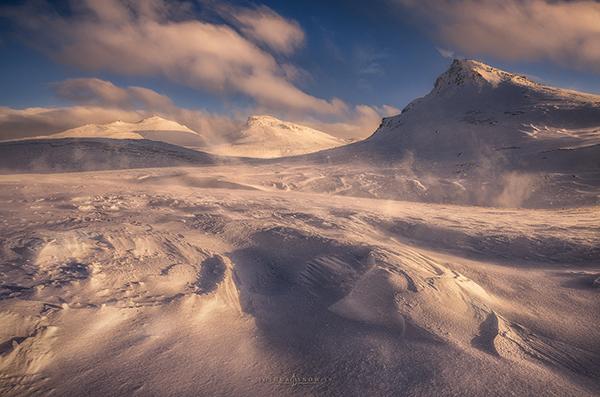
#1: Weather, Find it
Like I said before, atmosphere is everything in an impactful, interesting winter landscape image. Do your research and plan your trip according to the weather if you can or be flexible in chasing weather conditions. It will greatly increase your chances of coming away with an interesting image. Here are a couple examples where my research paid off.
#2: Gear Up
Nothing takes the joy out of shooting wintery scenes quite like being frozen solid or losing a few toes. It’s very uncomfortable, and when you’re uncomfortable, you’re impatient. That never bodes well in good landscape photography, so make sure you gear up. When I go out in the cold months, I make sure to take several sets of wool base layers, tops, and bottoms. Wool is amazingly warm and dries quickly. A really great waterproof, heavily insulated winter coat or parka and snow pants with vents are also crucial. You don’t want to overheat in the winter, your sweat will chill you to the core, so try and layer so you stay dry during your strenuous hiking and warm during your periods of stillness. It’s also really important to wear the right stuff on your feet. I find that wearing a combination of wool and cotton socks really works inside my thick, heavily insulated snow boots.
Don’t forget about gloves - Arguably more important than the aforementioned gear. If your fingers stop working, it makes it tough to take photos. In really cold conditions I like to wear a thin pair of gloves or liners for dexterity with a shell or second mitten style glove over those that fold back. Some of these have pockets for hand warmers if you get really cold hands. Of course, you’ll need to cover your head too and I really like wearing a "buff" around my neck so that I can cover my face and neck while I’m shooting.
Tip: Definitely use a remote that will allow you to trigger the cameras shutter from your pocket.
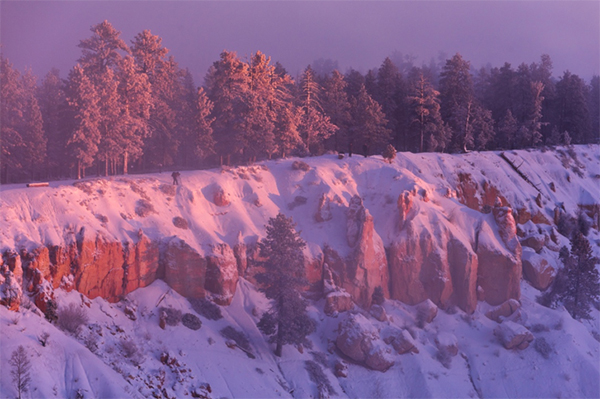
#3: Expose for Your Highlights
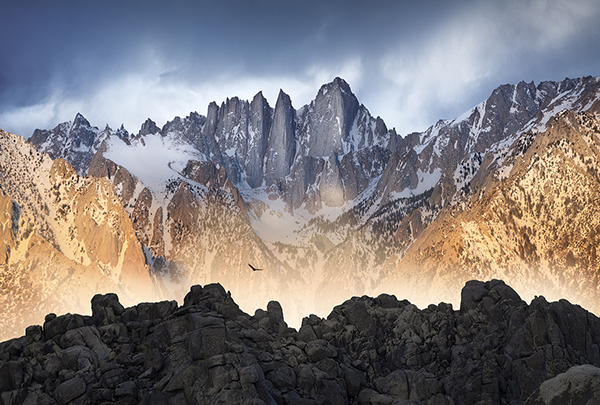
When the sun breaks through, casting its warm light across your scene, it can be incredibly dynamic. Snow is frozen water and what do we know about ice and water? It’s very reflective which can create intense highlights. Being prepared to bracket and use a polarizer or ND filters can help you capture that dynamic range if you cannot fit it into your histogram. Harnessing that dynamic range will help the final image feel that much more immersive. Since snow is so reflective, it’s really tough to capture the detail of the snowflakes and the texture of the fresh fallen snow. For this reason, I try very hard to protect my highlights while shooting scenes like this by ensuring the information in my histogram stays away from the right side. If your shadows, or the information in your histogram is now touching the left side, your shadows are clipped, and this means you will need to take at least two frames to harness all of the scenes light and shadow, otherwise known as bracketing. Just as the case was in the scene below.

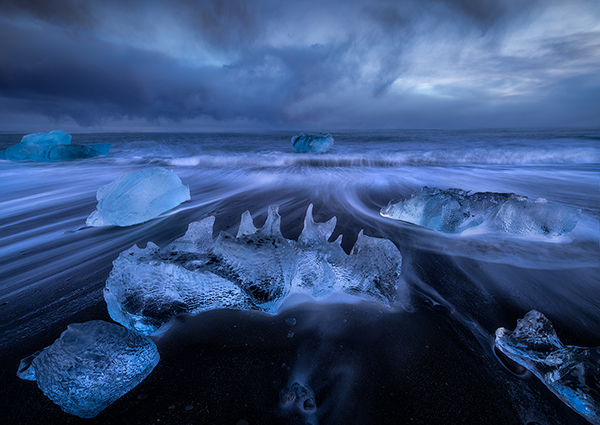
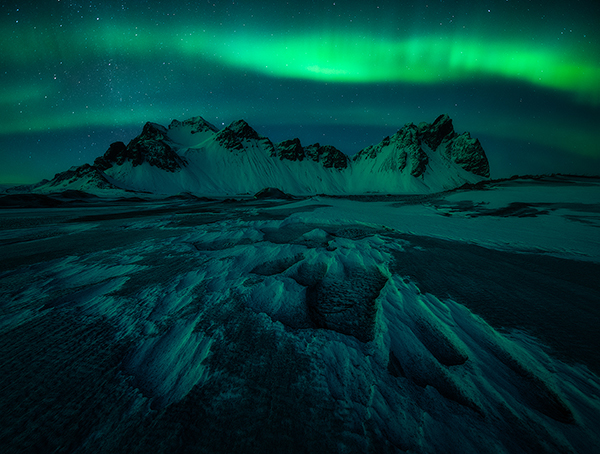
Inversely, that same reflective quality of snow can be really useful in capturing winter scenes at night! Like the image below of Vestrahorn in Iceland with the northern lights dancing above. The snow reflected the light and color giving tremendous dimension and contrast to the texture of the snow. The beach’s black sand had mixed with the white snow to create amazing patterns. It was only successful because of the reflected light.
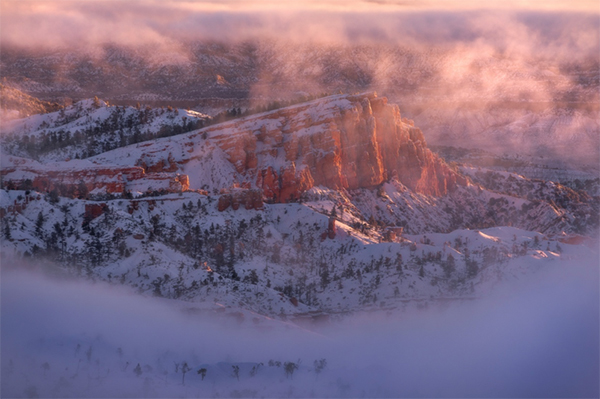
#4: Use What Winter Provides
I really enjoy when I see a winter landscape where the photographer has used the amazing and unique patterns in the snow as their leading lines or their foreground anchor, like the image below I tried to do just that. The snow can really simplify otherwise very busy scenes too. Adding separation, contrast and space between objects within the image. This can sometimes make finding compositions challenging but you can almost always rely on the snow to create something interesting to compose with.

#5: Post Process with a Gentle Touch
Post processing snow can be as challenging as capturing it. Like I mentioned above, it’s very reflective, and therefore adding too much contrast to the wrong tones, can create "crunchy," noisy or unpleasant appearing snow within your image. For this reason, I recommend very lightly processing snowy images focusing heavily on localized adjustments to shadows and mid-tones to try and prevent the brightest parts of the snow from getting out of control.
Ensuring your screen is calibrated in the post process phase also allows you to ensure that the colors that you saw on the photoshoot are accurately represented. I do this with Datacolor’s SpyderX, and am able to regularly calibrate my screen in less than two minutes to guarantee the contrast and tones I add are as close to my vision as possible.
Tip: Luminosity range sections or masks can do an amazing job of making these localized adjustments while protecting certain tonal values. I find that snowy scenes lend themselves very well to dodging and burning for the same reasons. Try using tonal contrast or clarity as well to help emphasize texture in the snow.

Bonus Tip
Because snow is so white it’s very easy to cause a blue color cast when trying to home in on the right white balance for your image. Oftentimes I will double process the same file. Once for cooler shadows with less saturation, and the second for warmer highlights with more saturation if there is in fact sunlight within the scene.
Winter is such an amazing time to take landscape images. It’s quiet, there are less people out and about, and it’s a great way to really connect with nature. When you’ve finished your hike and you plop down in the snow, the birds begin to sing, and everything just fades to silence. I live for it. These 5 tips have drastically improved my winter landscape photography and I hope they’ll help you too!
To learn more about Josh’s photography and adventures visit www.JSnowPhotography.com or follow him on Instagram and Facebook.
To find out more about Datacolor’s SpyderX visit https://spyderx.datacolor.com/.


![]()
Get the Latest Photo Tips, News & Reviews from Shutterbug!
| Camera Reviews Other Reviews | Mobile Reviews Photography Reviews Columns | News | Features | How-To | Resources |
 © 2025 Shutterbug
AVTech Media Americas Inc., USA
All rights reserved