- REVIEWS
Camera Reviews 
More Reviews Mobile Reviews Photography Reviews - GALLERIES
- VIDEOS
- BUYER'S GUIDES
4 Basic Errors with EXPOSURE BLENDING in Photoshop & How to Avoid Them (VIDEO)

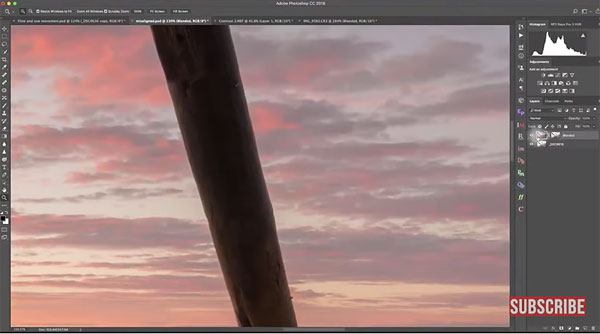
One of the most difficult challenges when photographing landscapes is balancing the wide range of tones from deep shadows to bright highlights that often occur in outdoor scenes. In fact, sometimes the density range is so great that’s it’s impossible to precisely exposure the image.
While many of us prefer to “get it right in the camera,” it’s situations this that require a trip to Photoshop if you want optimum results. And one of the most common solutions for this particular task is what’s known as “exposure blending.”
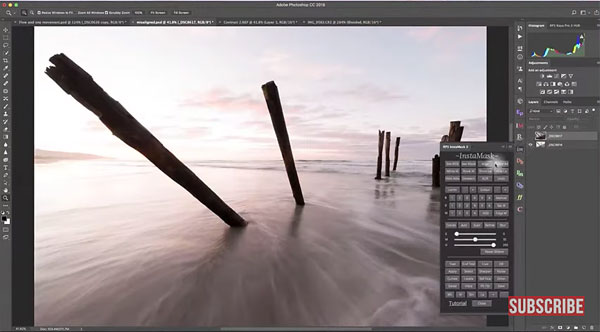
Simply put, exposure blending involves combining two or more shots of the same scene—each made at a different exposure—to arrive at one “perfect” photo. One example would be shooting three images of the same location; the first exposed for a prominent shadow area, another for the bright sky, and the third for the midtones of the scene.
Merging these images can deliver amazing results, and isn’t particularly difficult regardless of how many images you blend together—as long as you avoid four common mistakes that will hold you back. In the quick tutorial below, travel photographer Jimmy McIntyre demonstrates how to get the job done correctly.
The first error McIntyre discusses has to do with Brush settings. As he explains, “With exposure blending it’s extremely important to have 100% Opacity and 100% Flow. And if you’re a CC 2018 or above user, 100% Smoothing is what you need.” You’ll see why these settings enable you to achieve pleasing blends without blotches.
McIntyre’s other three tips are just as straightforward, and he clearly explains the simple steps necessary for avoiding all four mistakes— so you can blend images with perfection
There’s much more to see on McIntyre’s YouTube channel, so be sure and pay a visit.
And for another helpful Photoshop tutorial, check out the recent video we posted explaining a simple technique for vibrant sunset photos shot on dull days.


![]()
Get the Latest Photo Tips, News & Reviews from Shutterbug!
| Camera Reviews Other Reviews | Mobile Reviews Photography Reviews Columns | News | Features | How-To | Resources |
 © 2025 Shutterbug
AVTech Media Americas Inc., USA
All rights reserved