- REVIEWS
Camera Reviews 
More Reviews Mobile Reviews Photography Reviews - GALLERIES
- VIDEOS
- BUYER'S GUIDES
The 15 BEST Photography Tips for Beginners!
(Editor's Note: This story originally appeared on Wit and Folly as 31 Best Photography Tips for Beginners.)
I have been a professional photographer for a few years now and throughout my career I have continued to collect photography tips that have worked for me. Here are my absolute favorite beginner photography tips from my journal, which have continued to help me create beautiful imagery to this day.
I hope after reading through this article, you will gain some nuggets of inspiration that you can apply to your photography right away. As always, if you have any questions, just let me know!
1. Learn the Basic Compositional Techniques Such as Rule of Thirds, Leading Lines, Rule of Triangles, and Symmetry

Learning the basic compositional techniques should be one of the first things you try to master. By learning some of these techniques you’ll be able to compose your image in a more interesting way.
Additionally, by understanding the techniques you’ll understand when and why you should break them.
Here is a brief overview of some of the most useful compositional techniques:
• Rule of Thirds: in short, this rule breaks your image up into vertical and horizontal thirds. According to the rule, by placing your main subjects along one of the imaginary lines or intersections it will create a more balanced and interesting image. If you want to learn more, check out my Rule of Thirds article which includes 10 examples of when I used this rule in images I have taken.
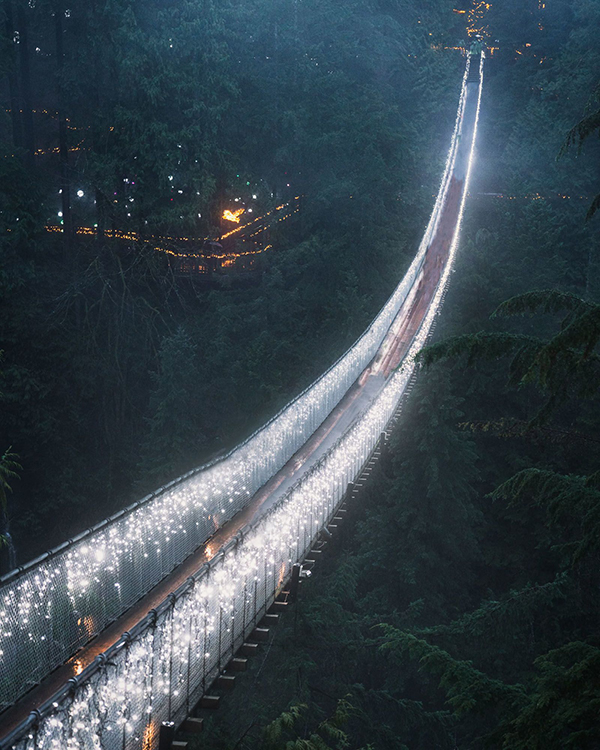
• Leading Lines: by using obvious or not so obvious lines in the image you can lead your viewer’s eyes through your image making it more pleasing.
• Rule of Triangles: implied triangles in an image can create a sense of the relationship between the three points of the triangle giving the image more unity.
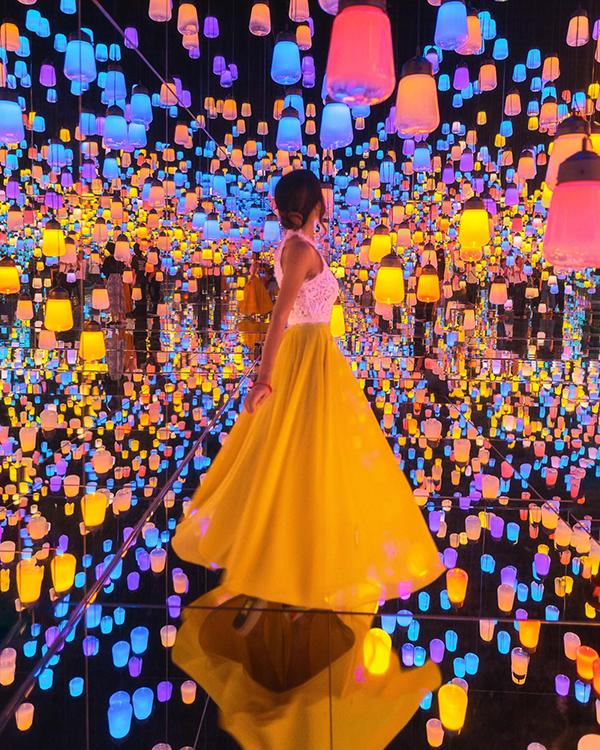
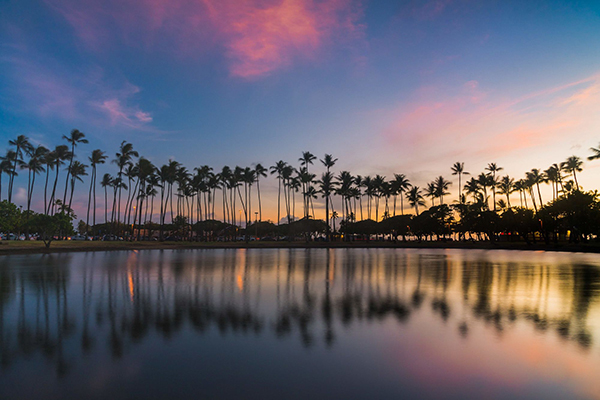
• Symmetry: One of the best ways to use symmetry is to capture reflections in a body of water or even a small puddle. Symmetry will create balance in the image making it more pleasing to the eye.
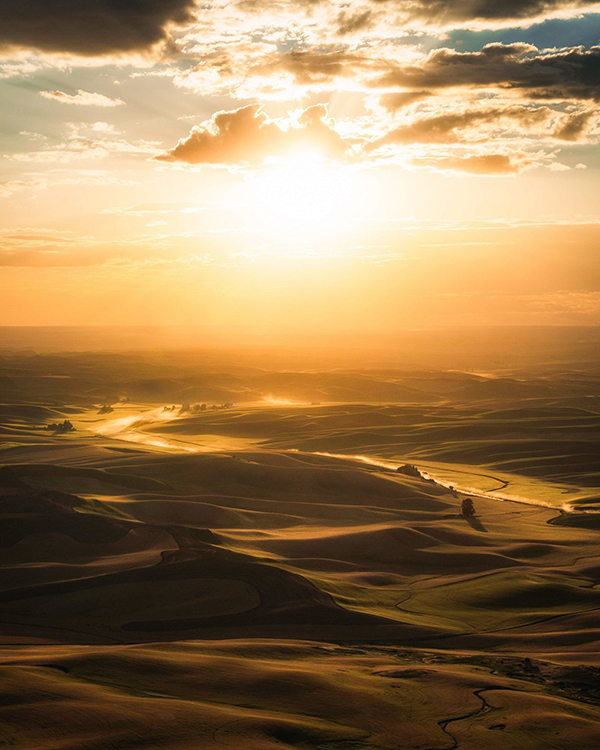
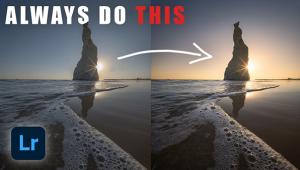
2. Sun Stars are Easier to Capture Than You Think
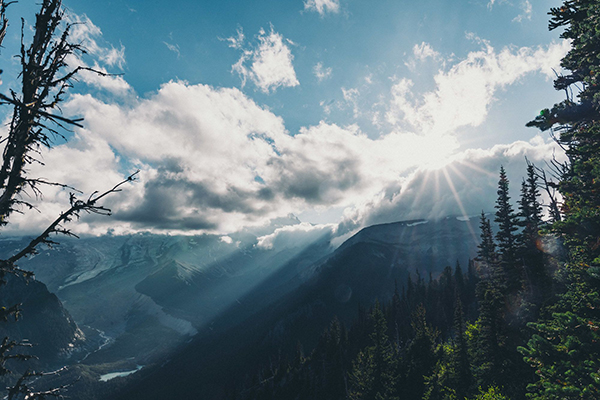
Sun stars are actually much easier to capture than you think. Here are some quick tips to help you capture sun stars the next time you get the chance:
• Aperture: To create a sun star, you’ll need to use a narrow aperture between f/16 to f/22. As a note, this will depend on your lens as some lenses are better at creating sun stars than others. If you don’t know how your lens will capture sun stars, a quick Google search will do the trick.
• Solid Element: you’ll need to capture the sun as it peeks around a solid element like the horizon, tree, mountain, etc.
• Right Conditions: Lastly, you’ll need the right conditions. If the atmosphere is too cloudy, hazy, or foggy, you’ll probably not be able to capture a sun star.
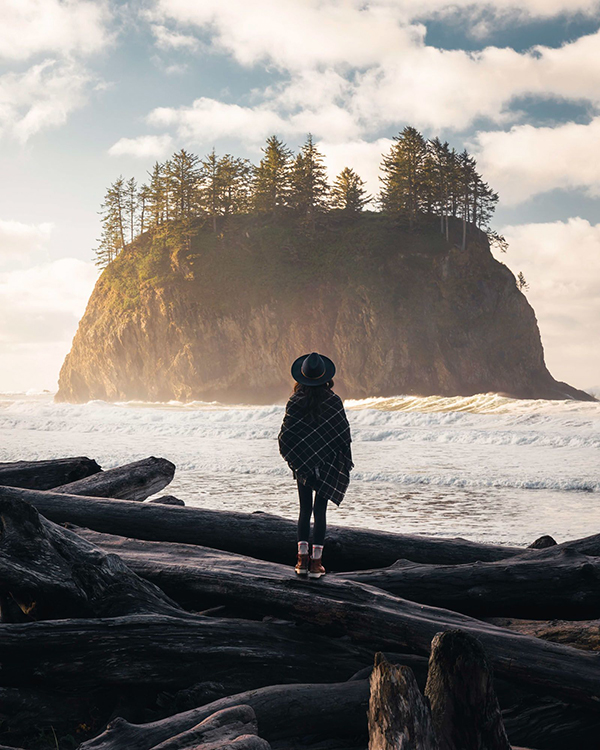
3. Use Some Sort of Foreground Element to Create a Sense of Depth

One of the best ways to make your image more interesting is to add a foreground element to create a sense of depth. The easiest way to do this is to get super close to the foreground element until the element starts to blur. In a sense what you’re trying to do is to frame the subject with the foreground element.
Some of my favorite things to use as a foreground element include flowers, leaves, grass, and the ground (if it has more a unique texture). Funny enough, I even know some photographers who carry around a pot of flowers to make sure they have a foreground element wherever they go.
4. Take Your Camera Everywhere You Go

This might sound like a basic concept, but it’s worth reminding yourself as everyone gets lazy once in a while. It’s important to take your camera wherever you go because you literally don’t know when the next photo opportunity might happen.
To give you an example, the only reason I was able to take this photo of Mount Rainier with the Lenticular cloud over it was that I had my camera with me.
I was on the way home from a short trip to Seattle and saw a glimpse of the Lenticular cloud over Mount Rainier. Since I had my camera with me, I quickly Googled for the closest location where I could get a clear shot of Rainier and found this location to take photos at sunset.
5. Astrophotography is Easier Than You Think
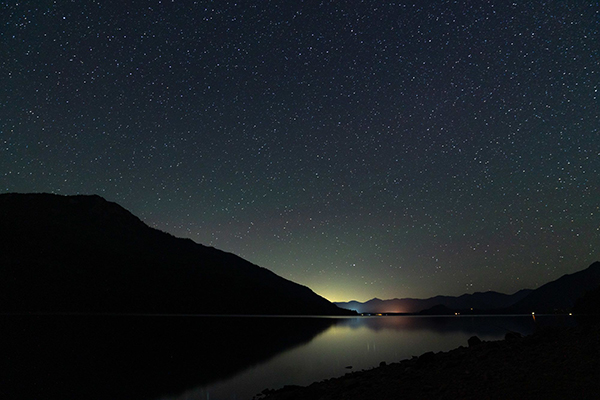
Astrophotography is actually much easier than you think. Yes, there are many intricacies to get the absolute best astrophotography images, but if you want to capture “pretty good” images, there are only a few things to keep in mind. Most importantly, to get the best results you have to get out of the city and find a location that is super dark and has little to no light pollution.
Here are some quick tips to help you capture beautiful astrophotography shots:
• 500 Rule: The 500 rule is a pretty good reference to use so you don’t have to overthink things. The 500 rule states that if you don’t want to capture star trails (movement of the stars) then you should divide the focal length you’re using by 500 to calculate the shutter speed. So if you’re using a 24mm focal length, then the maximum shutter speed you can use before star trails appear is 21 seconds.
• Know Your Camera’s ISO Limit: Don’t be afraid to shoot at higher ISOs and understand the ISO limit of your camera. This photo was shot at ISO 1600 and the image came out very clean. Each camera is different, so make sure to understand what works with yours.
• Focusing in the Dark: Surprisingly, it’s not too hard to focus on the stars even in the dark. To do this, I used manual focus and magnified the focus as far as I could. I then increased ISO until I could see the stars on the screen. Lastly, I slowly turned the focus ring until the star was not blurry anymore.
• Use Interval Shooting If You Can: The built-in interval shooting in the Sony a7RIII was a lifesaver. Once I was set up, I just set the interval and let the camera rip. I even captured some shooting stars this way too. If your camera doesn’t have a built-in interval shooting functionality, you can always pick up an intervalometer or just shoot each photo independently too.
• Include Some Foreground: I tried to take some sky only photos but it just didn’t have the same effect. By including some kind of “land” element, you get a much more balanced image in my opinion.
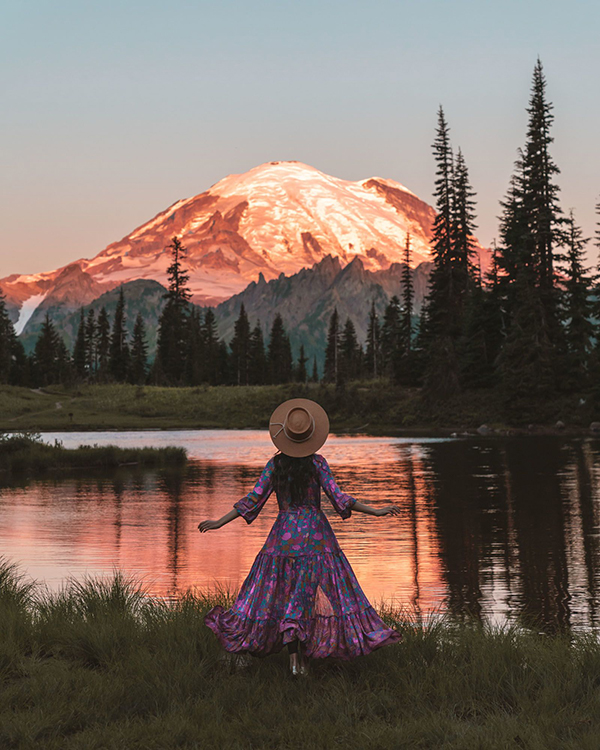
6. Use a Reference Point to Show Scale in an Image

In photography, it’s very hard to show the actual scale of an image without a reference point. This is why if you take a photo of a huge waterfall or an expansive canyon, it doesn’t look as big and as epic as you remember it.
One of the best ways to show the scale in the image is to add some sort of reference point that is easy to understand when a viewer looks at the image. This reference point could be a person, a building, a tree, or even a car.
In this image, I used Melissa as the point of reference to show the scale of the mountains in the background.
7. Learn How to Use a Polarizing Filter
A polarizing filter is a great tool to add to your arsenal that can help your images pop. The filter works by reducing reflections and also adds a bit of contrast to the image. So when you use one, you’ll get more saturated colors, deeper blues in the sky, and a less washed-out looking photo.
Although you can give your image a similar look using editing software, it’s hard to do and will take extra time.
What’s important to understand is that there are certain situations where it’s best not to use polarizing filters. This includes low light situations and at sunrise and sunset when the light is already soft.
8. Shoot at Golden Hour
As a beginner, shooting at golden hour is one of the easiest ways to create better-looking images.
Golden hour is called the golden hour for a reason. At this time of the day during sunrise and sunset, the light really is softer, more magical, and more colorful. As any serious photographer will tell you, one of the most important aspects of creating beautiful photos is the light.
More often than not during the golden hours of the day, you’ll get amazing light which will make it that much easier to capture breathtaking photos.
9. Don’t Skip Shooting in Bad Weather Either!
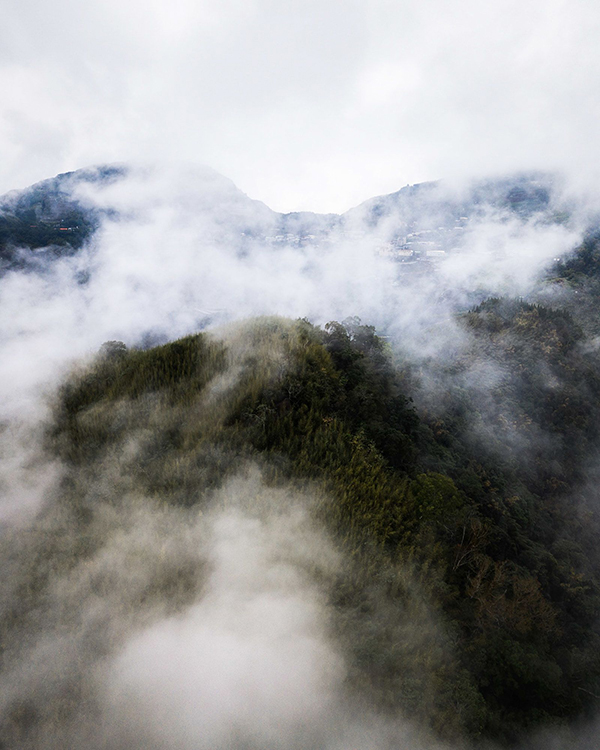
At the same time, even though it’s much easier to go out on a perfectly sunny day to shoot, make sure you go out and take photos in bad weather too.
Think about it.
If you want to create unique looking images, you have to take photos that other people aren’t already taking. Since most people will be at home when the weather is bad, you’ll have a better chance of making images that others don’t have in their portfolio.
Additionally, oftentimes you’ll get the most dramatic scene and lighting right after the storm has passed. This drone photo was taken right after a major rainstorm had passed in the mountains of Alishan in Taiwan.
10. Use an App Like PhotoPills to Help You Plan

Using an App like PhotoPills is one of the best ways to plan how to execute a shot whether that’s before you get to a location or when you’re already there. By using an app like this, you’ll know exactly when and where the sun will rise and set, and you can even use its VR feature to show you where the milky way will be throughout the night.
For this image, I used PhotoPills to find out when the milky way would perfectly align with the top of Mount Rainier. On this particular day, it aligned at 12:42 am so I made sure to have my camera set up at least 20 minutes before.
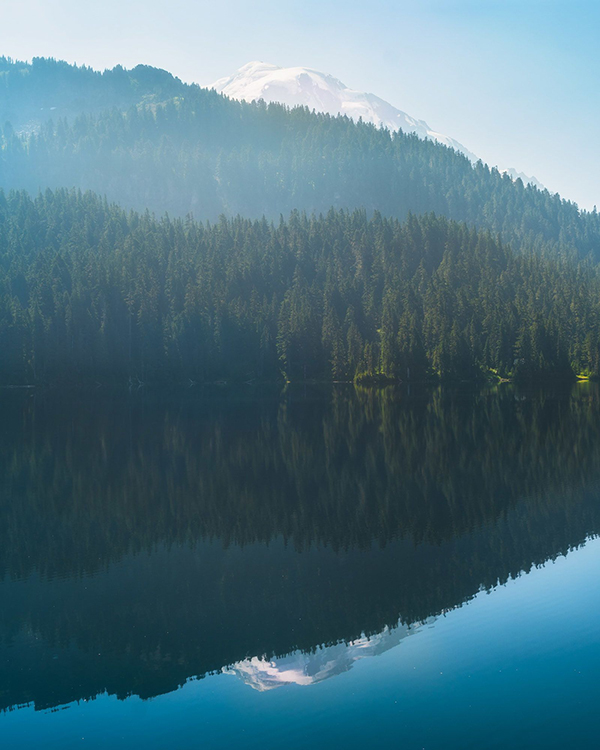
11. If You Can, Scout Out the Location Before You Get There
It’s important to scout out a location whether that’s in person or online because a difference of a few feet in where you take your photos can make all the difference.
Take this photo as an example. Do you notice how the image is slightly unbalanced because of the trees on the right that block Mount Rainier?
Well, if I had properly scouted this location, I would have known that by moving roughly 50 feet to the left I would have had a clear shot of Mount Rainier with no trees blocking it.
Two of my favorite ways to scout a location digitally is to use Google Image Search or Instagram. If the location you’re shooting is even slightly popular, you should be able to put together a list of all the best angles to take the photo from.
12. Use a Wider Aperture to Separate Your Subject from the Background and Make it Pop

One way to make your subject pop and to create a more professional look is to use a wider aperture such as f/2.8 or wider to blur out your background. In this image of my dog Sushi, I used an aperture of f/2.8 at a focal length of 30mm to capture this shot.
Since the aperture is wider at f/2.8, I was able to blur out the background which creates separation between Sushi and the background and brings more attention to her.
Notes from The Field: It’s easier to blur out the background if you can compress the image a little bit with a mid-range focal length like 50mm. If you use a wide-angle focal length like 24mm, you’ll need to get pretty close to your subject to blur the background.
13. Learn to Use Different Focal Lengths
Different focal lengths will give you different results even from the same location. Here are just a few different ways that you can use different focal lengths to create images:
• Wide Angle Focal Length (think 24mm and below): By using a wide-angle lens and placing it low to the ground or super close to a foreground element you’ll be able to create more depth of field with different layers in the image. You can do the same with other focal lengths but I like to use wide angle lenses when I’m shooting landscape images from a lower perspective
• Mid-Range Focal Length (think 50 mm): By using these focal lengths with a wider aperture you can throw out the background more and separate your subject from the background making the subject pop.
• Zoom Focal Length (think 70+mm): These focal lengths can be used to compress the background or to selectively compose specific subjects in the composition.
14. Know When to Use a Tripod
You’ll likely shoot more without a tripod than with a tripod. However, there will be times when having a tripod will definitely help you out. These situations may include shooting in low light conditions, shooting at slower shutter speeds to capture motion blur, or if you’re using narrow apertures to keep everything sharp in the image (think landscape photography).
It’s important to understand how you’ll be shooting and if you’ll use a tripod as you don’t want the tripod to get in the way.
From personal experience, when you have your camera set up on a tripod, you tend to be less willing to experiment with different angles or placements of your camera. Plus, the last thing you want to do is to miss a shot just because you were busy setting up the tripod.
15. Know What Shutter Speed to Use Without a Tripod Too
Going along with #12, sometimes you’ll be in a low light situation and don’t have access to a tripod. In these types of situations, it’s good to know what the slowest shutter speed you can use without introducing motion blur.
A good rule of thumb is that you should be shooting at a shutter speed that is equivalent to or higher than the focal length you’re using.
So, for example, if you’re shooting at a focal length of 100mm, then the shutter speed should be at 1/125 or faster.
Notes from The Field: Some cameras have better in-body image stabilization technology than other cameras. If your camera has better in-body image stabilization it means you’ll be able to shoot at slower shutter speeds and still keep your image sharp. So, the best thing you can do is to test out your camera and figure out what is the slowest shutter speed you can use at a given focal length to keep your image sharp.
Read the rest of this story with all 31 photography trips for beginners on Wit and Folly's website.
- Log in or register to post comments


![]()
Get the Latest Photo Tips, News & Reviews from Shutterbug!
| Camera Reviews Other Reviews | Mobile Reviews Photography Reviews Columns | News | Features | How-To | Resources |
 © 2025 Shutterbug
AVTech Media Americas Inc., USA
All rights reserved