Picturing Colorado; Glenn Randall Page 2
Randall's Photo Gear
He uses lenses ranging from 75--500mm (roughly equivalent to 20--125mm
in 35mm format) for use with his large-format camera. As his 4x5 camera has
no internal metering, he relies on a Sekonic L-608 light meter, and uses it
mostly in a spot-metering mode.
He uses a number of split neutral-density filters, made by Singh-Ray and Lee;
several of which are custom-made. "Split NDs allow me to produce images
that are closer to what my eyes saw (in the sense of having good detail in both
shadows and highlights) than the unaided film could produce on its own."
"I use polarizers once in a while," he says, but only with lenses
that are longer than normal, and to shoot subjects that are at the same elevation
as he is. He never uses a polarizing filter with wide-angle lenses. "My
goal is authenticity," he maintains. "Not
a photo that I fabricate by using an orange filter."
Occasionally, he shoots some sports and wildlife with his Nikon F4 and N8008.
He uses the medium-format Fuji GA645Zi with a short-range zoom lens primarily
to shoot landscapes that are a long distance from the road, fleeting photo opportunities
(like a rainbow), or what he regards to be a stock photo, rather than an image
he might eventually offer as a print. He makes his own inkjet prints on an Epson
Stylus Pro 9600 with a 44-inch paper path. He used to go to a lab for this,
he says, but doing his own printing "is much more cost-effective"
and still very high quality. Randall's images aren't enhanced either
digitally or in a darkroom.
 |
|
|
For now, he shoots entirely with film. "I'm dying for the day
when I can afford a digital back for my 4x5 that will produce the same quality
as film," Randall explains. "When digital backs double in resolution
and the price drops to one-third, I'll switch." His favorite film
is primarily Fujichrome Velvia 100F, and before that, Provia 100F. "I
like the color saturation that Velvia offers, and the versatility that 100-speed
offers as opposed to ISO 50."
Glenn Randall is a good example of a photographer who has persevered in his
craft--and loves what he does--to make a name for himself. His motto
is a testimony to the great lengths that he'll go to get a great shot
during the right time: "Sleep is for photographers who don't drink
enough coffee."
 |
|
|
6 Tips for Photographing the Wilderness
1. Buy a topographic map of the area you want to photograph. Randall
begins his research with a topographic map and looks for interesting terrain
that will get great light during sunrise or sunset. "In Colorado, the
angle of sunrise and sunset varies by about 60° during the year, so subjects
that don't work in mid-summer may work beautifully in mid-winter."
He says that in places where mountains rise above the plains, you have more
of a chance of spectacular light early or late. "I return often to a place
to find great light--eventually it will happen."
2. Find an interesting fore-ground--it's crucial
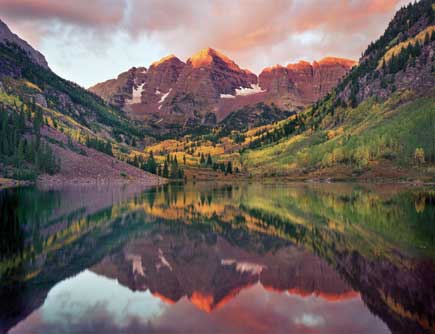
to your composition. For example, he points out, the Maroon Bells in Colorado
have been photographed a million times. However, great light and a distinctive
angle can make it distinctive and unique.
3. Randall's philosophy is: "The potential reward
is always greatest when the odds against you are the longest." He says
he likes to previsualize an image before going somewhere to photograph it. Many
of his best images have been the result of "a lot of planning and a lot
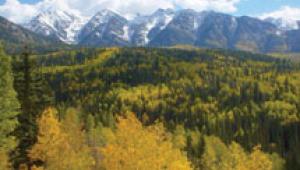
of luck." The image entitled, "Sunrise Aspen" was the result
of his quest to find an aspen grove that was backlit at the precise moment of
sunrise. To do this, Randall scouted out an aspen grove in advance. But when
he went to that spot the next morning, he says, "It looked hopeless."
A powerful wind was whipping the aspen branches around, making a sharp image
nearly impossible, and the sky to the east was cloudy.
Nonetheless, he set up his equipment and waited. To his surprise, the wind died
down for a few minutes and the sun peeked through a small hole in the clouds.
He frantically began shooting before the sun disappeared behind thick clouds
and the magical light was gone. He discovered that later that day, "This
photo opportunity disappeared for another year, when a powerful snowstorm came
through and stripped off all the leaves."
4. Have a working knowledge of exposure. Many photography students
have trouble with this, Randall says. "My basic approach is to find a
great foreground and take that basic exposure for the photograph, then I meter
the background and use a split neutral-density filter to bring the background
illumination into the range of the foreground, which is often dimmer."
He says he uses a split ND filter "about half the time because I shoot
in very contrasty light."
Even if you don't want to spot meter a scene, he says, you should learn
how to work with light on a shadowed foreground, an illuminated background,
and reflections (the amount of light reflected from the water varies depending
on the angle of the light striking the water). When looking directly into the
sun at sunset or sunrise, he says, a three-stop ND filter is a rule of thumb.
5. Learn composition by practice. "Look for dead spots
in the frame," Randall says. "It's up to you to make each
image intriguing. Include only those elements that are interesting to the viewer
and exclude everything else." Train your mind how the camera "sees"
a scene. Our eyes tend to dart around looking for areas of interest, and ignore
distracting elements. However, Randall points out, the camera sees it all.
6. Get to know places well that you want to photograph. "This
takes time and it's good to do it close to home," he advises. Even
if you're not in the middle of nature's wonderland, there's
probably a park or natural reserve nearby. In most parts of the country, there
are attractions that can yield great shots. "Find the best possible subject,
then go back again and again until the light and atmospherics make it something
special."
To view more of Glenn Randall's images, visit www.agpix.com/glennrandall.
- Log in or register to post comments


