HDR Processing: Software: Photomatix
Photomatix from HDRSoft (www.hdrsoft.com) was the first of the major automated HDR programs, and in many ways is still one of the best. The idea behind Photomatix is a 2-step process. First, the program combines a set of bracketed exposures into a single 32-bit-depth file that cannot be displayed on a monitor or printed. In the second step, a tone mapping is applied to convert the high bit-depth file to a normal 16-bit TIFF file that can be displayed, printed or worked on further in Photoshop.
Photomatix runs as a standalone application that accepts JPEGs, TIFFs, Raw files and high bit-depth image files as inputs. There are also Photomatix plug-ins available for Aperture, Lightroom and Photoshop.
If you shoot your bracketed exposures in a Raw format, then you’ll have the workflow choice of either converting the Raw files first and then running them through Photomatix; or leaving them in the Raw format to be processed and combined in Photomatix.
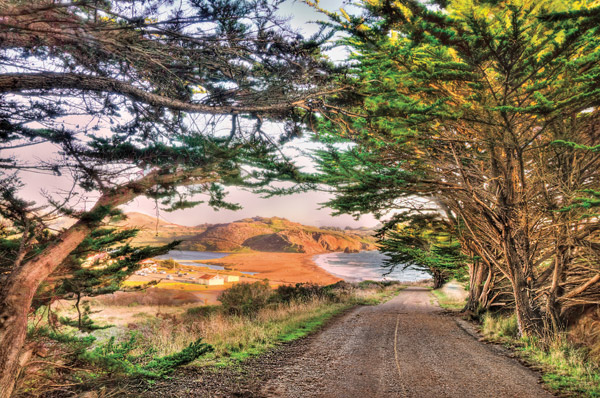
From under the dark shade provided by a row of trees planted along an abandoned road in Coastal California, I looked out at a beach scene lit brightly by the late afternoon sun. To capture the lights and darks of this landscape, I shot a bracketed sequence of exposures.
1. Look through your photo library and select a set of bracketed shots that you want to combine into an HDR image.

2. Launch Photomatix. A Workflow Shortcuts dialog box will appear on the screen. This initial dialog box is pretty straightforward. To get started, click Load Bracketed Photos.
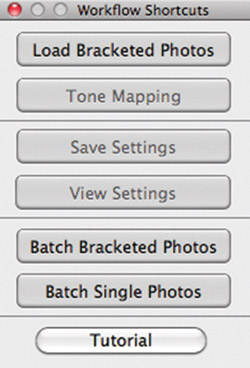
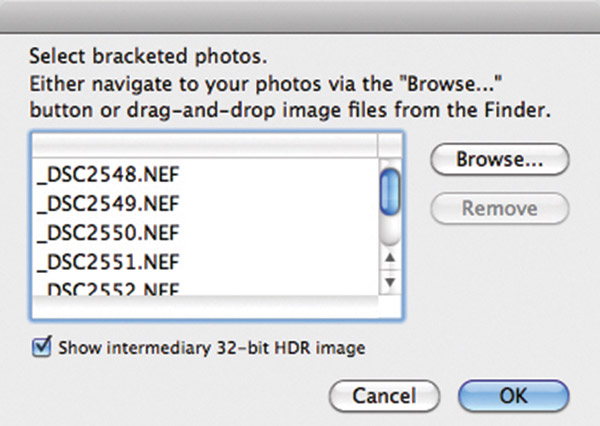
3. Use the next dialog box that opens to select a group of bracketed photos for blending. If you want to see how your HDR blend is shaping up as Photomatix walks you through the 2-step process, check Show intermediary 32-bit HDR image.
After you have selected the images you want to use, click OK.
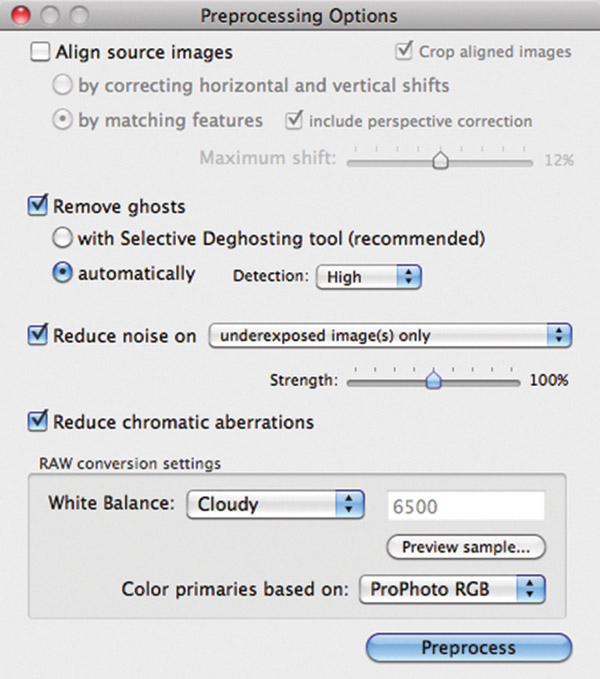
4. The Preprocessing Options dialog box gives you a number of important blending preferences to choose from:
Align source images sets Photomatix to try to align your images. Most of the time this option is not necessary if your bracketed sequence was shot using a tripod.
Remove ghosts is intended to help you remove apparent “ghosts” in your images. Ghosts are caused by objects that have moved between captures. You can select automatic ghost removal as I did here, although automatic ghost removal works less well than Selective Deghosting when the motion is caused by a single object. The reason I chose automatic ghost removal is because the ghosting comes from the complex structure of branches moving in the ocean wind. Selective removal wouldn’t have been possible because motion was present in every capture.
Reduce noise is a helpful option that lets you reduce noise on the underexposed images in a bracketed sequence. You can also use the drop-down list box to reduce noise on images with other exposure values.
Reduce chromatic aberrations removes some of the purple fringing that occurs when processing an HDR image using automated software.
RAW conversion settings are very important. If you are feeding Raw, unprocessed files into Photomatix, it will give you a little control over the Raw conversion process.
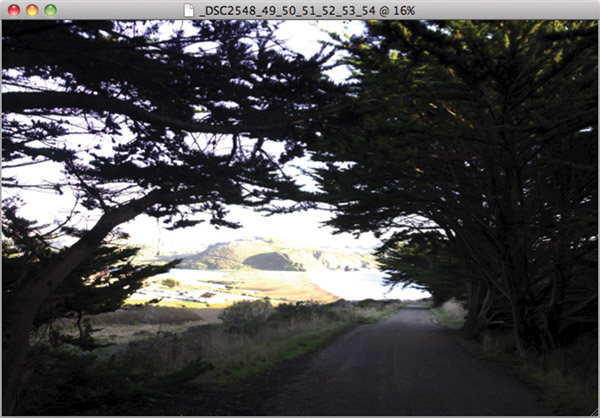
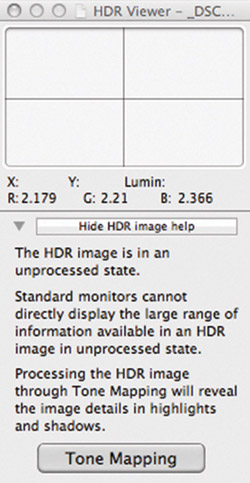
5. Click Preprocess. Photomatix will go to work. If you selected Show intermediary 32-bit HDR image back in Step 3, the program will display a high bit-depth image blend that cannot be displayed on a standard monitor. So don’t worry if what you see doesn’t look very good. Click Tone Mapping to continue.
6. After clicking Tone Mapping, Photomatix will open in a configuration similar to the one shown here.

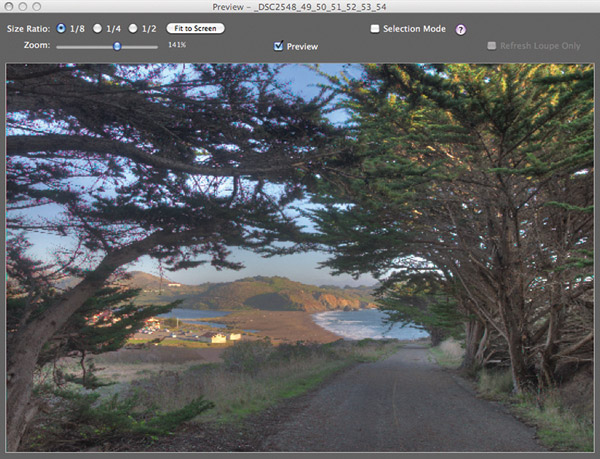

You’ll be able to see your blended HDR image in a Preview window like the one shown here. As you adjust the tone mapping of your HDR image, the Preview window will show you how these adjustments affect your image.
The long Adjustments panel contains many options that you can use to adjust the tone mapping of your image. I encourage you to play with these sliders to find out what each one does. You can compare the default settings that the Adjustments panel shows on this page with the settings I used in the Adjustments panel in (Figure A). Take a look at the default HDR image blend shown in the Preview window with the adjusted image’s colors, saturation and tonal variety shown in the image in the Preview window in (Figure B).
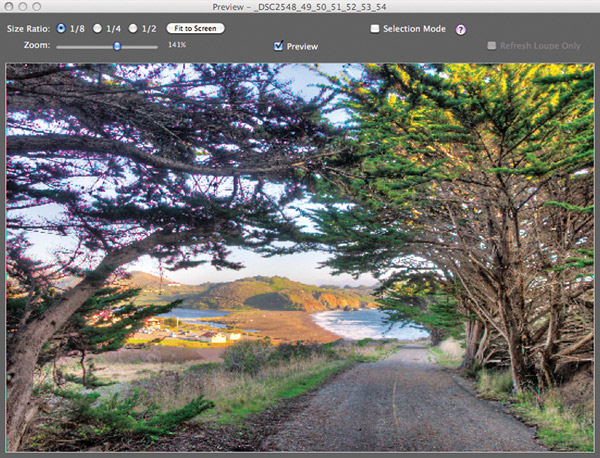

You can quickly set the tone mapping of your image by clicking one of the presets in the Presets Thumbnails panel shown below. You can then use the sliders in the Adjustments panel to custom modify your tone mapping.
7. I often like to start tone mapping adjustments by clicking one of the presets in the Preset Thumbnails panel. This gives me a baseline to start from. The Enhancer-Painterly preset is shown above. After clicking a preset, it is time to adjust the sliders on the Adjustments panel. I generally start by adjusting the White Point, Black Point and Gamma sliders until I am happy with the overall exposure of the blended HDR image. Next, I work with the Color Saturation, Luminosity and Lighting Adjustments settings until I am pleased with color and lighting. Finally, I work with the Advanced Options, which fine-tune my settings, to see if I can improve my results.
8. When you are happy with how your HDR image looks in the Preview window, click Process at the bottom of the Adjustments panel.
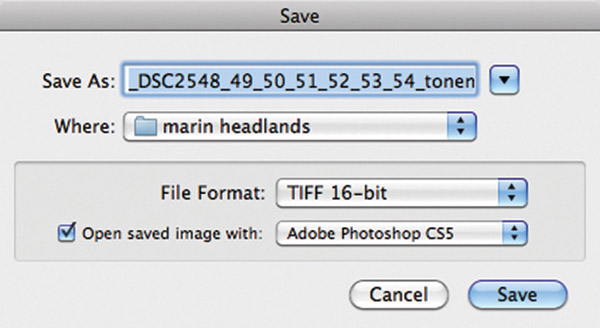
A Save dialog box automatically opens. The image that results from your HDR processing can be saved as a TIFF file, which can be opened in Photoshop.
Tech Specs
18mm, 7 exposures at shutter speeds ranging from 1 second to 1/320 sec., each exposure at f/11 and ISO 200, tripod mounted; exposures combined in Photomatix, starting with the Enhancer-Painterly preset, with settings customized using the Adjustments panel.
 Author Bio:
Harold Davis is an award-winning professional photographer and the author of many best selling books on photography and image processing. His images are widely collected and commissioned, and his popular photo workshops are often sold out. He lives in Berkeley, California with his wife and 4 children.
Where To Buy:
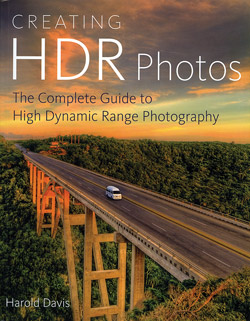
“Creating HDR Photos, The Complete Guide To High Dynamic Range Photography” (ISBN 978-0-8230-8586-6, Amphoto Books, $29.99) is available wherever photographic books are sold and online at sellers such as Amazon (www.amazon.com) and Barnes and Noble (www.barnesandnoble.com).
- Log in or register to post comments


