Geometric Light Trails: A Penlight, A String, Some Gels And You’re In
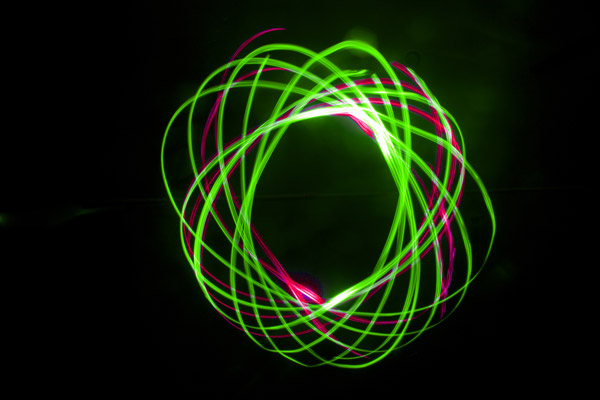
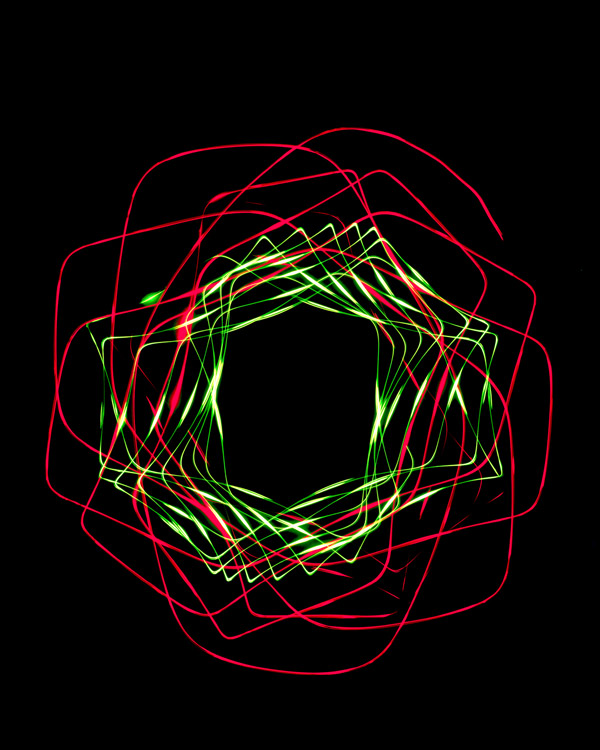
To create the abstract light trails you see in this section, I used a simple penlight. I carry one in my photo backpack so when I shoot at night, I can see the camera controls easily. I suspended the light from a horizontal wooden dowel supported by two vertical stands. There are many things you could use, though, such as a ceiling fan (with the power turned off, of course), a ceiling hook typically used to suspend a hanging plant, or the support structure of a garage door opener in a garage. What you use to suspend the penlight doesn’t matter, but it needs to be in a room that can be completely darkened.
The way you suspend the penlight can vary. Use as thin a string as you can find because it makes the penlight move in a more geometric pattern. I tried picture hanging wire and very fine electrical wire, and these gave me the kind of images I like as well as those I made with kite string.
The technique is simple. The camera is placed on a tripod and is angled straight up. Since it is very awkward to look into the viewfinder like this, a right angle finder or using a camera with an articulating monitor via Live View is extremely helpful. This is not a requirement to do this technique, but it makes it easier on your neck and back. When I did this with film years ago, I didn’t have a right angle finder and I was able to get great images. Now that I’m older I really appreciate not having to contort my body to look into the viewfinder (the right angle finder and articulating monitor are also useful when shooting cathedral ceilings and for close-up work outside at ground level).
In a dark room, after you have focused manually on the illuminated penlight (autofocus won’t work for this), you toss it in some kind of circular motion and then open the shutter. You do not need to use the mirror lock-up feature or a cable release. As the light swings on the string or wire it creates a pattern that is recorded on the digital sensor.
The Exposure
It is impossible to take an accurate light reading with a subject like this using any kind of meter. Therefore, using the LCD monitor and the immediate feedback you can get after each timed exposure, you can determine the best exposures according to your taste. Start with the settings I used to produce these images, and you can always tweak them should you like something different. I used ISO 200, f/11, and the exposure time varied depending on how complex I wanted the designs to be. I used 25 seconds for most of these pictures. A long exposure like this gave me enough time to place colored gels over the lens to get some interesting effects.
The gels I use are thin plastic sheets that I’ve cut into small pieces. You can find these at stores like Michaels, Target, and Walmart. They are not optically superior, but for this kind of technique it doesn’t matter. Even if they are scuffed or scratched, they still work just fine. Many colors are available. I used red, purple, cyan, green and yellow. During the long exposures, I simply laid the gel on top of the lens and switched colors on impulse. The white portions of the light trails resulted when no gels covered the lens.
The images you see here (#1 through #6) were taken with a 24-105mm lens set to the 24mm focal length. It is important to include the entire geometric light design in the frame, and the wide angle allowed me to do that. If the penlight swings outside the frame, the result will look like a bad cropping job.

All Photos © Jim Zuckerman


- Log in or register to post comments


