- REVIEWS
Camera Reviews 
More Reviews Mobile Reviews Photography Reviews - GALLERIES
- VIDEOS
- BUYER'S GUIDES
Exposure Techniques: Modes, Patterns And ISO Settings

"Though the amount of light needed for a good exposure is constant for any scene, you can balance aperture against shutter speed for various image effects, weighing one against the other in every frame you take."
Exposure systems in digital cameras are highly sophisticated components that can analyze light, contrast, color and all the aspects of a photo instantly. Yet with all the automation and computerization there’s still the need to understand how to get the most from all the available options, to know when to choose a particular mode or metering pattern, when you can rely on automation and when you need to step in to get the best exposure possible. This set of tips deals with the creative use of the various Exposure modes, metering patterns, bracketing features and more.
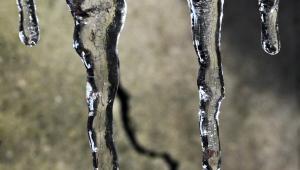
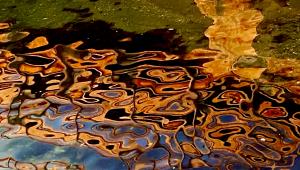
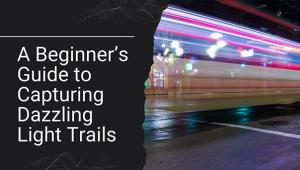
Low light strategy: Use a high ISO.
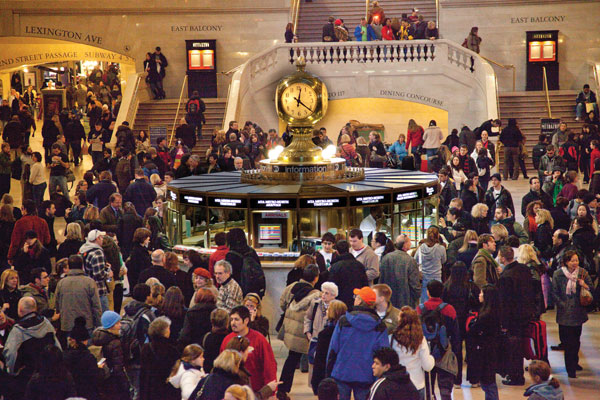
Digital cameras can be highly light sensitive. You can set a very high ISO—or light sensitivity—and change it to adapt to the light at hand in every frame. If you find that your pictures are shaky in low light because you cannot work with a fast enough shutter speed, raise the ISO and gain more shutter speed freedom. Every time you raise the ISO 1 step, from 100 to 200, you gain a step in shutter speed, from 1/15 to 1/30 second. Raise it to 400 and you’d get a 1/60 second, 800 to 1/125 second, and so forth.
There are side effects to working at high ISO speeds—increased noise and increased image contrast (with accompanying loss of color fidelity)—so use a high ISO judiciously. These handheld photos taken inside New York’s Grand Central Terminal (#1 and #2) were made at ISO 6400 and an exposure of f/6.3 at 1/100 sec.

All Photos © George Schaub
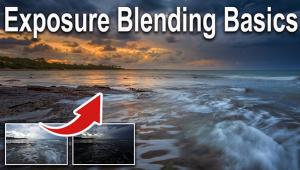
Pan with a subject in motion.
Panning is a technique that combines a slow shutter speed with moving the camera in tandem with the motion of the subject. This results in the main subject looking more or less static while the background becomes a blur. That’s how this bus zipping down New York’s 7th Avenue (#3) and these polo players (#4) were caught in action, with the implied motion supplied by the background blur.


To get these shots use TV or S, Shutter-Priority mode, to set a slow shutter speed, starting at about 1/15 second and going slower as you test the effect. It takes some practice but after a while you’ll get a feel for when to release the shutter as the subject goes by and how to use a kind of follow-through motion to keep the subject in the frame as you work.
The main issue you may run into when going for this effect is too bright a light level to be able to get as slow a shutter speed as you want. First, lower the ISO to the lowest number, or light sensitivity. If the scene is too bright you might “run out” of aperture to control exposure. If so, try shooting in a spot where the light level is lower (shoot in the shade). Or, you can place an ND (light-reducing) filter over the lens.
If you can shoot using a tripod and panning head so much the better, but shooting handheld, as was done for these photos, can be fun, if a bit more challenging.
Use the Program Shift mode.
Some photographers think of Program exposure mode as “Snapshot” mode, or for using your camera as a “point and shoot.”
Program mode is actually quite sophisticated. When making exposure calculations it takes into account the ISO, the focal length of the lens, whether or not the flash is activated, the minimum shutter speed necessary to get a steady shot given the lens on the camera and more. Program can also be used as a way to have complete control over image effects without using Aperture- or Shutter-Priority exposure mode using an option known as Program Shift.
Once the camera makes a reading in Program you can turn a control dial or command dial to shift aperture and/or shutter speed. If you change aperture, the camera will automatically change shutter speed to make up for the gain or loss in light, and vice versa. You can use Program with any of the metering patterns.
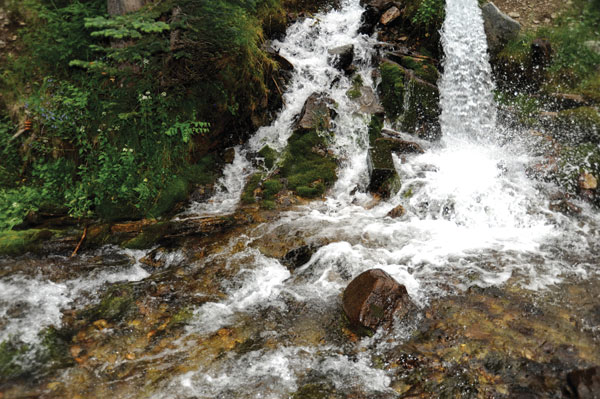
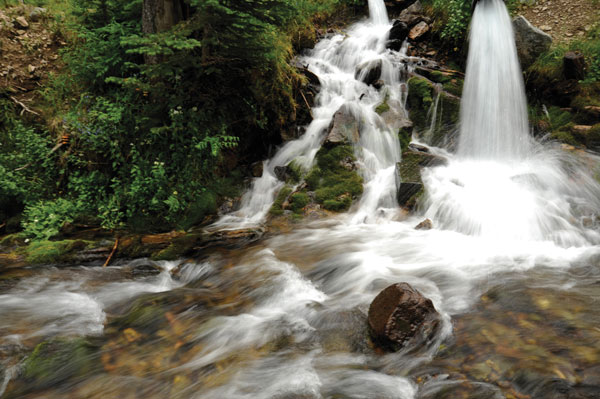
In many ways, Program is one of the easiest Metering modes to use. You can shift and make adjustments using equivalent exposures on the fly, depending upon what image effect you need or desire. This method was used in these 2 photos of a small waterfall—(#5) shows all the droplets at 1/250 sec and (#6) shows the water flow effect at 1/8 sec. Shifting in Program mode yielded an aperture of f/2.8 and f/16 respectively, maintaining the same overall exposure while shifting the image effect.
Shoot landscapes with Aperture Priority mode.
Aperture settings contribute to what is sharp and unsharp in the photograph. It is 1 of 3 variables that determine depth of field.
In some cases you’ll want to make the entire background sharp to give the subject context. In others you might want to pinpoint the main subject by unsharpening the background, or at least making the background a less detailed part of the image.
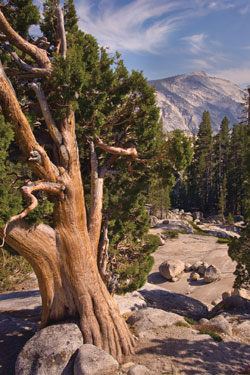
Because many landscape photos rely on a deep depth of field to show focus from the foreground to the distant background, Aperture Priority is often referred to as the “Landscape exposure mode.” This photo (#7) was made in AV mode with an exposure of f/29 at 1/80 sec. Focus “began” at the closest rock in the foreground and stretched all the way to the distant mountain and sky (infinity).
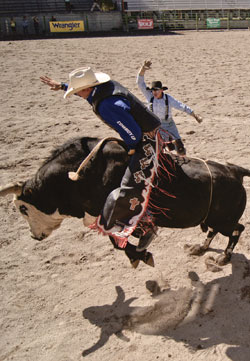
Capture the action with Shutter Priority mode.
Choose Shutter Priority mode when you want to capture the action of fast moving sports or any photo where split-second shooting is key. Simply set the Exposure mode dial to “S” or “TV” (for Shutter Priority/Time Value) and test out the shutter speed that you think you might need to freeze the action.
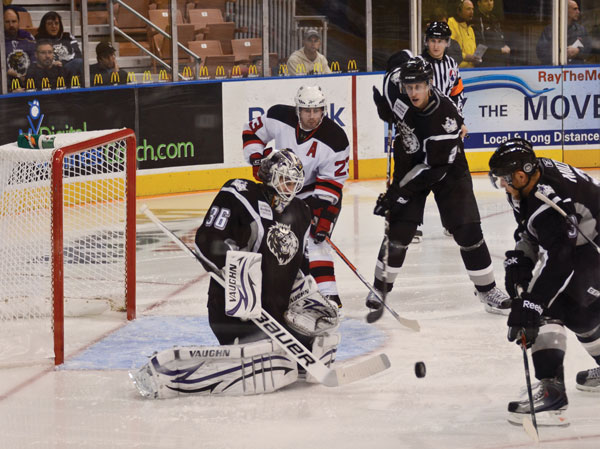
For some sports 1/500 second will do—for really fast moving sports a shutter speed as high as 1/2000 second is required. If you need more light sensitivity to get those speeds always remember that you can raise the ISO to “buy” more shutter speed. The photo of rodeo action (#8) was made at 1/1250 sec; the goalie’s save (#9) was shot at 1/1500 sec.
Tech Tip
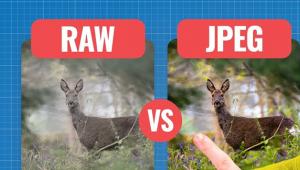
The Case For Raw
There are 2 file formats you can use when making photographs—JPEG and Raw. JPEG is for those who want to shoot without doing much, if any, image processing after exposure, and for those who might want to print using kiosks or online services without having to process the photos. There is nothing inherently wrong with JPEG files. It is just that Raw affords so much more.
Here’s why:
Raw files can be processed using Raw converter software that allows you to make changes to the image without affecting the original file, known as “non-destructive editing.” You can switch the white balance, contrast, color saturation and more with ease and without causing the file to be compressed or to lose image information. You can even correct, to an extent, exposure settings.
JPEG also allows you to change the look of the image file during post-exposure processing, but certain things like white balance, switching from Monochrome to Color mode and contrast corrections are less easily done or impossible to do. And, when you edit you are changing the structure of the file itself, not a set of “sidecar” instructions as you work with in Raw.
Raw files contain more image information, more colors and more light information. They are recorded at a higher bit depth than JPEGs, and more bit depth equals more information, and more information usually means a higher-quality image, particularly when making prints.
JPEG files are compressed files, which means that at the moment of exposure a percentage of image information is tossed away by the processor. Raw files are uncompressed.
However, Raw files require you to process the image prior to being able to print, send or share it. JPEG files are ready to print, send or share (given they are not too large for e-mails, etc., in which case they are easily made smaller in file size).
For the best image quality, shoot Raw. For convenience, shoot JPEG. What is the best advice? Set the camera to Raw+JPEG and get the best of both worlds.
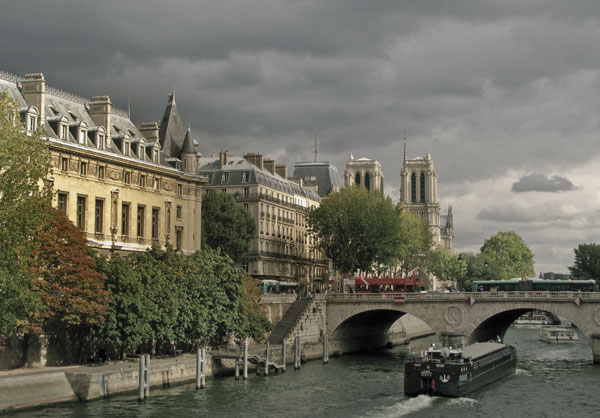
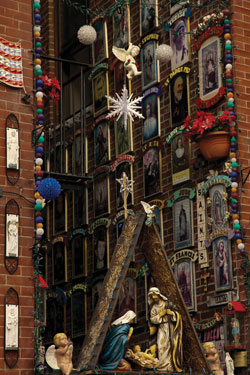
When to use the Center-Weighted Averaging (CWA) metering pattern.
Center-Weighted Averaging reads light from all parts of the viewfinder, with 70 percent of the exposure calculation weight coming from the center of the frame and the remaining 30 percent of the calculation from the edges of the frame. It is called “averaging” because it takes in all the various brightness levels and then averages them to what is called a “middle gray” exposure reading.
The key to using Center-Weighted Averaging patterns (CWA) is to include the brighter areas of the scene within the frame when you make readings, but don’t just read the brighter areas.
This is called “biasing toward the highlight” and by including both bright and dark areas in the reading area you allow the metering system to average them to get the exposure right. It takes some practice but it’s a great way to control exposure.
In this photo (#10) the camera view is first shifted to make a CWA reading from the left portion of the frame. The exposure is then read and “locked” and then the frame is shifted to create the composition you see here.
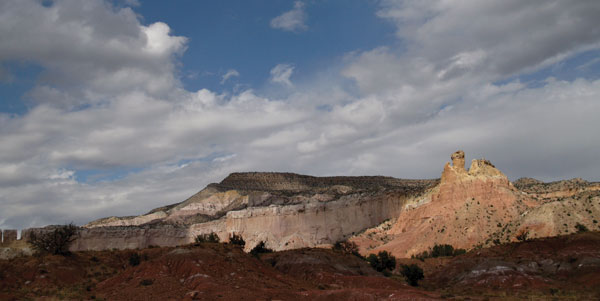
Use Spot Metering for selective area readings.
The Spot Metering pattern takes a reading from a specific area within the frame. While you can change the location of the spot reading area in the finder, many photographers maintain the spot pattern as a small circular area in the center of the viewfinder (it is the default position). Spot Metering is a photographer-controlled technique, and therefore is probably the most accurate, and perhaps most challenging, way to read light.
You can use Spot Metering to pick out select portions of the scene, such as when catching a shaft of light striking a distant formation in Ghost Ranch, NM (#11), where the reading is “locked” on the sunlit formation.
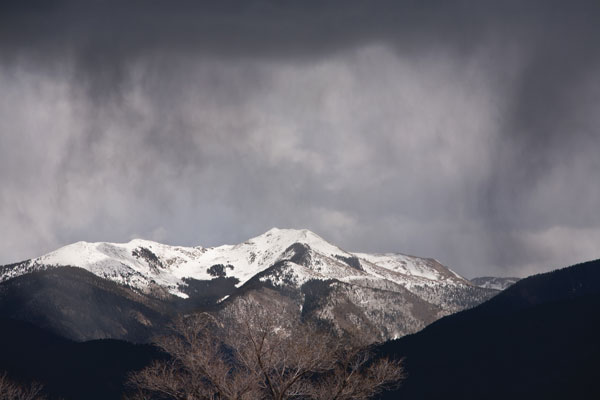
Spot is also perfect when shooting snow in bright light. In this photo of a stormy sky with white-capped mountains (#12), the Spot reading was made from the bright snow and a +1 exposure compensation was added. When you use Spot on white you usually have to compensate exposure to “place” the bright white correctly in the recording range.
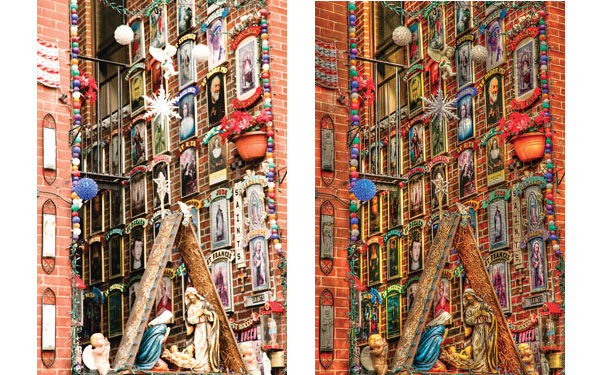
How to read a Histogram.
A Histogram is a graphic representation of the distribution of brightness values in the scene. It can be helpful for checking exposure and can be read on the LCD as you work to guide your exposure decisions.
If the right side of the graph is shoved up against the end of the chart’s frame and especially if there are truncated spikes accompanying it, it’s a good sign that your picture will be overexposed. Similarly, it reveals underexposure (loss of detail in the shadows) if the graph is shoved up against the left side.
If a large portion of the graph indicates overexposure it’s a signal to decrease the exposure. You can do this by taking a reading that includes the brighter areas in the scene and locking the exposure; by dropping the exposure via the exposure compensation (minus 1 or 2EV): or by switching to Manual Exposure mode and increasing the shutter speed and/or narrowing the aperture until you move the information in the graph toward the center and away from the edge.
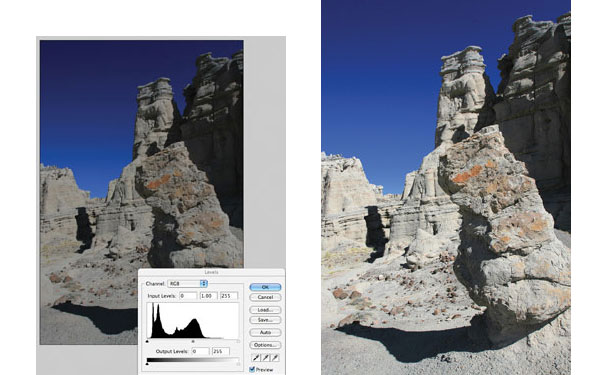
Take a look at these images and their Histograms (emulated using Photoshop’s Levels panel). This is just like the Histogram you see in your camera’s finder. The pairs show the initial Histogram and the corrected image.
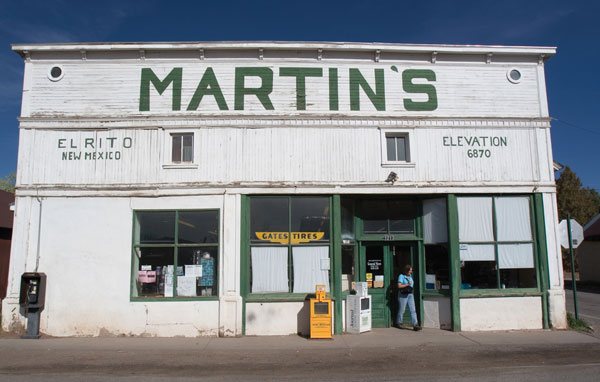
The storefront photo (#13) shows a lot of information shoved onto the right side and cut off at the top, indicating too much bright light, or overexposure. The fix is to drop exposure by minus 1.5EV, and the resultant exposure shows good reproduction of the bright whites (#14).

These formations were underexposed and look flat, lacking their true contrast; note the Histogram shows no or very little highlight information (the right side of the graph, #15). In this case adding exposure of about 1EV produces a good exposure (#16).
Tech Tip
Image Effects And Exposure
Though the amount of light needed for a good exposure is constant for any scene, you can balance aperture against shutter speed for various image effects, weighing one against the other in every frame you take.
Aperture is the opening in the lens; shutter speed determines the duration of the light exposure through that opening. Exposure control means working with both of these controls in tandem. In some scenes, that might mean choosing a wider aperture and a faster shutter speed: in others, a slower speed and a narrower aperture. The term “equivalent exposure” means that many combinations of aperture and shutter speed yield the same exposure. The way you balance the two creates different image effects.
Remember:
Aperture=Focus Effects
Shutter Speed=Motion Effects
Use the Auto Exposure Lock to maintain selective exposure.
When making readings the exposure readout changes with any movement of the camera and change of scene. There are times when you will want to lock the exposure reading you have made—for Spot and Center-Weighted readings, for controlling highlights and when making specific subject readings and then recomposing to place the subject you just read into a different area of the frame.
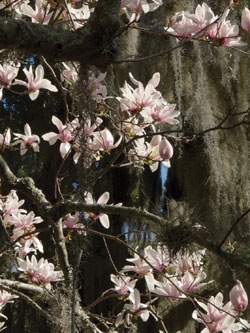
Take a look at the photo with bright white blossoms sitting in front of a dark background (#17). With the wind blowing and the large area of darkness in the background the only way to get a good exposure and keep the bright blossoms from becoming overexposed is to take a (Spot) reading from one of them and lock it for the shot.
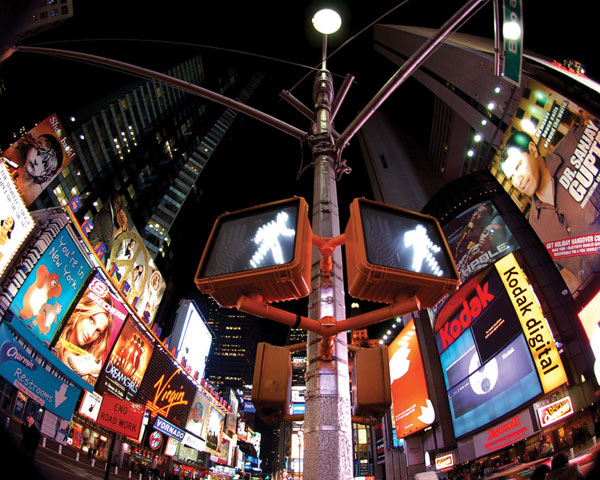
The (Center-Weighted) exposure reading in this photo of Times Square (#18) was made from the bright billboards in the background. Exposure was locked and then the composition was changed to include the foreground street sign in the frame. Failure to do this would have resulted in very overexposed billboards and a poor shot.
There are numerous ways to lock exposure, depending on your camera. On some cameras there is a button labeled “AE.” When you press this button it holds whatever exposure reading is in the camera at the moment. In most Canon cameras this function is indicated by an (*) on the camera back, which you press to lock exposure. If your camera lacks a specific locking function slight pressure on the shutter release button usually does the trick.
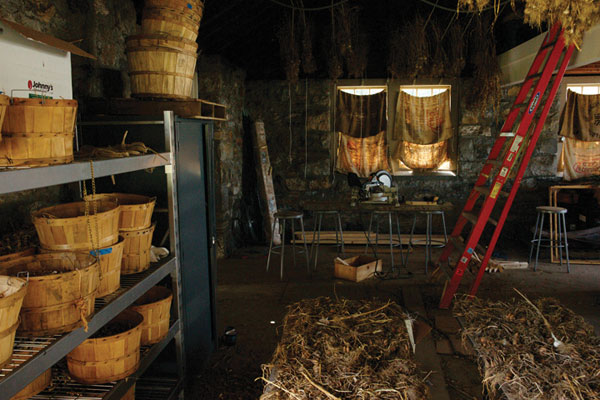
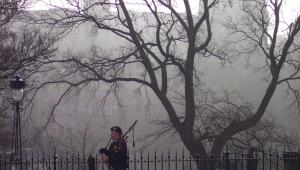
Take advantage of low contrast.
Flat, or low contrast light creates little or no brightness differences throughout the scene. It is the light of overcast days, under a forest canopy or when the scene is entirely shaded by a high wall.
For digital, flat light is no problem. In fact, it is perhaps the easiest light in which to make photographs. You can shoot in any Auto Exposure mode and use the Evaluative metering pattern for good results.
This photo (#19) was made in the shade of a building. It is crisp, bright and not “dull.” The reason is that there was no high contrast to fight, which might have affected the bright white areas in the scene or made the colors too dark. In short, all the exposure information was captured. The color and contrast were easily enhanced by increasing the Color Saturation (Vivid Picture style) and the Contrast settings in the camera.

Use Exposure Compensation for bright white.
An important tool when working in Program, AV and TV Exposure modes is exposure compensation, accessed via a +/- button or menu item. It is an extremely helpful function when there is bright white in an image, a condition that is most likely to “fool” the meter into recording the white as a dull gray and making all the other areas of the scene too dark.
This often occurs in scenes where there are very, very bright areas, such as snow at high altitudes on a sunny day, or with bright white clapboard buildings, such as this New England church front.
Odd as it might seem, you add exposure to this type of scene by dialing in a +1 or +1.5 exposure compensation. This set shows the image “as read” by the meter (the dull white, #20) and the compensated exposure (#21).

When to use Auto Bracketing.
Bracketing is making a set of exposures that add and subtract exposure from the camera’s recommended readings. It is often used as a way to obtain images for use in HDR processing, where 3 or more shots are combined to make 1 exposure, but it is also a great fail-safe way to get the right exposure, or very close to it, when the light is tough to read or you simply do not have the time to make complicated exposure calculations.
Auto Bracketing is a way of setting the camera so that 3 (and sometimes more) exposures are made in a bracketed sequence with a press of the shutter release button. Lacking that feature, you can also bracket manually, 1 exposure at a time.
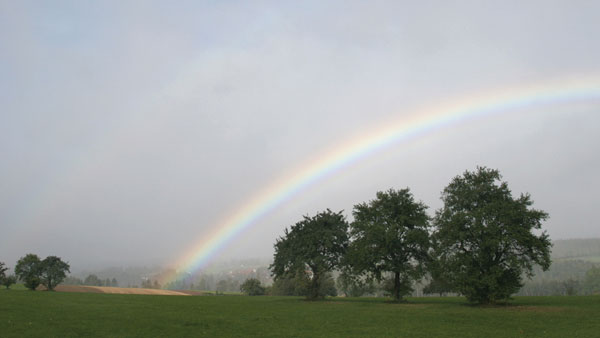
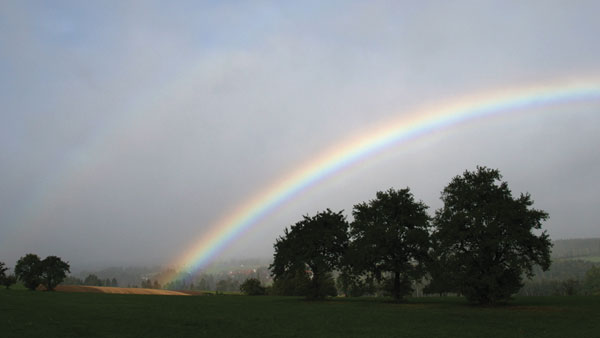
Auto Bracketing was used with this shot of a fleeting rainbow. It was raining so Auto Bracket was set inside the car, and then there was only time for 2 bracket sets before this phenomenal scene faded away. Having to shoot this manually might have meant a lost opportunity.
You can set the exposure bracket for as much as 1 stop, EV, or more or less. An exposure bracket is generally 3 shots in sequence—1 “normal” or recommended, 1 with less and 1 with more light, as seen here (#22, #23 and #24). Keep in mind that if you are using AV mode the brackets will be made in shutter speed settings (for example: f/8 at 1/125 sec, 1/60 sec and 1/250 sec) and the opposite in TV mode (for example: f/8 at 1/125 sec, f/5.6 at 1/125 sec and f/11 at 1/125 sec).

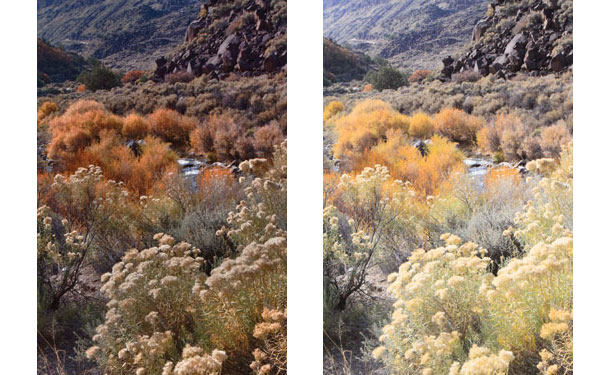
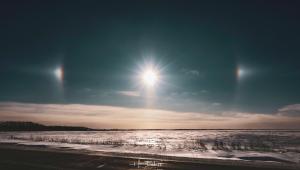
Meter off the backlight for brilliant color.
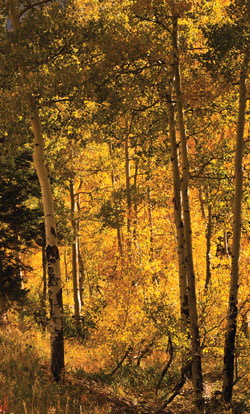
When you encounter a backlit scene the easiest way to get great color is to meter off the bright light, lock the exposure and then re-compose as you will. In this fall scene Center-Weighted metering was used to make a reading of the glowing leaves and resulted in a perfect exposure for this subject matter (#25).
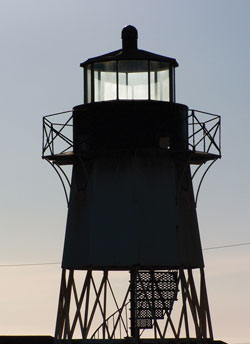
Use back lighting to create silhouettes.
Back lighting is inherently contrasty, meaning that there will be a considerable difference in exposure between the foreground and the light behind it. In some instances this means that some or the entire foreground will either be in silhouette (having form but no detail within the form) or be considerably underexposed. Exploit this high contrast by exposing for the light using Spot metering and do not include the shadow areas in your exposure calculations. As the sun set behind this lighthouse (#26) it created a stark form and nuanced background colors, yet the light through the beacon housing remained silvery rich.
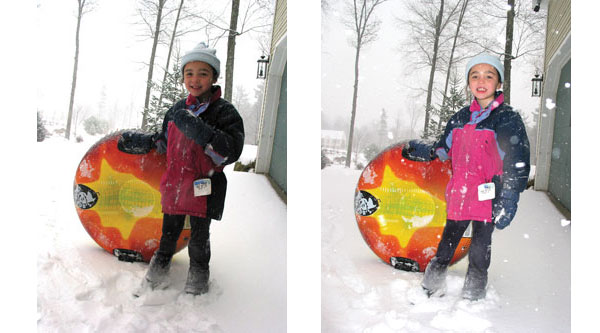
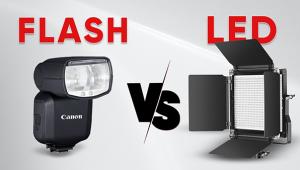
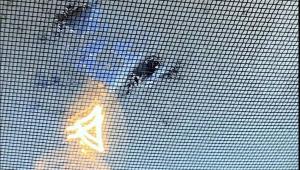
Use the built-in fill flash for backlit main subjects.
The small flash found on your camera is not intended for illuminating great distances or providing lots of light in a dark room. It is best used fairly close-up or to add just a “kicker” of light to a scene. It can also be used to bring a subject that might otherwise be backlit out from the shadows, such as this non-flash and flash example of Emma Polgrean getting ready to sled down a hill on a snowy day (#27 and #28). Note how the flash “freezes” the snowflakes as they fall.
These flowers (#29) were photographed with a Lensbaby (www.lensbaby.com) at the minimum focusing distance and the on-camera flash. The bokeh is enhanced by the way the flash/focus combination creates rim highlights, a kind of “halo” of soft focus around the flowers.

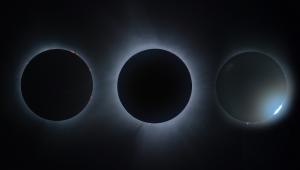
Tame high contrast in-camera.
Given that high contrast can cause exposure problems, there are some in-camera controls that can be used to modify its ill effects. New processing algorithms that go under the general heading of “Tone Compensation Control” deal with contrast with an automatic shadow/highlight balancing act. Called D-Lighting in Nikon cameras, iContrast in Canon and similar terms in other models, the processing set-up controls highlights and “opens” shadows.
You can set these controls to low, medium or high, depending on your perception of how high in contrast the scene might be, or leave it at Auto to allow the camera’s processor to make the call. In this set of images the contrast control (here in a Sony D-SLR) is off, set to +1 and +2. Note how the shadow areas open up (become brighter with more detail) as the Tone Compensation is set higher (#30, #31 and #32).


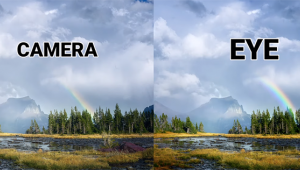
Shooting for HDR imaging.
While some photographers do not like HDR when it’s taken “too far” there are times when it can come in handy. The sensor in the camera has a certain range of brightness levels (contrast) that it can record. When the contrast gets too high it can cause a loss of detail in the shadow and/or highlight (brighter) areas. You can overcome this by making multiple exposures of the same scene using different exposures, then using software to combine those exposures to extract details in the highlights and the shadows and put them together in 1 frame. Some cameras now have HDR functionality built-in.
In order to ready images for this technique you need to bracket exposures and make a number of different exposures of the same framing. (See Auto Bracketing), so working on a tripod is recommended.
Shown here are 2 shots from a bracketed series and the final (#33, #34 and #35) highly dramatic HDR rendition that looks more illustrative than photographic. You can also make “straight” HDRs that make a photo made under poor lighting conditions look like it was made under ideal conditions.
In the landscape shot there’s a more natural conclusion to the work, one that brings in the most detail from the light, dark and camera-recommended exposure of this high contrast scene. Which is best? That’s what the debate is all about. Whether images look best showing the deep shadows that a high contrast scene when photographed would have always shown in the past, or one that uses digital technology to reveal all the information that can be gathered from the bracketed shots (#36, #37, #38 and #39).

- Log in or register to post comments


![]()
Get the Latest Photo Tips, News & Reviews from Shutterbug!
| Camera Reviews Other Reviews | Mobile Reviews Photography Reviews Columns | News | Features | How-To | Resources |
 © 2025 Shutterbug
AVTech Media Americas Inc., USA
All rights reserved