Double Mattes, Digital Style; Add A Touch Of Class To Your Online Photos Page 2
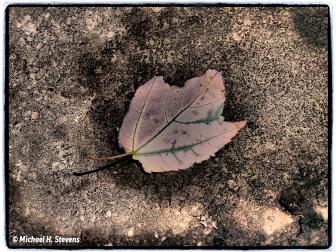
You will notice that we have created a narrow three-dimensional under matte with a beveled edge and a thin shadow. We are going to duplicate this process for the larger over matte with a couple of minor variations.
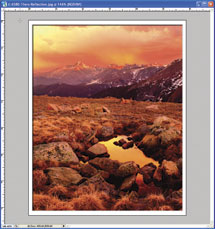 |
9. We start by combining all the layers in the image with the command, Layer>Flatten Image. Then, just as we did for the under matte, we duplicate the Background Layer, Layer>Duplicate Layer. You can still use the name Background Copy. As before, select your Background Color by clicking the lower box of the two little color boxes in the toolbar to get the Color Picker window. Again, we’re going to select white (R: 255, G: 255, B: 255). Now we’re going to increase the Canvas Size with the Image>Canvas Size command. Make sure the Relative box is checked. This time we’ll increase the Canvas Size, height and width, by 25 percent. We want the canvas to increase uniformly around the image so we keep the Anchor in the center.
10. Make sure the Background Copy layer is highlighted in the Layer Palette. Then select Layer>Layer Style>Stroke commands. Once again set the Layer Style to:
Size: 2
Position: Outside
Blend mode: Normal
Opacity: 100 percent
Fill Type: Color
Set the color to a medium gray (R:138, G: 138, B: 138). Resist the urge to click OK. We need to create the little shadow to give the matte that three-dimensional appearance.
11. On the left side of the Layer Style window, remember to click on the words “Inner Shadow” rather than just the little check box to the left.
 |
Set the Blend mode to Multiply with the drop-down menu. Double click the color box to the right of the Blend mode drop-down menu to open the Color Picker. Select black (R: 0, G: 0, B: 0). Adjust the Layer Style properties to:
Opacity: 75 percent.
Use Global Light: checked
Angle: 135?
Distance: 3 px
Choke: 0 percent
Size: 1 px
Contour: diagonal pattern
Noise: 0 percent
12. Now click OK on the Layer Style window.
13. We now a have a realistic, three-dimensional double matte around our photo. To add a classier, gallery quality appearance, we’re going to adjust the matte so that it is a little wider at the bottom.
 |
 |
14. To do this, flatten the layers with Layers>Flatten Image command. Now we can change the Canvas Size, Image>Canvas Size. Make sure the Relative box is still checked. Again select Percent as the unit. This time we’re going to leave the Width at zero since we don’t want to change the width. Set the Height to 2 percent. Now we’re going to change the Anchor so the canvas size is increased only on the bottom. Click the top center arrow of the anchor. The anchor box should then look like the figure. Click OK. You’ll notice that the matte has increased in width only on the bottom.
 |
Contact
Adobe Systems Inc.
345 Park Avenue
San Jose, CA 95110
800-833-6687
www.adobe.com
- Log in or register to post comments


