Digital Photographer’s New Guide To Photoshop Plug-Ins; Flood (By Flaming Pear) Page 2
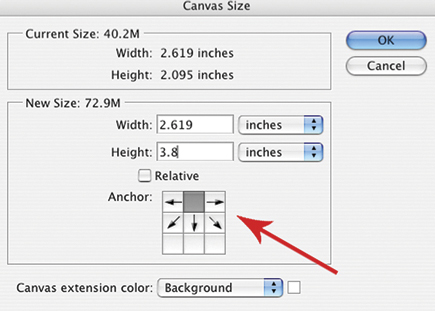
Using the tic-tac-toe-like graphic (Figure 3), decide where you want the additional space to appear. The gray square in the middle of the graphic represents the photo. In this example, I clicked in the upper middle square and that moved the gray box to that spot. This means that the new “real estate” will be added below the photo, as shown by the arrows. If you were to move the gray box to the middle right box, then the new area would be added to the left side. Type the amount of the enlargement desired into the appropriate fields. Also note the background-color pull-down menu; this specifies what color you will see in the expanded portion of the image. It doesn’t matter what color you choose in this case because the water will soon cover it.
 |
|
|
Creating Waves
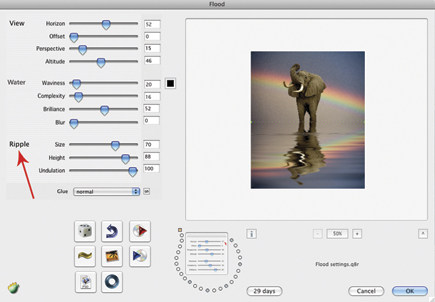
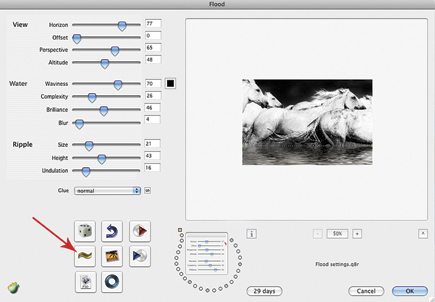
In the Flood dialog box, the four sliders most commonly used to create an infinite number of wave patterns are those found under the Water section: Waviness, Complexity, Brilliance, Blur. They are used in conjunction with each other, and most of this plug-in’s creative effects are altered by working these four controls until you are satisfied with the reflection’s appearance. There is no “correct” setting that will give you a guaranteed perfect reflection because every photo is different and each reflection has to be customized for the subject. Image resolution also makes a difference. A wave pattern on a 40MB file will look very different if the same parameters are used on a 5MB file.
 |
|
|
|
 |
|
|
Ripples
The three sliders at the bottom of the dialog box under the Ripple section (see Figure 4) are much more realistic than the Pond Ripples offered in Photoshop (which can be found under Filter>Distort>Zigzag, if you’d like to compare). I’ve never been happy with Photoshop’s attempt to create realistic ripples; however, the effect in Flood is subtle and believable.
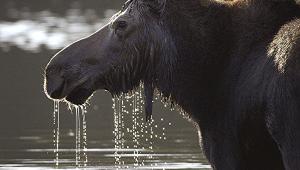
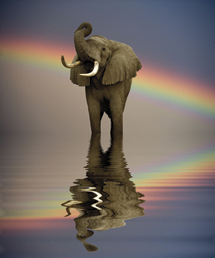
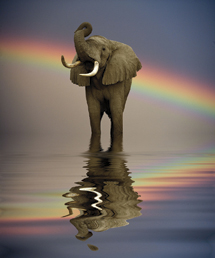
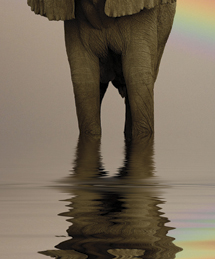
Using a combination of the three ripple controls, I created a credible disturbance in the water at the base of the elephant seen in photos D-F. In Photo D, there are no ripples and the image looks oversimplified, while in Photo E I applied some ripples and the water around the elephant’s feet is now broken up and looks much more natural. In Photo F, I’ve cropped tightly in on the water to show that the effect looks like believable ripples on the surface of the water.
 |
 |
||
|
|
The Glue pull-down menu found beneath the Ripples section is like the blend modes in Photoshop. I’ve never found a good use for any of these effects in creating realistic, or even surrealistic, reflections. But it is interesting to experiment with them for different visual effects.
Extra Options
A number of extra controls can be found at the bottom of the Flood dialog box, which appear as icon buttons. The first, which looks like a die, is Randomize. Every time you click this, it’s like a roll of the dice—all the parameters are changed and the wave pattern displays endless variations in the preview window. If you don’t really know what kind of wave pattern is appropriate for your picture, this will give you a continual slideshow of possibilities. Just below the die, the Random Seed icon (Figure 5) changes the wave pattern, but retains the position of all the sliders.
 |
|
|
Once you have established the surface of the water in a way that looks good to you, try this button and study the various options it offers up. The other icons grouped here don’t offer image-altering effects; instead, they offer other controls like Save and Undo. If you let the cursor hover over these icons, a small text box will appear telling you what they do.
Below the image preview there is a strange horseshoe-shaped configuration of small circles. These are program presets, and by clicking in any of the open (non-colored) circles you can save the specific wave pattern you’ve just created. This acts as a shortcut almost, because later all you need to do is click on the circle where you saved the preset and its settings are loaded onto your current image. I’ve never seen another program with this kind of design, but it works very well once you get the hang of it.
Digital Photographer’s New Guide to Photoshop Plug-Ins by Jim Zuckerman and Scott Stulberg; 160 pages; paper with flaps; 81⁄2x10; $24.95 US ($26.95 Canada); ISBN-13: 978-1-60059-212-6; published in April 2009; A Lark Photography Book (www.larkbooks.com). Available wherever fine books are sold.
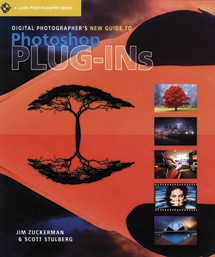 |
Jim Zuckerman has done the legwork, describing and test driving many plug-ins for a variety of functions, as well as recommending the very best options currently available on the market. New Photoshop owners, experienced digital artists, and pro photographers will all find recommendations to make their tasks in Photoshop quicker, easier, and more fun.
- Log in or register to post comments


