- REVIEWS
Camera Reviews 
More Reviews Mobile Reviews Photography Reviews - GALLERIES
- VIDEOS
- BUYER'S GUIDES
Use This 3-Step Photo Editing Trick for Sharpening Photos Without UGLY, Crispy Results (VIDEO)
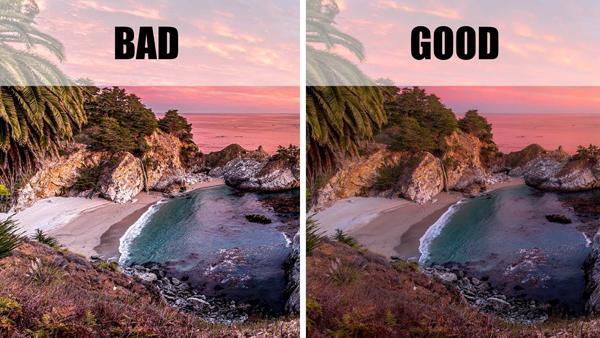
When improving soft images during the editing process there’s a big difference between sharp, crisp, and crispy. Do things properly and you’ll achieve realistic sharp results. But make a common mistake and you’ll turn an otherwise nice shot into a crispy, ugly mess.
In the following tutorial from French landscape photographer Serge Ramelli, you’ll see a foolproof three-step trick for properly fixing soft images, and learn what Ramelli calls, “The biggest mistake I see when sharpening photos.”

The mistake Ramelli is referring to is using the common method of globally sharpening images. He bluntly insists that this lazy approach “is killing incredible photos.” As you’ll see, Ramelli prefers to sharpen images selectively using a formula that delivers dramatically better results.
Ramelli says he uses this three-step trick on virtually every image he sells in his galleries. Before demonstrating how he sharpens images locally by employing a simple mask, Ramelli stresses the importance of taking a subtle approach, and avoid over-sharpening at all costs.

Using a landscape photograph he shot on the beach in Big Sur, California, Ramelli begins by explaining that he prefers natural-looking results. He therefore takes a cautious approach when it comes to sharpening, texture, and clarity. With this in mind, his process begins some very light-handed sharpening to the overall shot.
Steps two and three are the key to his method, as he demonstrated how to add a mask and do local sharpening to only the portions of his image that need it. It’s admittedly a bit easier to simply employ Photoshop’s Unsharp Mask Tool and pull the slider to the right. But if you want optimum results, Ramelli’s method is definitely the way to go.
After watching the video take a trip over to Ramelli’s YouTube channel where you’ll find more helpful editing and shooting advice. And be sure to watch another tutorial we posted, explaining the difference between the Texture, Clarity, and Dehaze Tools when editing photos in Lightroom.


![]()
Get the Latest Photo Tips, News & Reviews from Shutterbug!
| Camera Reviews Other Reviews | Mobile Reviews Photography Reviews Columns | News | Features | How-To | Resources |
 © 2025 Shutterbug
AVTech Media Americas Inc., USA
All rights reserved