Point & Shoot: How to Photograph Textures
|
As the subject of a photograph, texture speaks to our sense of touch. The way that things feel is very ingrained in our consciousness. Texture tells us about the nature of a subject, whether it's the rough surface of a straw hat, or the silky smoothness of satin. The light that reveals an object's texture also gives us a sense of its dimensionality. In a photo, texture tells us something about the subject's weight and bulk, as well as its relative hardness or softness.
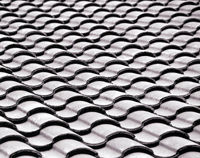
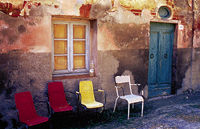
Strong, specular light that rakes across an object emphasizes its surface characteristics in sharp detail, and creates a pattern of highlight and shadow. When shooting outdoors, it's a good idea to shoot early in the morning or late in the afternoon, when sunlight skims across a subject at a low angle. If you're taking pictures indoors, you can position lights this way, at any time you wish. All you need to do is to place the main light so that it lights the subject from one side. The flattering, soft light used for photographing people is not appropriate for photographing texture—this light source should be direct, not diffuse. Look at the contrast in the scene you're shooting. If the shadows appear to be too dark and the highlights too washed out, then you may want to add a fill light to illuminate the shadow side slightly. Experiment by shooting a series of photos of your subject, with the light at a different position for each shot. The resulting photos will reveal what lighting position works best for capturing the subject's texture. Textures can be depicted several different ways. First of all, you can move in close to your subject to magnify the surface irregularities of the object. Texture is most often depicted in close-ups. However, when texture is part of a broader scene, as with the rippling surface of sand at a beach, it's often better to back off and show the expanse of the subject. Just as with patterns, many texture photos work well when they have some visual variety and appear to extend beyond the frame of the picture. Framing is important, especially when you want to emphasize texture as your subject. You can dramatize this idea by comparing various surfaces within a scene, such as an elderly potter's gnarled hands creating a pot made of wet, silken clay. When showing several textures like this, you'll need to zoom in close and eliminate anything that doesn't contribute to the tactical qualities of your image. Black-and-white film—or the black-and-white setting on your digital camera—is a good choice for emphasizing texture, as it eliminates the distractions of color. But whether you're shooting in black-and-white or color, it's best to set your point-and-shoot camera on its landscape mode to get great depth of field when shooting textures from a distance. You'll want to use the close-up mode when shooting at close range, but this will also give you a shallower depth of field. Turn off your camera's built-in flash when photographing textures, as it will produce a harsh, flat light. The shadows in your picture will become so weak, the texture will disappear. When capturing texture, just remember that a successful photo should convey to the viewer a feeling of how the object's surface would feel to the touch. Readers are encouraged to submit photos to our monthly Point & Shoot Homework Assignment feature. Please look for the entry coupon on page 79 for topics and more details. |
- Log in or register to post comments
