- REVIEWS
Camera Reviews 
More Reviews Mobile Reviews Photography Reviews - GALLERIES
- VIDEOS
- BUYER'S GUIDES
PHOTOSHOP TIPS: Replace ANY Sky in ANY Photo in Just 5 Minutes (VIDEO)
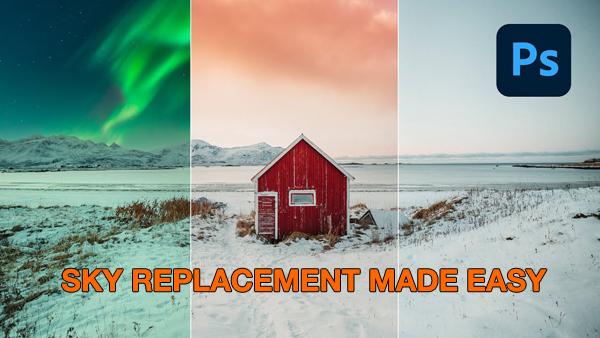
Remember when replacing a dull, drab sky in Photoshop was a cumbersome, complicated, and time-consuming process? Well that’s a thing of the past, thanks to innovative new automated features that make this task about as easy as it gets.
Photo instructor Peter McKinnon has over five million subscribers on YouTube for two very good reasons: Not only does he have an engaging, exuberant style, but he’s very adept at keeping things quick and simple when it comes to both shooting and editing tutorials. In the video below, he demonstrates an easy and effective sky replacement technique that you can accomplish in less than five minutes.
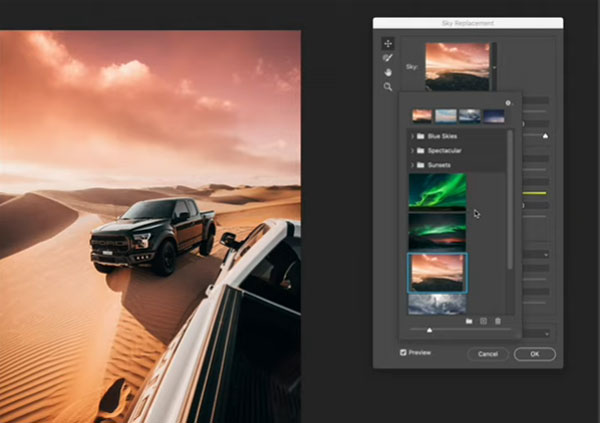
McKinnon begins with an overview of Photoshop’s new sky replacement technology, and then walks you through everything it takes to replace any sky in any photograph with ease. The replacement sky can be one of several default options built into Photoshop, or you can choose one of your own.
The trick for achieving a natural looking result is to select a new sky that is a good match for your original image in terms of color values, direction of light, and a few other key variables. When done right, in just a few minutes you can turn a so-so landscape image into a realistic money shot.

Once you select the sky you want to use, Photoshop’s Sky Replacement Tool offers a number of sliders for modifying color temperature, brightness, contrast, and more. McKinnon even demonstrates how easy it is to adjust the scale of your new sky, so it meshes perfectly with the original image. He also explains how to add a slight edge fade to keep everything looking real.
After watching this quick video, head over to McKinnon’s YouTube channel for more editing and shooting tips. We also encourage you to check out the tutorial we posted yesterday, explaining Lightroom mistakes you need to avoid & how to do things right.
- Log in or register to post comments


![]()
Get the Latest Photo Tips, News & Reviews from Shutterbug!
| Camera Reviews Other Reviews | Mobile Reviews Photography Reviews Columns | News | Features | How-To | Resources |
 © 2025 Shutterbug
AVTech Media Americas Inc., USA
All rights reserved