- REVIEWS
Camera Reviews 
More Reviews Mobile Reviews Photography Reviews - GALLERIES
- VIDEOS
- BUYER'S GUIDES
Lightroom Basics: Fix UGLY Mask Edges in Just 4 Minutes (VIDEO)
Have you ever noticed when employing masks that ugly artifacts appear around the periphery of the selection? It's a common problem that can be quickly resolved by following the quick and easy tips in this tutorial from the Photoshop Café YouTube channel.
Instructor Colin Smith is the founder of the channel and an expert at all things Adobe. In barely four minutes he demonstrates how to rehabilitate a photo by eliminating these unsightly edges, and his effective method is so simple that even beginners can accomplish the task with ease.
The demonstration image is a pretty seascape shot with a beautiful sky. Smith's goal is to reduce the silhouette in the foreground. So he grabs Lightroom's masking tool and chooses Select Subject. Lightroom's AI selects the gazebo on the shore, but Smith also wants a selection of the foreground.
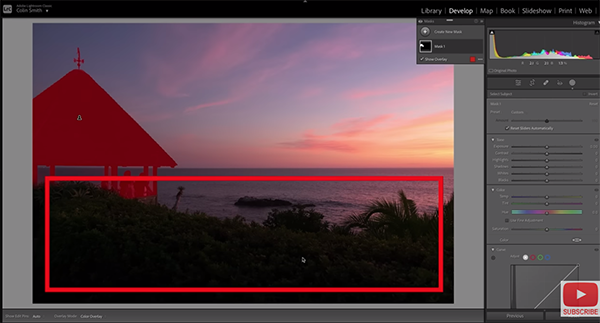
Smith quickly accomplishes this task using Lightroom's Object tool that works in two modes: either with a selection or by using a brush. He chooses the latter approach and roughly paints over the area he wants to keep. Lightroom then makes an AI selection of that area in the image.
But here's the problem: after increasing exposure and opening up the shadows, ugly artifacts around the edges of the selection are readily apparent. There are several was to fix this mess, some more complicated than others, but Smith reveals a technique that does a great job and is as simple as can be.
Smith chooses the Subtract option and grabs a large brush, making sure that Feather is set to the maximum. You'll then notice two concentric rings; the inner ring represents where the brush is, and the outer ring depicts the Feather. He then runs the feather across the area that needs repair.
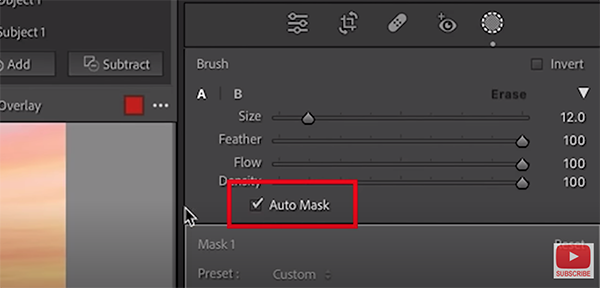
The next step is turning on Auto Mask to sample color and protect the edges around the foliage. There are a few minor refinements, using the keyboard shortcuts Smith provides, and the rehabilitation process is complete—short and sweet.
Smith's popular YouTube channel is full of straightforward techniques like this, so be sure to pay a visit whenever you find yourself in a jam.
And don't miss the earlier tutorial we posted from another post-processing expert, explaining how to dodge and burn in Lightroom for perfectly exposed photos.


![]()
Get the Latest Photo Tips, News & Reviews from Shutterbug!
| Camera Reviews Other Reviews | Mobile Reviews Photography Reviews Columns | News | Features | How-To | Resources |
 © 2025 Shutterbug
AVTech Media Americas Inc., USA
All rights reserved