- REVIEWS
Camera Reviews 
More Reviews Mobile Reviews Photography Reviews - GALLERIES
- VIDEOS
- BUYER'S GUIDES
Lightroom Basics: Dramatic, Realistic Skies in 2 Quick Steps (VIDEO)

Most landscape photographers know that a dramatic realistic-looking sky is often a key element in captivating photos. Today you'll learn a simple-two step edit that provides compelling results without sky replacement, image stacking, or other complicated procedures.
Instructor Pablo Garcia may be engineer by training, but his true passions are nature photography and helping other photographers improve their shooting and image-editing techniques. In this quick tutorial he demonstrates the sky enhance method he prefers, and it's easy enough to implement for Lightroom users of all skill levels.
Garica agrees that Lightroom's Select Sky option works great most of the time, but in certain instances "you have to do some refinements by Adding or Removing, because the Select Sky mask is applied to 100% of the selection and can result in skies that don't appear natural."

The simple solution is to Intersect the sky selection with a Linear Graduated filter, and Garcia walks you through the straightforward steps for getting the job done. The sky in Garcia's sample image is far less than impressive, even though he made of a few basic adjustments before pulling it up on the screen.
That's because we must always be mindful of how global enhancements affect other areas in the shot. He begins with Lightroom's Select Sky mask to illustrate the pros and cons of this approach, paying particular attention to a few problems that need to be fixed—even after making a few refinements by adding Clarity, Contrast, Dehaze, and a couple other tweaks.
Garcia describes the problem with the initial step like this: "When we first selected the sky Lightroom made a 100% selection of the sky from top to bottom." The point is that most skies have a wide range of tones, and a universal selection doesn't always create a natural-looking result.
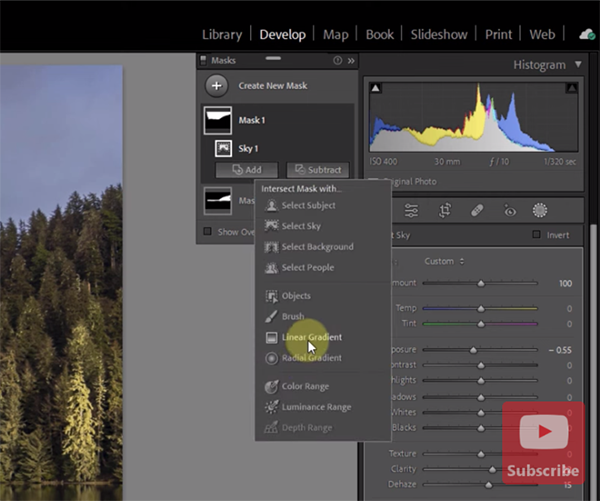
The second step changes everything by combining Lightroom's Intersect function with a Graduated Filter. Garcia demonstrates how the fading effect of the filter enables you to control how much of your edits get applied to the sky. The trick involves using a Linear Gradient to accentuate the effect.
Garcia walks you through the entire process in barely seven minutes, and we think you'll be very impressed by the transformation he achieves. Garcia's instructional YouTube channel offers other helpful tips and tricks like these, so be sure to pay a visit.
We also recommend watching a tutorial we posted from another image-editing expert who explains the difference between Lightroom's Vibrance and Saturation tools and the best way to employ them for enhancing different types of photos.


![]()
Get the Latest Photo Tips, News & Reviews from Shutterbug!
| Camera Reviews Other Reviews | Mobile Reviews Photography Reviews Columns | News | Features | How-To | Resources |
 © 2025 Shutterbug
AVTech Media Americas Inc., USA
All rights reserved