- REVIEWS
Camera Reviews 
More Reviews Mobile Reviews Photography Reviews - GALLERIES
- VIDEOS
- BUYER'S GUIDES
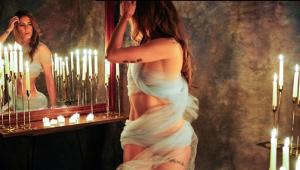
Inside My Celebrity Photoshoots: Tips on Using Natural Light

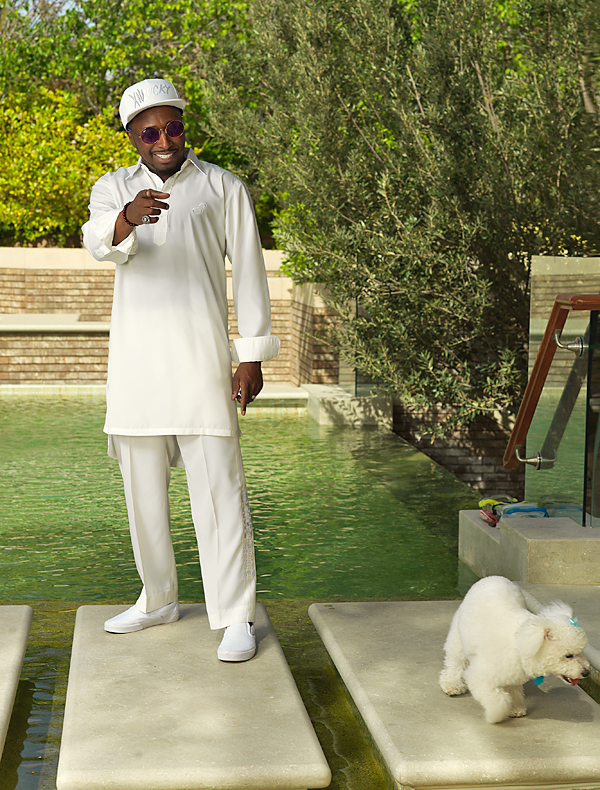
One was the first man to walk on the moon; the other arguably the greatest athlete of all time. I’ve photographed both Neil Armstrong and Muhammad Ali, among hundreds of other celebrities over the years.
Like many famous people, the image you and I might conjure up is at odds with what they’re really like. And it’s that person—who they are in their private life and who can be so different to their public perception—that I try to capture when I photograph someone of notoriety. In reality, they are people just like you and me.
It’s the ability to encompass the essence of the person that qualifies you as a celebrity photographer. That requires a certain skillset such as lighting, posing, color, balancing for skin tones and exposure accuracy. But more than anything, it’s about people skills.
No two shoots are ever the same, and there is always a detailed brief outlining specifically what’s required—publicity images, promotional shots, a feature story or a personal portfolio. This brief dictates my approach to the shoot, and whether I need one assistant or ten.
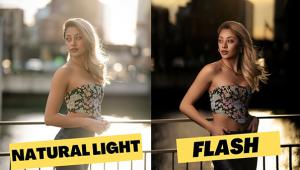
Natural light: Hints and Tips
I’ve spent my entire career studying light. Shooting in natural light always provides the photographer with a range of options and opportunities, and challenges too. My mantra is this: place light on what you’d like to see, remove light from what you don’t want to see. That might sound simple, but when I am asked to photograph a celebrity outdoors, nine times out of ten it will be under less-than-ideal lighting.
My approach to shooting outdoors is to be proactive. I might find myself building an outdoor natural studio with scrims and reflectors, like when I photographed YouTube celebrity Jenn McAllister. We had to shoot at noon, so we placed a 7x7’ scrim directly overhead, with a two stop diffusion silk. This created a beautiful, soft open light. As a fill, I placed a large white four-foot reflector directly in front of my subject.

This is great for creating a commercial style portrait and serves to brighten the eyes. A narrow strip silver reflector was used behind my subject, redirecting the sun, and adding and edge light to her right. Basically, a studio outdoors.
Here in Hollywood, you must possess the skill in creating that “perfect light,” any time of day. I’ll usually take a client outdoors and shoot a variety of different looks, from fashion, theatrical, commercial, lifestyle and urban. I will vary my lighting styles by backlighting my subject, using the hard direct sun on my subject face, and diffusing the sun for softer portraits.
I photographed Freddie Prinze Jr and the cast of Star Wars Rebels. Freddie’s outdoor portrait could not have been any easier than using the natural sun. When shooting in natural light, without reflectors or any auxiliary light, it is important to place your subject in the best angle to the sun for the specific look you are trying to create. Freddie was positioned with his back to the sun, and by slightly angling his face toward the sun, I was able to capture some natural fill on his face.

Since natural light always varies, I make sure to take a shot of the SpyderCHECKR card and use the reference image as a custom white balance. When I don’t get the time, as it does happen when working with celebrities, I simply take a shot of the SpyderCUBE, and use the black, white, and neutral gray swatches as references in post processing. This is important when shooting backlit portraits, as the color balance will be much cooler.
When I can, I will take my laptop on location to review exposure and color balance. I calibrate my laptop with the Spyder X, guaranteeing I am looking at accurate images, and proper exposure. The Spyder X takes about 2.5 minutes, and will also adjust for the ambient exposure. Once I do a check on the images,

I shoot untethered. Having an accurate exposure and reviewing on a calibrated monitor is invaluable, as the celebrity’s manager will assume that what they are seeing is what they will be receiving for final color.
Ky Principles for Shooting in Natural Light
SOFT LIGHT—Light that has been dispersed
Create a soft window light style by placing a 4x4’ or 7x7’ panel directly over the subject, while having your back facing the sun. The diffusion silk material varies between one and two stops
HARD LIGHT—Light that has not been dispersed
Use this light quality for fashion celebrity portraits, subject facing the sun without any diffusion. If the sun is overhead, I have my subject tilt their head up, close their eyes, give them a three count, then I shoot.
DIRECTIONAL LIGHT—The sun will always be off camera axis.
This style creates depth and rich shadows, ideal for photographing men, or younger female subjects. The key is to have your subject slightly rotate left or right, until you see the shadows placed slightly below the nose and the chin. Make certain the nose shadow does not come across the center of the cheek, below the eye.
BOUNCE LIGHT—Used when I have to redirect the sun.
The sun and the origin of light are not always the same. I’ll place my subject with the sun (origin) to their back, then use a white reflector to redirect the sun as the key light. This creates dimensional portraits, as now I have the sun serving as a hair and rim light. When the sun is weak or at a low angle, I’ll use a silver reflector. I’ll also look for a bright light spot in the background, usually while the background source is dark. I then use a telephoto lens to compress the background.
SUBTRACTIVE LIGHT – Not often considered, but will result in creating dramatic images.
I usually use a black collapsible reflector and place near my subject’s face, opposite the sun, which creates deeper shadows. I also use it at an angle between the sun and my subject to create diffused shadows. I use this when creating theatrical head shots or publicity portraits.
White Balance & Color Management
I use this in all my celebrity portraiture. I started as a graphic designer, working in color correction and prepress. It starts with accurate white balance and exposure, with attention given to capturing proper dynamic range. I start with securing a neutral white balance, using my SpyderCHECKR card on every location change. When I photograph celebrities, I use the gray 18% gray card panel swatches, which guarantees removing any unwanted color cast due to atmospheric color bias.
I also have the white and black swatches, which serve as my b&w-point reference when using my eyedropper in post processing. It serves as a quick reference when shooting to card and reviewing the histogram, safeguarding me from clipping the highlights and shadows.
Apply the above principles and – whether you’re shooting Neil Armstrong, Muhammad Ali or the Next Big Thing, you’re sure to elicit great results.


![]()
Get the Latest Photo Tips, News & Reviews from Shutterbug!
| Camera Reviews Other Reviews | Mobile Reviews Photography Reviews Columns | News | Features | How-To | Resources |
 © 2025 Shutterbug
AVTech Media Americas Inc., USA
All rights reserved