- REVIEWS
Camera Reviews 
More Reviews Mobile Reviews Photography Reviews - GALLERIES
- VIDEOS
- BUYER'S GUIDES
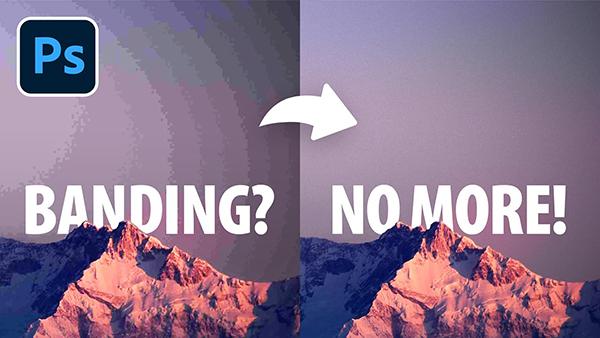
How to Banish Unsightly Banding From Photos in 3 Easy Steps (VIDEO)
Last week we presented a quick solution for eliminating ugly color fringing from photographs captured outdoors in high-contrast situations. Today we're tackling another unsightly problem; namely, color banding and gradient banding that can also ruin an otherwise great shot.
This nine-minute tutorial from the hugely popular PiXimperfect YouTube channel describes how to avoid banding in the first place by choosing the proper bit depth. The lesson also explores several helpful Photoshop filters that will dissolve banding, and how adding Texture is a big help
Instructor Unmesh Dinda is a highly acclaimed image-editing expert who teaches workshops across the globe and has almost five million subscribers to his instructional YouTube channel. By following his succinct advice you'll never have to worry about banding again.
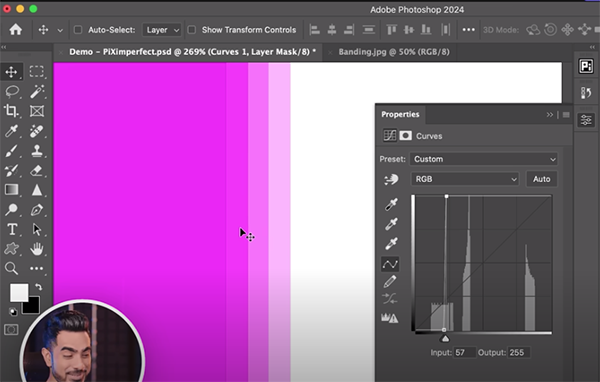
So what exactly is "bit depth," how does it factor into the equation, and why does Dinda say you "should always work in 16-bit (even if you plan to export files in 8-bit)? Binda uses a simple illustration of a solid color to answer these important questions. As you'll see, banding is clearly evident in the 8-bit file.
But by going to Mode and choosing 16-bits per channel, the ugly banding quickly disappears. The problem with working in 8-bit is particularly acute when you start to stack up a variety of adjustments—especially when the image includes plenty of smooth transitions.
Another thing to keep in mind is that "banding always occurs in areas with lesser details." Dinda uses a mountain scene to illustrate why this happens. He explains why the imposing peaks look fine, but there's obvious banding in the featureless sky. That's because this area is totally devoid of detail, and the corresponding smooth transitions exacerbate the problem.
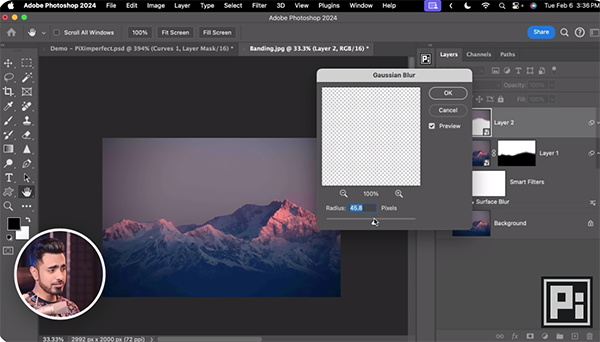
One solution is to slightly blur the sky, but it's essential to first switch the Mode to 16-bit , otherwise this quick fix makes things even worse. With the proper Mode selected you can selectively apply the blur to only the areas that need it, like the sky in this example, without softening essential details in other portions of the shot.
The aforementioned adjustment isn't the final step, because the banding is gone but the sky is now too smooth for a realistic result. Adding a bit of Texture in the right place is all it takes to remedy this concern, and Dinda demonstrates the straightforward process. Do it and forget about banding once and for all.
We suggest joining the millions of photographers who subscribe to Dinda's extremely helpful YouTube channel where you'll find effective solutions for just about any editing problems that pop up.
And don't miss last week's tutorial from another expert who provides a one-minute Photoshop fix for removing ugly color fringing from high-contrast landscape scenes.


![]()
Get the Latest Photo Tips, News & Reviews from Shutterbug!
| Camera Reviews Other Reviews | Mobile Reviews Photography Reviews Columns | News | Features | How-To | Resources |
 © 2025 Shutterbug
AVTech Media Americas Inc., USA
All rights reserved