- REVIEWS
Camera Reviews 
More Reviews Mobile Reviews Photography Reviews - GALLERIES
- VIDEOS
- BUYER'S GUIDES
8 Tips on How to Take Powerful Portraits with Prime Lenses
My approach to taking portraits is simple: I want to capture natural, relatable images, where I'm able to catch every individual's true essence and true identity. For me, prime lenses are the ideal type of lens for this type of photography. They offer a more accurate perspective for what I'm looking for as an artist, giving me more of what my eye sees—especially when I'm shooting from low angles for more compelling compositions. In my gearbox right now: the Tamron SP 35mm F/1.8 VC, SP 45mm F/1.8 VC, and SP 85mm F/1.8 VC lenses. Knowing how to wield these tools, as well as keeping some other basic tips in mind, can help ensure you'll come away from a session with compelling portraits.
1. Know when to tap into which prime lenses.
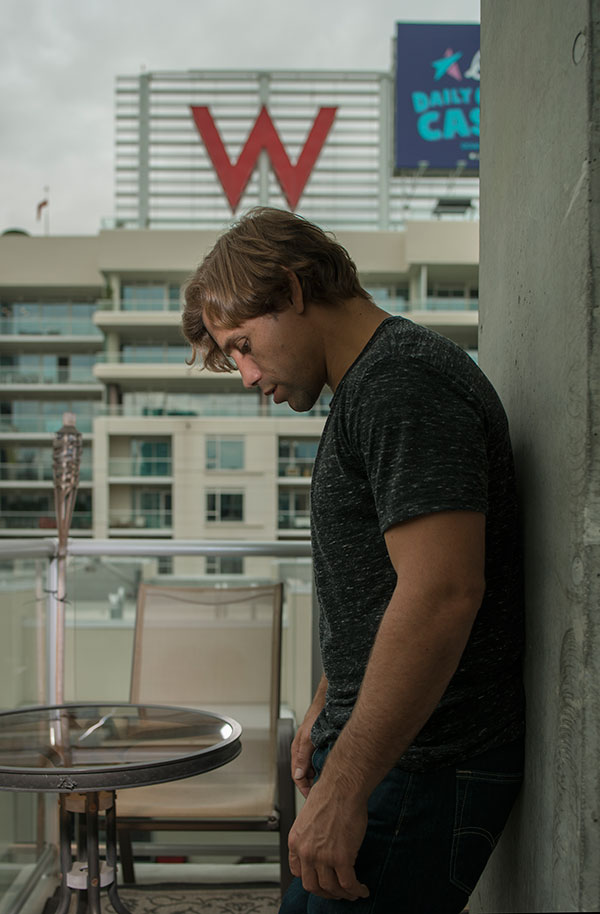
I like to mix up which primes I use, depending on the scene before me. I choose the lens for each session according to who or what my subject is and what I'm trying to convey in the portrait. The 35mm or 45mm lenses offer me more of an environmental look, for example, with a little more depth-of-field. The 85mm, meanwhile, allows me to take that same shot and create an image that's a bit more artistic and painterly.
The individual perspectives that each lens offers train your eye to see as a photographer. Know your style and try to develop it, and figure out what lenses work best with that—and even once you know that, keep broadening your work by using a variety of lenses. It will allow you to create a specific story or narrative that maybe you wouldn't have thought of doing otherwise.

2. Build trust with your subjects.
Working my camera is the last thing I do; the first thing I do is get my subjects to relax. That might involve a drink, talking about family—anything that strikes the interest of both photographer and subject. It often happens organically, when you're simply chatting with your subjects. Let them dictate the conversation. Once their expressions start to light up, grab your camera and keep listening. This is one of the most underrated tips in portrait photography, and one that may prompt some of your best photos.

3. Let your backgrounds complement your subject.
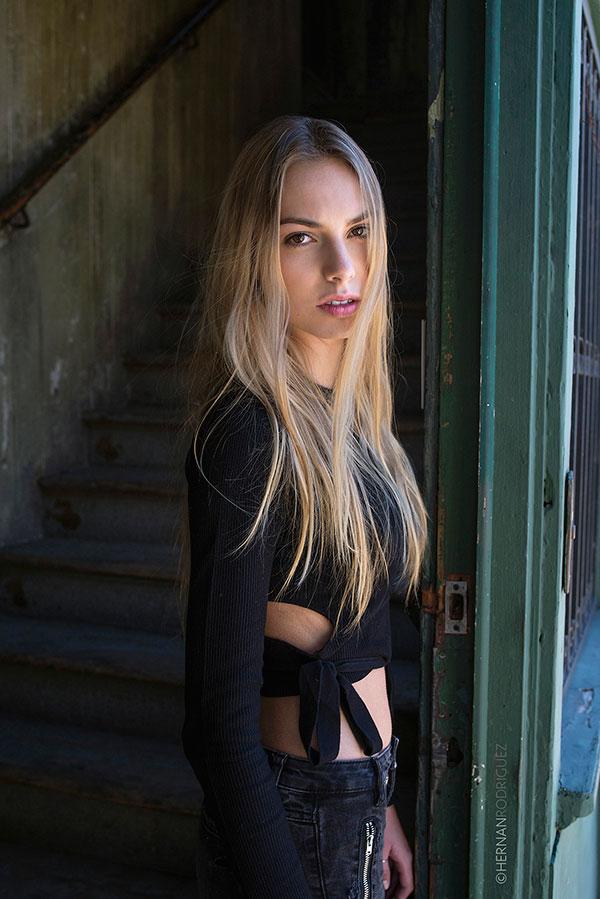
The background can take away or add to the photo, and it always has to support the subject. I like less distracting backgrounds, unless I'm creating a portrait that supports an athlete or someone else whose job or other characteristic is important to show in the narrative I'm creating. For instance, if I'm photographing a basketball player shooting some hoops in the street, I'll use a prime like the 35mm because I don't want to erase that background ambience. If it's a situation where I want to solely concentrate on my subject, I'll create blocks of color in the background—a trash can or a car or a colored wall—and use the 85mm to create that focus.

4. Pick lighting that complements your subject.
Who's in front of your camera for a portrait dictates what kind of lighting you should use, and how you should direct it. I often choose to use natural light, especially with older subjects—it's softer and more forgiving, with longer shadows. You can use a softbox or umbrella to mimic the light that's already there. If your subject is younger and has good skin, on the other hand, you may opt to shoot midday for harder shadows, using a grid and snoot to focus your light.
Try to keep your lighting simple and controlled. Umbrellas can offer multiple types of light: If you put black reflective fabric behind an umbrella, for example, it will bounce back more intense light at your subject; take the reflective fabric off and it bounces back softer. Meanwhile, if you collapse it completely, you'll get a more direct light.

5. Get a handle on your white balance.
Skin tones are critical in portraiture, and I recommend using a custom white balance to make sure you get everything just right. I have an 18% gray card in my backpack for every shoot, and it's always accurate. Especially if you're outside for your session, the lighting conditions may change, so you'll want to be able to gray-card before every shot.

6. Make sure your direction, or "poses," work for each individual subject.
Start analyzing your subject as soon as they show up for the session, as each individual has different body language. Watch how their body naturally turns or leans. You can place your subject in a chair to start to see how they sit, then refine with maybe a head tilt here or a slight body shift there. When you keep their positioning aligned with how they normally sit or stand, it makes them less nervous and the image feels less contrived, which results in more natural portraiture.
Your subject may even have a quirky characteristic, like constantly playing with the change in their pants pocket. Work that particular pose in if you can do it easily. I also have a walkthrough motion I do in which I instruct my subjects to swing their arms from their pockets to the back of their necks in slow motion. I'll often find a natural-looking pose during this movement that looks natural.
7. Switch up your vantage point for varying effects.
Perspective adds a lot to the final outcome of your image. I try to stick to what I do best, which is traditional, classic portraiture, like a painting. Position yourself at eye level with your subject, so you have the gaze coming directly at the viewer. You can also direct your subject to look off to the side. In every portrait session, I do at least one shot that seems slightly more voyeuristic. Simply direct your subject to look toward the camera but slightly away from the lens.
However, if you want to make your subject look more powerful or larger than life (useful if you're photographing an athlete or taking a male portrait), crouch or kneel down and shoot from a lower angle. Prime lenses are awesome for that. I can use the 45mm, for example, to depict the strength I'm looking to show, but without distortion.

8. Clean up your portraits in post-production.
First look through your galleries for the "money" shots. That includes weeding out both the technically weaker images—blurry photos, for instance, or ones where the lighting didn't come out exactly how I wanted it—and also ones where your model may not be the most relaxed. You want images where your subject is completely present in the image and connecting with the viewer.
Once you've winnowed it down to your finals, it's time to do some retouching. How much you do is going to depend on your personal style. In my case, I just do a slight retouching. I'll get rid of blemishes, make sure the white balance is where I want it, and open up shadows if needed. I don't get involved in a lot of the more high-definition retouching techniques that are the fad now. I want my work to be timeless, not obvious that it's something I did in 2018. Strive to keep things simple!


![]()
Get the Latest Photo Tips, News & Reviews from Shutterbug!
| Camera Reviews Other Reviews | Mobile Reviews Photography Reviews Columns | News | Features | How-To | Resources |
 © 2025 Shutterbug
AVTech Media Americas Inc., USA
All rights reserved