- REVIEWS
Camera Reviews 
More Reviews Mobile Reviews Photography Reviews - GALLERIES
- VIDEOS
- BUYER'S GUIDES
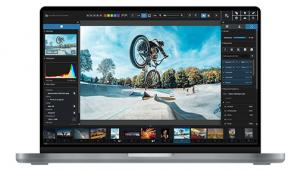
10 Photoshop Preferences to Speed Up Your Workflow (VIDEO)
Would you like to streamline your Photoshop workflow for faster more-efficient editing, so you can get back out shooting where you belong? If so, the quick tutorial below is just what you need.
Photographer, author, and instructor Julieanne Kost calls herself a “Digital Imaging Evangelist” for good reason: She’s an acclaimed expert in Photoshop and Lightroom, known for simplifying the editing process with effective techniques that get the job done fast and effectively.
Today’s helpful episode reveals 10 “super useful” preferences for streamlining your workflow, along with a few tips and tricks. In just two minutes, Kost covers file handling, a variety of important tools, the Photoshop interface, and much more. By following her advice you’ll save tons of time in the future.
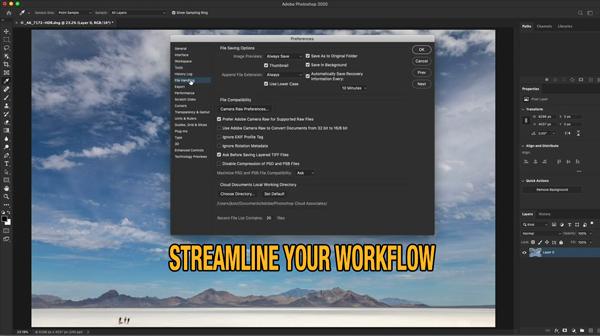
Kost includes keyboard shortcuts to further speed up the process, and we suggest bookmarking this lesson for future reference because she covers a lot of ground in a hurry. Before moving on to specifics, she begins in the General Preferences panel with a few basic settings. Here you’ll see how to speed up batch processing and avoid the commitment to Transform every time you place an image.
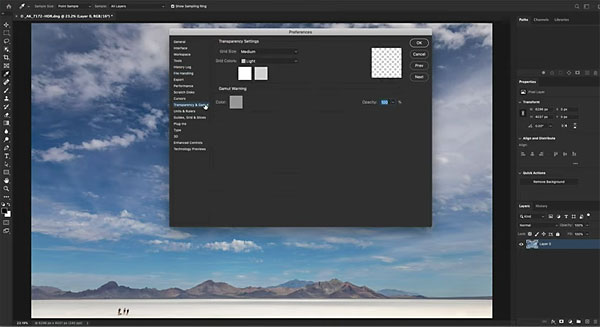
Next are a few suggestions for customizing the Interface panel, She demonstrates how to change the theme with lighter or darker colors, and modify the highlight color to make it easier to see what’s selected.
As you become more familiar with Photoshop and its features you may want to disable the tool tips, and Kost illustrates how to do that. Moving on to File Handling, you'll learn how to specify the manner in which Photoshop saves your files.

There are a bunch of other preferences options that enable you to customize Photoshop for your style of editing. Kost’s tips and tricks combine to accelerate the editing process in a way that works best for you.
After watching this video head over to Kost’s YouTube channel, where you’ll find a wealth of information on all things Adobe.
And be sure to check out another editing tutorial we posted recently, explaining why image brightness drops when you reduce saturation, and what to do about it.
- Log in or register to post comments


![]()
Get the Latest Photo Tips, News & Reviews from Shutterbug!
| Camera Reviews Other Reviews | Mobile Reviews Photography Reviews Columns | News | Features | How-To | Resources |
 © 2025 Shutterbug
AVTech Media Americas Inc., USA
All rights reserved