Wedding And Portraiture
Black And White--Its The In Thing
Black and white pictures
are no big deal--at least for me. I started in black and white many
years ago, but was thrilled to get out of the darkroom when color became
the "in" thing. |
|||
We first have to learn though
how to really take advantage of what the black and white medium has to
offer. It's not just always a question of switching camera backs
and putting in a roll of the other film. To the contrary, there's
much more to creating black and white images. But first we need to learn
what's really inherent in great black and white images that make
them so attractive. |
|||
Color film, on the other hand--especially
color paper--has, maybe, a range from 1-10. So, we have to compress the
complete range of tones in color to only that small difference which the
color paper can handle. Otherwise, when we print to get detail in the
brightest areas of the color photograph, the darkest areas will go completely
black. |
|||
Before we discuss that, let's
talk about the new Kodak T-Max black and white film--T400CN. First of
all, it's processed in the regular C-41 method, which means a regular
color lab can process the negatives for us in the same manner that they
process our color films. We don't have to go into the darkroom,
ourselves. |
|||
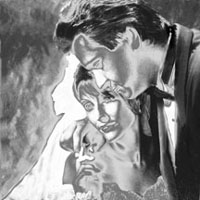
The picture was exposed on
color film. To get this black and white effect, I scanned the image into
my computer and through Photoshop I "desaturated" the image,
taking out all of the color. Then, I adjusted the image in "curves"
and created the complete range of tones that is so great for black and
white printing. With the file saved at a high resolution, I can now send
out for a negative or print it directly onto one of my printers in my
home office. I can also e-mail it anywhere in the world in seconds. |
|||
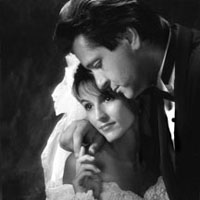
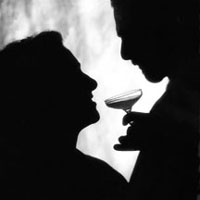
The close-up of the groom's
profile over the bride's face (Photo 3) and most of the pictures
all started out as color images. I already pushed the limits of the film
in this picture, before translating it to black and white, by spotlighting
the "mask" of their faces--from cheek to cheek. I did this
because I wanted to light her with my regular pattern, while keeping the
left side of his face in shadow. The spotlight effect was created by wrapping
a Shutterbug magazine around the open main light and directing it exactly
where I wanted the light to fall. |
|||
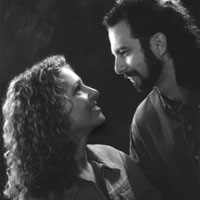
For Photo 5 I tried a different
lighting pattern to create the same effect as in the previous two images.
This time I placed the light in the position where I normally have it
for a profile. This created split-lighting on her and lit his profile
beautifully. Then, I used my reflector to wrap the light around onto the
shadowed side of her face and to keep the light from flaring into my lens.
All these portraits were created, by the way, with my Hasselblad and a
150mm lens on Kodak film. |
|||
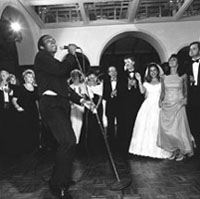
Photo 7 is another image that
was created directly on Kodak T Max film and printed in sepia. Wow. Just
take a look at what Tim Roberts caught at this wedding. Look at the detail
throughout--from the deepest black of the singer's tux to the white
of the bride's dress. The sepia effect really works here. Could
have been a picture made in the '40s or '50s--just what people
love to see again today. |
- Log in or register to post comments
