- REVIEWS
Camera Reviews 
More Reviews Mobile Reviews Photography Reviews - GALLERIES
- VIDEOS
- BUYER'S GUIDES
Tools And Functions For Low Light Photography: Tripods, Ball Head, Flash And More

Low light photography requires technical discipline to get the kind of pictures you want. Obviously artistry is also part of the equation, but shooting when the light is reduced presents technical problems that can only be dealt with using technical solutions.
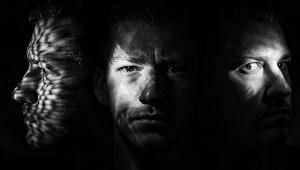
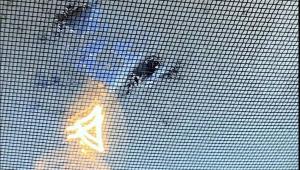
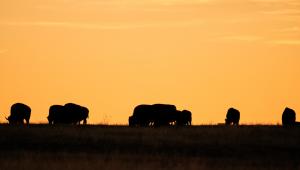
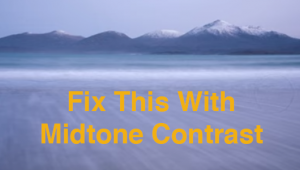
Specifically, there are two major issues. First, digital sensors require a certain amount of light to record an image with a good exposure, and in low light situations you are forced to use long exposure times and/or high ISO settings. Second, a digital sensor doesn’t have the incredible sensitivity that our eye/brain combination has. We can see detail in very dark environments with our eyes (see side bar) while a digital sensor will record only black. For example, a landscape or seascape, such as (#1), illuminated by a full moon has approximately 5.5 percent of the light seen under a midday sun. This is an 18 f/stop difference. We can see plainly under a full moon once our eyes adjust to it (i.e. our pupils open larger), but a camera gives us a black image unless we use a very long exposure.
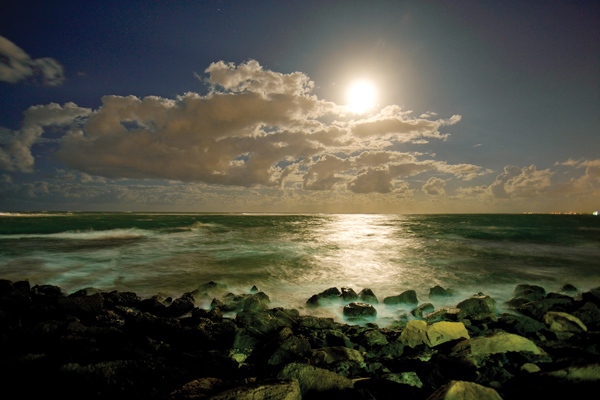
All Photos © Jim Zuckerman
The technical solutions I am referring to have to do with a combination of equipment and camera settings, or functions. In this chapter I’ll go over the requirements for successful low light photography.
Tripods
I know this may come as disappointing news to many people reading this issue, but a tripod is essential for low light photography. Yes, I know there are some circumstances where using a tripod is impossible or not permitted, but when it is feasible to use a tripod you must do so. Doing low light photography without a tripod is like shooting yourself in the foot. It just doesn’t make sense.
I am often asked to recommend a tripod, so let me take a moment here to make some suggestions for you if you happen to be in the market for a good one. The tripod should be lightweight yet sturdy. If it is too heavy, you will leave it home most of the time and that defeats the purpose. Therefore, I recommend a carbon fiber model. These are more expensive than a normal metal tripod, but in my opinion they are worth their weight in gold because carrying them is less of a burden.
I use the Induro CX214 (#2), and my wife, who is very petite and can’t carry heavy equipment, uses the Induro C014 (www.indurogear.com). Both models are carbon fiber. Of course, there are many manufacturers that make excellent tripods, so do some shopping to see which best fit your needs. I’ve never heard my wife complain about the weight of her tripod, and at 98 pounds she won’t wear a necklace or earrings that are too heavy.
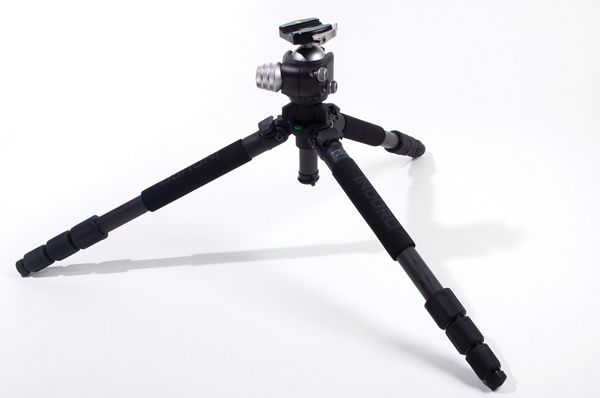
Next, you want a tripod that unfolds and collapses easily and quickly without fighting with the legs. Some people prefer legs that unlatch with a lever, but I like the large, rubber knurled knobs that loosen and tighten with a half turn. The 2 Induro models my wife and I use operate flawlessly, and we can open and collapse 3 sections on 1 leg with a single motion once the knobs have been loosened. The faster you can open and close a tripod means that missing an important picture is less likely. It also means less hassle with the tripod.
You have to decide how many leg sections you want as well as the length of these sections. Your height determines this in large measure. I travel a great deal and I wanted a tripod to fit into my checked luggage. My Induro CX214 fits into a normal piece of luggage at a diagonal, or if I remove the ball head it will fit lengthwise.
Ball Head
A tripod is basically a platform; you mount the camera to the platform using a tripod head, and my choice is a ball head. It is very important that you buy a good model. Don’t use a tripod head with 2 or 3 levers or you will end up being frustrated in the field. They are slow, confusing, voluminous and you will hate your tripod and never use it. Get a ball head, and make sure the ball action is smooth and won’t lock up on you.
I use the BH 40 LR from Really Right Stuff (http://reallyrightstuff.com) (#3), and it has worked without any problems for several years. My wife uses their BH 30 LR. This is smaller, lighter and less expensive. The “LR” stands for “lever”, and this refers to the fact that you can tighten and loosen the grip that holds the camera onto the head with a lever rather than a knob. Flipping a lever is faster than working a knob to take the camera on and off the head, so that’s why I opted for this style. Being able to adapt quickly to situations is often an issue when taking pictures, especially of fast moving subjects.

The Really Right Stuff ball heads use what’s known as the “Arca Swiss” style plate that screws onto the bottom of the camera, and this is what I recommend, regardless of the model of ball head you choose. Pictured in (#4) is the plate I keep permanently affixed to my 70-200mm f/2.8 IS telephoto zoom. I have a similar plate on the bottom of my camera. The length of the plate adds stability to the camera or lens when it is mounted on the ball head. Any other type of plate isn’t designed as well in my opinion, and I’ve seen people think their camera is securely mounted on a tripod only to have it fall off and hit the ground with a horrible thud that invariably means extensive damage. Some plates are very small—too small—and don’t hold the camera securely. Other plates are pentagonal and don’t seat easily, making you think they are locked in place but in actuality they are not.

Before you buy a ball head, take note of the size of the ball. If it is too small it won’t provide the ease of operation you want. The camera and lens combination you use may be too heavy for the ball to support the weight. In addition, the larger the ball, the easier it is to tighten the head when you want to lock the camera in one position for shooting. Less expensive and poorly designed heads will slip a bit once you tighten them.
Electronic Flash
Even though the subject of flash photography is an intimidating one for many people, I recommend always carrying a portable flash. You may not like direct on-camera flash—few photographers do—so learn other techniques such as bounce flash, off-camera flash, diffusion, etc. to manipulate the lighting to suit your taste. Flash is especially important when the dimly lit subject is moving.
The pop-up flash built into your camera can certainly provide enough light for some situations, but it is not an ideal solution. It doesn’t have the power you will need for subjects that are beyond 10 feet, and you can’t use it off-camera for effects such as three quarter side lighting, backlighting or bounced light.
Flashlight
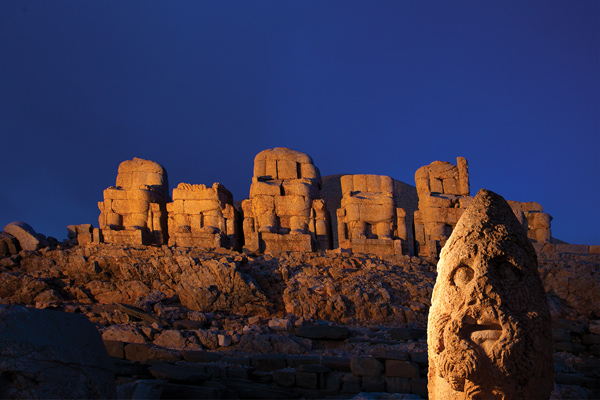
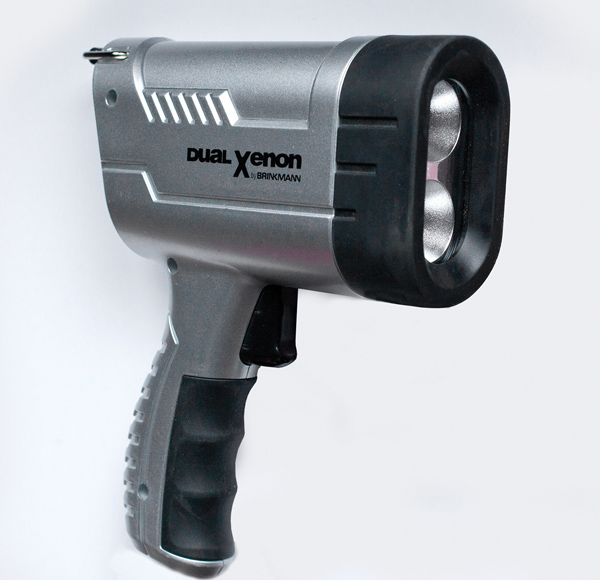
A flashlight can be used to ‘”paint with light.” This is a fun, creative and unique way to light a subject. If you are doing macro (close-up) work, a small penlight works well. However, if you intend to light up larger subjects and/or outdoor scenes, such as the megalithic head from the 1st century B.C. on Mt. Nemrut in Turkey (#5), I recommend getting a xenon model. I use the Dual Xenon spotlight by Brinkmann (#6), (www.brinkmann.net). It is lightweight and powerful enough that your exposure times are quite short. You can see in the photo from Turkey that I was able to illuminate the huge stone figures in the background with this light and they were about 100 feet away. My exposure time on the entire background was about 5 seconds, while I used approximately a half-second exposure on the large foreground head.
Better Beamer
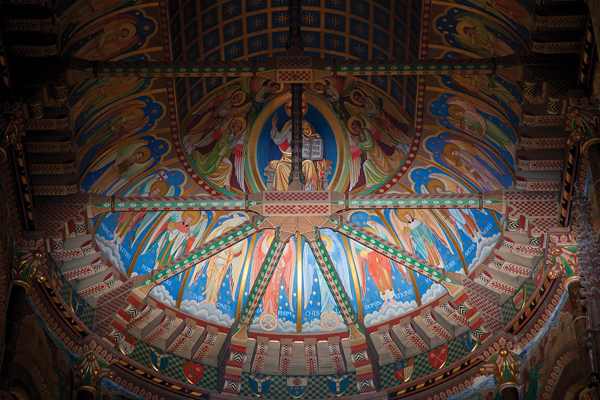
The Better Beamer is a device that attaches to a flash head with Velcro and focuses the beam of light. In image (#7) you can see the plastic Fresnel lens positioned in front of the flash, and this lightweight device does an incredible job in extending the reach of a flash when the subject is far away. Because the light from a flash is reduced very quickly as it travels (according to the Inverse Square Law, when it travels twice the distance it is diminished by a factor of 4), a distant object such as an owl in a tree at night or a poorly lit cathedral ceiling may be hard to illuminate for a correct exposure unless you raise the ISO quite high. By using the Better Beamer to focus the light, you can expose a subject at a distance of 100 feet or more.

The cathedral ceiling I photographed in Cork, Ireland, (#8), shows the use of straight flash. The light is evenly distributed across the ceiling. In photo (#9), I used the Better Beamer and you can see how the light is focused on the center portion. In photo (#10), I zoomed in to fill the frame with most of that illuminated center. You can see how effective this is in concentrating the light on the subject. This then allows you to use a smaller lens aperture and/or a lower ISO.


High ISO Settings
As photographic technology has improved, image quality results at high ISO settings have become better and better. Yet, there is no question that even with enhanced noise reduction, very high ISO settings increase digital noise and result in a degradation of picture quality. This happened with film and it now occurs in the digital realm. With film grain, photographers often considered the coarse look to be an artistic technique. Nevertheless, most of the time we stuck with lower ISO settings because they produced fine-grained images that revealed detail with tack sharp clarity.
No one likes digital noise, on the other hand, and photographers using D-SLR cameras don’t purposely use a high ISO setting to add artistry to a picture. That’s why we welcome advances in technology that address this problem. When I bought my first serious digital camera in 2004, a Canon 1Ds Mark II ($8000 at the time), ISO 1600 was almost unusable because the noise was so pronounced. Of course, compared to film, 1600 was an extremely high ISO and we didn’t expect that it would produce images with superior quality.
However, the bar has been raised now and our expectations along with it, and for good reasons. For example, the Canon 5D Mark II (for a third of the price) offers excellent pictures taken at ISO 1600, and although this setting isn’t as good as ISO 100 or 200, it’s quite usable. It enables us to handhold the camera in many low light situations when using a tripod is not possible. With this camera, ISO 800 offers the same quality as 200 did 10 years ago.
And you don’t have to spend a lot of money to get reasonable quality at relatively high ISO settings these days, although it’s agreed that cameras with larger sensors deliver better results at higher light sensitivity settings. It’s hard to imagine, but the way technology in this area is advancing it might be possible in the not-too-distant future that a tripod may become irrelevant to shooting in low light situations. For the moment, I still prefer to shoot with an ISO setting of 100 or 200 and a tripod.
Image Stabilization
If you must shoot without a tripod, then image stabilization (IS is Canon’s term and vibration reduction, or VR, is Nikon’s) is definitely worth the extra expense. This feature is worth every penny because it means getting a sharp picture versus ending up with a picture that is “almost” sharp—i.e. blurred. Note that most camera brands have some form of image stabilization built into the body, making specified lenses unnecessary.
For example, (#11) is the famous Pieta by Michelangelo in St. Peters Basilica in the Vatican, and because no tripods were allowed I had to rely on the IS feature in my 70-200mm f/2.8 lens as I handheld the camera. I raised the ISO to 640 and took the picture at 1/30 sec, and it’s truly remarkable that it is tack sharp given the weight of the lens. In this particular lens, the 3-stop image stabilization feature means that my shooting at 1/30 sec was like shooting with a shutter speed equivalent to 1/250, which is 3 f/stops faster than 1/30th of a second. This technology has certainly opened up new realms of low-light shooting for photographers.
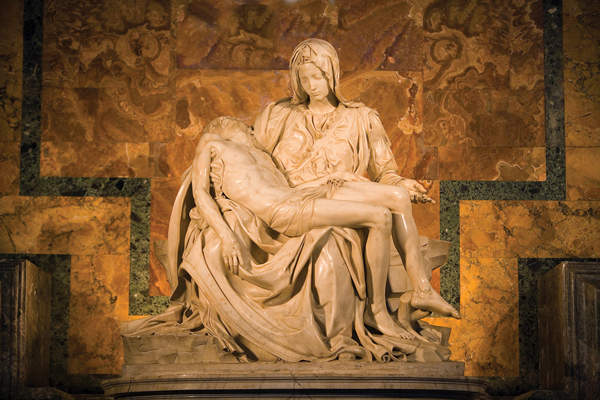
In a darker section of the cathedral, I composed photo (#12), and I was even more amazed that I got a sharp picture because the shutter speed was a shocking 0.8 seconds. I raised the ISO to 800, and even though I could have gone higher, I much prefer to go for as much picture quality as I can get. The lower the ISO, the better the quality will be, and therefore I used the IS feature to stabilize the camera enough to get a sharp picture. Again, given the weight of the 70-200mm f/2.8 lens, this is remarkable.

Ultra-Fast Lenses
Few of us own lenses that have extremely large apertures because they are very expensive and they aren’t as versatile as zoom lenses. For example, the Canon 200mm f/2 is $5700. This is only a 1 f/stop difference from the 70-200mm f/2.8 lens, and for that extra f/stop you pay an additional $3400!
Another example is their 50mm f/1.2, which is $1519 at this writing compared to the 50mm f/1.4—which lets in just one half f/stop less light—that costs only $370.
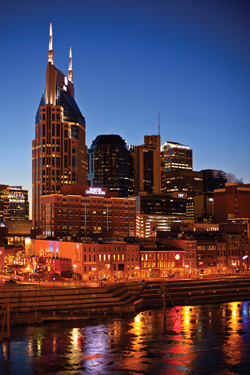
These ultra fast lenses, however, allow us to shoot in low light circumstances while keeping a lid on the ISO, and at the same time enabling us to use a shutter speed fast enough for a sharp picture without using a tripod. The picture of downtown Nashville, Tennessee (#13), is an example. This was taken from a bridge over the Cumberland River, and even though this is a walking bridge, the wind as well as dozens of people in motion set up subtle vibrations that make tripod use impossible. Therefore, I used a 50mm f/1.4 lens to take the shot with ISO 800 and the lens aperture set to f/2.
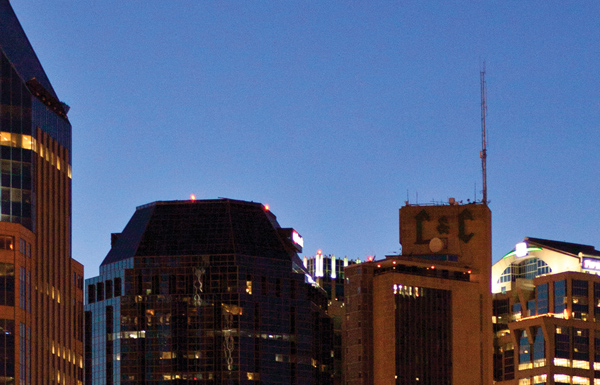
If I have no choice because a subject is extremely dark, I will shoot wide open. However, I find that at the fully open f/1.4 the edges of the image are not as sharp as I want. In (#14) I’ve enlarged a small section of the downtown Nashville photo at 100 percent so you can see the minimal digital noise, and you can also see that the image is sharp with the 1/45 sec shutter speed. I braced myself against a structure on the bridge and held my breath as I took the shot. Also, I pressed the shutter button gently and smoothly in an attempt to minimize camera movement.
What’s An Attowatt?
On a trans-Atlantic flight a couple of years ago I sat next to a German physicist and we got talking about dynamic range as it pertains to photography and the human eye. His field was research having to do with sight, and he explained to me just how sensitive our eyes are. He told me that the human eye is capable of detecting light as dim as 3 attowatts in the green portion of the spectrum.
What is an attowatt? “Atto” is the mathematical prefix for a quintillionth or, in scientific notation; it is 10-18, or .000000000000000001 (that’s 17 zeros to the right of the decimal). We can detect 3 attowatts, or 3 quintillionths, of light in the green. I’ll be impressed when image engineers can make a digital sensor that is as good as the human eye. We would then have a sensor with a dynamic range of 30 f/stops!
- Log in or register to post comments


![]()
Get the Latest Photo Tips, News & Reviews from Shutterbug!
| Camera Reviews Other Reviews | Mobile Reviews Photography Reviews Columns | News | Features | How-To | Resources |
 © 2025 Shutterbug
AVTech Media Americas Inc., USA
All rights reserved