Tabletops And Speedlights: Shoot Small Subjects With Affordable Set-Ups


All Photos © Jack Neubart
The word “tabletop” itself is somewhat vague. How big or small is it exactly? Well, for my tabletop in this instance I decided to use an inexpensive, round coffee table. The working height is a bit low, but I manage. It features milk-white translucent glass, which I light from underneath. The support struts sometimes get in the way, as does the lower shelf. But, like I said, I manage. And it doesn’t take up extra space. I improvise from there, using other tools at my disposal and adding other background materials.
While tabletop setups can benefit from the ability to light from below, other surfaces you could use include a kitchen/dining table, countertop, ping-pong table, or breakfast nook—or a pro-style “sweep” table, one that is constructed of translucent plastic that is sloped from base to back to allow for supplemental lighting underneath.
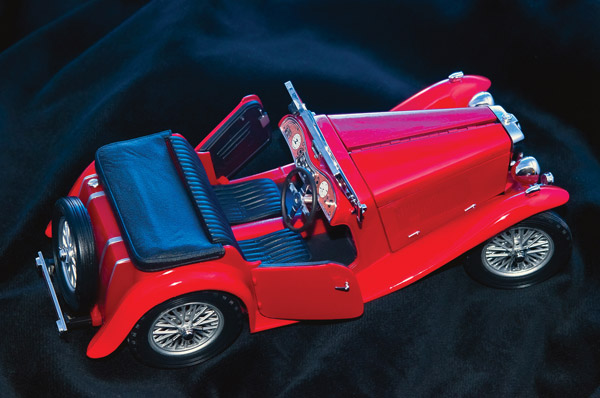

The Key Ingredient: Lighting
The right lighting goes far in making a tabletop shot work. But you don’t need fancy studio strobes or bulky lights. You can work very effectively and expeditiously with shoe-mount flash.
If you own at least one speedlight, you may even be able to use that in combination with the camera’s built-in flash, depending on your camera system. One key advantage to big strobes with modeling lights and continuous lights is that they let you visualize the lighting, something a shoe mount rarely affords. The route I take is simple. With an understanding of light and shadow at my fingertips, I set up my speedlights and shoot the picture, studying the screen for any needed tweaks in lighting or subject placement and go back at it.

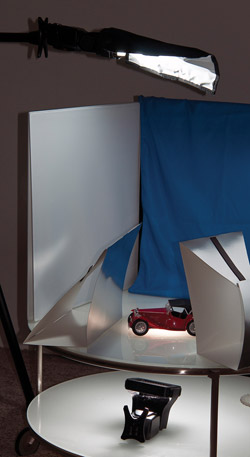
What You’ll Need
Lighting. For the most flexibility the shoe-mount flash should have a tilt/swivel zoom head. And it should have enough power to deliver the f/stops and depth of field needed. Even better is two speedlights, but one will do and you can always use the camera’s built-in flash to augment the lighting, keeping vigilant of hot spots and other glaring reflections.
Consider a speedlight that supports built-in wireless TTL operation—most have this feature these days. It just makes things easier. You could also use a more sophisticated infrared or radio wireless system that supports TTL flash. Failing that, you’ll need sync cords (and a camera with PC connectors, not as common as you’d think) that allow you to place the flash “off” the camera mount. In short, the best results are when the light from the flash comes from a different direction than the camera itself.
A compact flash meter might be handy with multiple lights, if you’re not using TTL flash. Set the camera to Manual Shooting mode, regardless of whether TTL or manual flash is used. And keep a penlight handy for light painting in conjunction with the strobe illumination (using relatively long shutter speeds). It saved the day on one shot, making a second speedlight unnecessary.


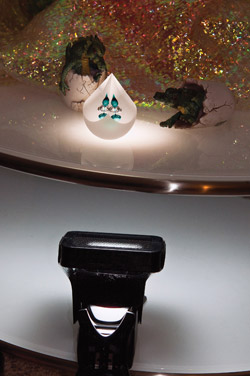
Light Shapers/Modifiers And Reflectors. There are a ton of devices designed to shape light from a speedlight. Just broadly, they include bounce panels, soft boxes and umbrellas for a softer light; grids, snoots and barndoors to contain the light; and filter gels (actually, acetate) to color the light. Keep a supply of cards handy: white (to reflect light) and black (to subtract it), to help further control the lighting. You can also buy silvery reflectors and tiny mirrors that come in different shapes and sizes.
Backgrounds. We’ve already mentioned my coffee table and briefly the sweep table (also known as a shooting or product table). As mentioned, a formal sweep table uses acrylic glass that sweeps upward toward the back, on a support structure, letting you use the glass to diffuse light coming from behind and below. One option when using a sweep is to let the white backdrop graduate from white (light) to gray (dark) toward the back. A simpler alternative would be to use a pliable sheet of acrylic glass material that can be bent upward at the back, leaning against the wall and weighted down or taped down with Gaffer’s tape. Clip it to an aquarium stand to gain all the benefits afforded by the diffusion material/backdrop. In place of that, use a sheet of glass covered with vellum paper—2-3 layers, again sweeping up at the back. Vellum has a both a shiny and matte side, and you can use either as a backdrop.
In the past, I got good use from white posterboard as a backdrop. White seamless paper in narrow widths and short lengths is another option. Add color sheets later on. As with acrylic glass, when using any of these materials as backdrops, consider forming them into a sweep. Another interesting choice, and one of my favorites, is Mylar. Light bouncing off this material creates a fanciful backdrop resplendent in color. And of course a perennial favorite is black velvet. Or use other fabrics. Try to drape soft materials into gently sloping curves that follow the contours of the subject or that mimic each other into a pleasing repetitive pattern.
Light Tent. Diffusion tents are often rectangular in shape, with some interesting oddities such as the 4-sided pyramid tent I have. These tents are largely constructed of sheer white fabric that diffuses the light, and the white surfaces also act to bounce light back onto the subject to some degree. Large plastic domes, popularly known as cocoons, serve the same function, but they naturally come with a reflective sweep. Fabric tents often come with additional backdrops that attach in some fashion. The nice thing about acrylic glass and related plastic tabletop flooring is that they add a nice reflection that can be used to enhance the shot. The lights are normally placed outside and aimed through the tent’s walls or ceiling. The front is either open or slotted for the camera. You can find a light tent to suit your needs practically anywhere, from almost any manufacturer.
Light Supports. Most shoe-mounts come with a mini-stand, which I often use. You can also use a tabletop tripod provided it’s weighed down so it won’t topple over with a flash positioned precariously on top. A regular tripod will do: just attach the mini-stand or a shoe adapter to the centerpost. Better still, use a tripod with an articulated centerpost so that you can use it like a boom arm, like they use in Hollywood but on a much smaller scale. And there is always the light stand—but nothing fancy for our purposes. Finally, use stools or small tables that can be easily moved around. You can use commercially available clamps, provided you have some place to attach them without worrying about damaging anything. All this assume that you have gone the wireless route.
As I recently told a friend, every pro photographer does things his or her own way. There’s no one formula. I’m always looking for new tabletop subjects to photograph, trying new things, looking to reinvent myself, seeking a challenge. When it works, great; when it doesn’t, you try again. Yes, using shoe-mount flash adds to the challenge of tabletop photography—and it also adds to the flexibility, affordability and fun.
- Log in or register to post comments


