- REVIEWS
Camera Reviews 
More Reviews Mobile Reviews Photography Reviews - GALLERIES
- VIDEOS
- BUYER'S GUIDES
Plustek OpticFilm 120 & SilverFast Ai Studio 8: A 35mm And Medium Format Scanner
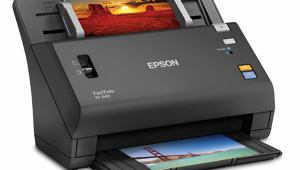
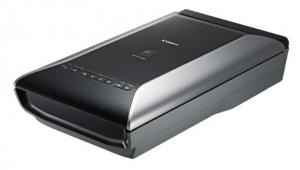
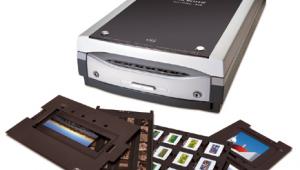
Designed for professionals, enthusiasts, schools, and clubs, the OpticFilm 120 scanner from Plustek ($1999) can handle negative and positive film, including 35mm filmstrips, individual 35mm slides, and medium format film up to 6x12cm format. The scanner contains an eight-element glass lens and can deliver up to 10,600dpi optical resolution, with a claimed 4.01 dynamic range using the supplied SilverFast software’s Multi-Exposure function. The tabletop scanner is about the size of a six-slice restaurant toaster (about 8x14.5x7.5”) and is supplied with a complete set of very well-constructed film holders, an IT8 calibration target, and a full version (not a trial) of SilverFast Ai Studio 8 software. In fact, this product, I was told, was very much a joint effort between LaserSoft and Plustek, and all in all the benefits of cooperation are apparent as you work your way through the process of scanning images.

Setting Up
Like any precision instrument, the OpticFilm 120 is not something you can plug in and go. That’s not to say that the scanner itself is complex, and basic operations are well described in the accompanying guide. After loading the hardware and software programs and drivers, easily done following steps on the supplied CDs, you put the film in the appropriate holder emulsion down, slip but do not force the film holder into the front opening and then get to work.
What is complex, and what took me a solid two days to explore to where I felt at all comfortable, is the software. Yes, there are some procedural elements that are a bit awkward, but when I say comfortable I mean getting a good grasp of the tools and options it affords. I recommend that you give yourself time to do the same and the reward will be a refinement of results that will surprise you, as it did me.
All Photos © George Schaub
When you first load the software a screen may pop up asking if you’d like to check for updates. Do it. The software has two options—using what is called WorkflowPilot, an automated scan with a few options such as image resolution and intended purpose and format, or scanning with “manual” settings. You can start with the first, which gives a scan that you can then hand off and play with in the software or move to another image processing program later, but for me the true benefits here are derived from taking advantage of the many image refinement and correction tools SilverFast Ai Studio 8 affords, so, for me, I turned the Pilot off.
Using The Software
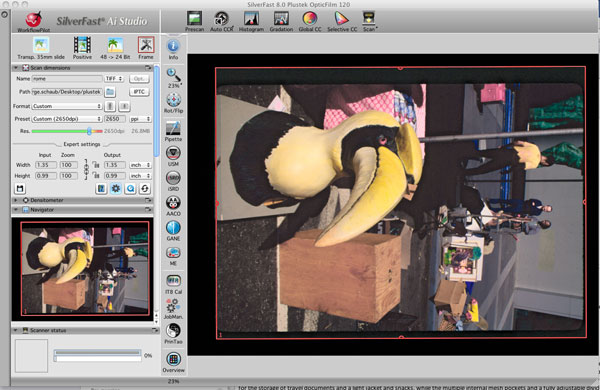
Take the time to check out the video tutorials on both the SilverFast and Plustek websites. But be aware that there are some “diversions” in the workspace that you should be aware of and at least one or two “misdirections,” which we’ll cover as we work through the scan procedure. Although you can do batch scanning, I prefer to do my scans one image at a time, and that’s the procedure I’ll describe.
The first step is to set up the image parameters and ID, which you do in the upper left panel of the workspace. The first box sets the format, the second the type (negative, positive, and even Kodachrome), and the next is the bit depth. For this test I stuck with 48-24 bit, but there are numerous other options there depending on your needs, including grayscale scanning.
You then name the file, choose a file format, indicate where the image should be saved, and even add caption and copyright into the file via the IPTC button. You then choose a resolution and, if desired, use a preset for a specific image size and aspect ratio. (Note: When you choose an aspect ratio a crop is enforced, although you can move the crop frame around in the pre-scan phase.) There is a green to red “Res” bar that indicates what the software considers a “safe” resolution for the medium and format you have chosen.

Once that’s done it’s time to do a pre-scan on which you can apply your refinements. This is one of those “fakeouts” I referred to; don’t do a pre-scan using the Prescan button at the top of the workspace, but use the Overview button in the lower left tools panel. The scanner will then grab the holder and bring it into the cabinet and do a pre-scan on all the images in the holder. Once this is done you will get an emulated filmstrip with all the images highlighted. Turn off the highlights on all but the one image you want to process at that time. The scanner will then draw the holder in and do another pre-scan on the selected image and pop it up full screen into the workspace. Adjust the frame as needed (the red borders) and then get to work.
As you go through the options the changes are shown in the workspace in real time, with some changes taking a bit more time than others, so be patient. Going back to the Overview button after the work on one image is done and saved allows you to then choose another frame from the strip following the same selection procedure.
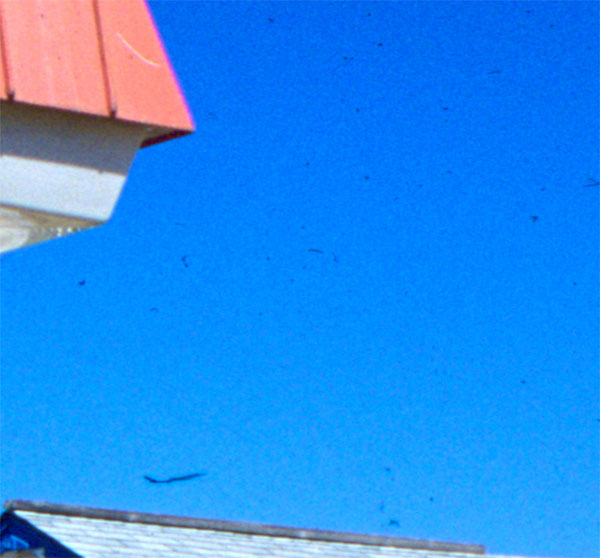
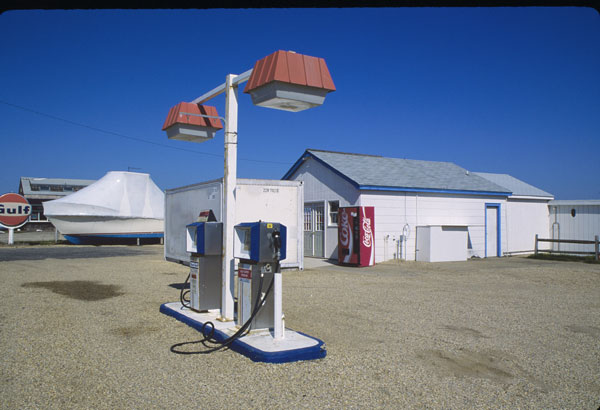
Image Processing
Depending on the media, there are numerous and rather impressive processing options. I encourage you to try them all and explore.
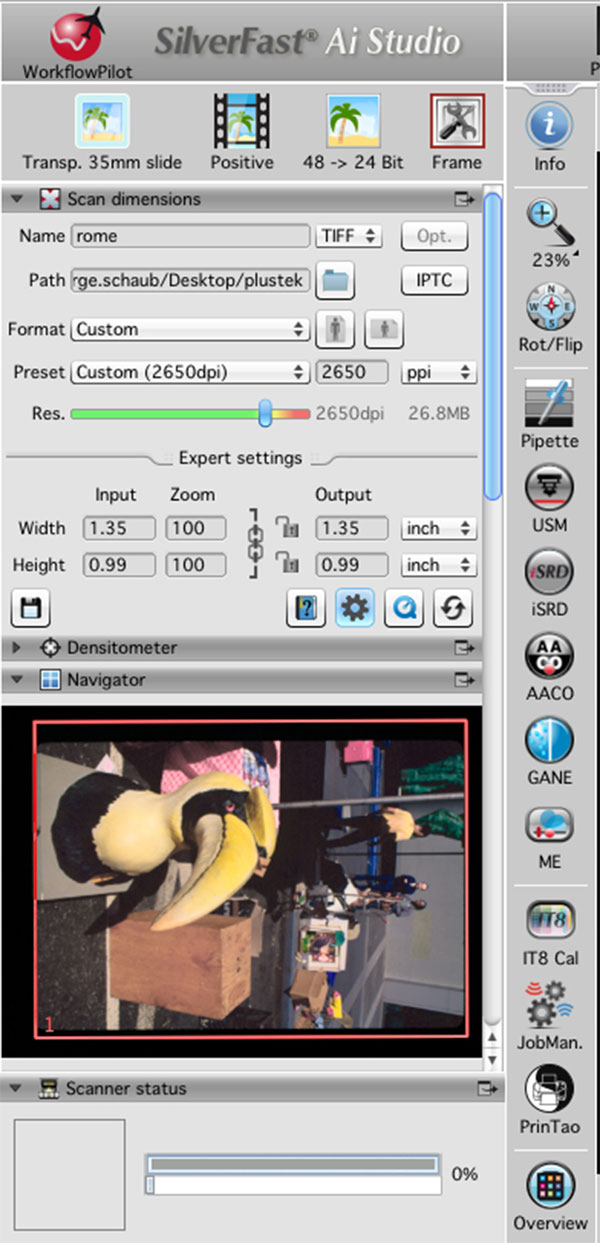
Here are some of the highlights that I found most helpful, starting with the toolbar buttons (see the accompanying full-screen capture). To activate them click on them; to turn them off, click again. More notes on tools used can be found in the image captions. When you choose one of the tool options an accompanying dialog box with sliders or other controls pops into the left panel.
Pipette: A white point, black point, and neutral gray selector. Click on it and position the cursor tool over the appropriate value. This is a very precise tool. I used it to set deep shadows and, for white point, generally clicked on spectral highlights, a combination that sets both exposure and a rough kind of color balance.
USM: Unsharp Masking, which is preset at 100 percent at 1 pixel radius. There can be endless debate about when to set this, when scanning or later, or to turn it off, but I left it at the preset and was very satisfied, but probably would not get too aggressive with it. When this button is activated a control panel pops up with a 1:1 viewing option, which I recommend doing to avoid oversharpening.
iSRD: This is an important tool for those resurrecting images from the attic. Of course there is some smoothing involved in dust and dirt removal, but for those dug-in dings and bits of dust this is invaluable. It works by creating an infrared layer of the crud and then tossing that layerin processing. Very sophisticated, but do note that Kodachrome and black-and-white negatives cannot benefit from this tool.
AACO: This is a sort of shadow/highlight control with sliders, but be careful with it as over-application can produce edge artifacts. I did use it to cut down on shadow noise in a dense area of a high-speed slide film, but overall am not a big fan.
GANE: A noise and grain control. If you over-res a grainy film it can look too rough, especially when working with grainy high-speed negative films. I also encourage experimentation with this tool as well as restraint.
ME: Mutli-Exposure, really two scans, one for highlights and one for shadows. This works very well for contrasty (underexposed/overdeveloped, for example) black-and-white negs and high-contrast slides with textured highlights. It takes double the scan and processing time, but is well worth the wait.
PrinTao: This mystical title refers to a setup for printing later. Not really necessary unless you want to go right from the scanning module. I usually tweak a bit in Photoshop later so I didn’t use this in my test.
A pop-up menu also appears in the left side panel (by the way, you can de-dock any panel you want into a side workspace or additional monitor) when you choose the Histogram, Gradation (curve control), Global and Selective Color Control buttons on the top row. These tools are fairly self-evident, so I won’t say much except that they can seem esoteric to those used to working in, say, Lightroom or Photoshop, but they do a fine job when you get the hang of it.

The Workflow Debate
The question about scanning software is always whether ’tis better to do the refinements in the supplied software or just set resolution and format in a scanner and pass it along. In some cases, with some software, I take that course because of the lack of sophisticated controls or options, but here I recommend that you get to know the software and use it for the lion’s share of the work. I did approach this with some skepticism, but after a week of scanning and processing, and learning about the various (and often hidden) nooks and crannies of SilverFast Ai Studio 8, I came to do much of the work on the scan process in this software and then final tweaks in Photoshop.
Conclusions And Recommendations
While spending $2000 for a scanner might be off-putting, it’s pretty much a case of getting what you pay for and paying for what you need. For those who have a library of medium format and 35mm material they wish to archive, process, and print there really isn’t a competitively priced product on the market today that delivers the goods like this hardware/software package. The scanner is solidly built and hums along quickly through tasks, and the film holders are among the sturdiest and well built I’ve seen of late. I do have to say that some of the more complex operations can be more lengthy than others, but keep an eye on the scanner process at the base of the left side panel to follow progress.
Some might be concerned that the lack of autofocus in the scanner might cause sharpness issues, but the combination of the holders and the lens in the scanner itself seem to make up for that. I did not have one scan that did not match the image sharpness of the original viewed through an 8x loupe on a light box.
While the software definitely requires patience to learn, especially if you do not have past experience with SilverFast products, being patient and playing with it, and taking advantage of the video tutorials, pays dividends. While titled a “120” scanner, I have to say that the 35mm scans I obtained were among the best I’ve gotten from any scanner in recent experience. Even mounted slides came out sharp and crisp, and the iSRD feature saved me from having to rewash the film to get the embedded crud removed.
I have often thought about doing some photography with my old medium format cameras, but being addicted to inkjet printing and not wanting to return to the chemical darkroom space I hesitated, mainly due to the lack of a quality and somewhat affordable medium format scanner. After working with the Plustek OpticFilm 120 and accompanying software, I am seriously considering taking the old Hassie and Rolleiflex out of storage.
Film Scanning
If I may digress for a moment, I’d like to address some issues about film images and their digital conversion as I think they are pertinent to procedures, and most importantly expectations about your scanning results. For those who have shot and processed digital images, you have gotten used to the true malleability of Raw format and the ability to address exposure, contrast, and color issues.
Film is quite different in this regard. First, film’s characteristics are fairly hard-boiled into the original emulsion—contrast, color cast and bias, exposure range and the like are set up when the emulsion is mixed and finally fixed during processing. There is some leeway in negative films, as density/contrast issues can, to an extent, be resolved with printing, and scanning, procedures. Slide films are less tolerant of exposure miscues, and blown highlights cannot be recovered, unless you resort to selection and fill techniques, but that requires considerable skill and even then can seem false in the final result, especially if printing large.
Another issue is the probable age of film images many of us will happily resurrect when using this device and software. Color slides of the non-Kodachrome variety may well have begun to lose both density and certain dyes; even the venerated Kodachrome slides may lose density, although colors seem more “permanent.” Depending on processing and storage procedures, black-and-white negatives may also lose density over time, and I have found that chromogenic films are quite poor in this regard. As Bob Schwalberg once told me, “Density defends density,” but I fear that all of the above will challenge your quest for high-quality conversions, so take all this into consideration when editing for scan work. Happily there are numerous fixes for these older image problems in the SilverFast software, some of which are addressed in this review, but you should realize the limitations that some images may impose.
Contacts
Plustek: www.plustek.com
LaserSoft: www.silverfast.com


![]()
Get the Latest Photo Tips, News & Reviews from Shutterbug!
| Camera Reviews Other Reviews | Mobile Reviews Photography Reviews Columns | News | Features | How-To | Resources |
 © 2025 Shutterbug
AVTech Media Americas Inc., USA
All rights reserved