- REVIEWS
Camera Reviews 
More Reviews Mobile Reviews Photography Reviews - GALLERIES
- VIDEOS
- BUYER'S GUIDES
Playing With Pixels
Add Motion To Stills
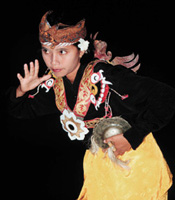
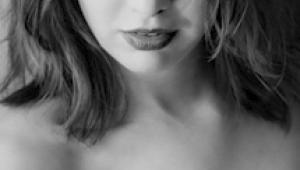
I'm a still photographer: I shoot only still pictures. Video? It's cool, but I like to capture individual "frozen moments in time." However, I often like to convey action--and the grace of a moving subject--in my still pictures. Before the advent of fast computers and digital imaging programs, I used several techniques to simulate the feeling of motion in a scene. These included panning during an exposure and shooting at a slow shutter speed when using a flash. Both techniques work very well. Today, I seldom use these techniques. Why? Because achieving similar results in the digital darkroom is easier--I don't have to make any calculations in the field, especially when it comes to mixing daylight with the light from my flash. And, I have complete control as to how the pictures turn out. Photo 1: I photographed this dancer in Lombok, Indonesia, during a nighttime performance at my hotel. I simply set my camera on Program and shot. I got a good exposure because I followed the rule of "filling the frame" with the subject when shooting on Program (or any automatic mode) when taking flash pictures. Don't fill the frame and you may get an overexposed flash picture--because the flash system may try to light the background, too. |
|||
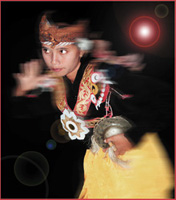
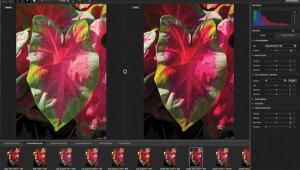
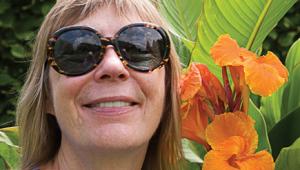
Photo 2: After scanning the original slide into Adobe Photoshop 5.5, I made a duplicate layer. Now I had two identical images--one on top of the other. Next I applied the Motion Blur filter found in Filters to the top layer. The top layer was now totally blurred and the bottom layer was totally unaltered. |
|||
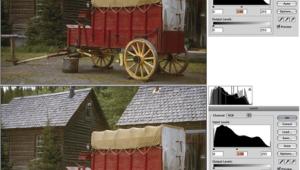
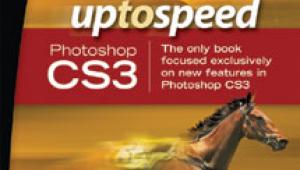
Photo 3:Using the Eraser tool found in the Tool Bar on the top layer (blurred image) I erased the blur on the dancer's body--a technique that left only faint traces of her body and costume in the background. To make the smooth transition from a sharp subject to the blurred edges of the subject, I had to adjust the pressure of the Eraser tool as I moved from the center of the subject outward. In the middle of the subject, for example, I set the Eraser at 100 percent. Toward the edges, I set the Eraser to 5 percent. To ensure that I erased the blur effect on the parts of the dancer that I wanted clear, I switched off the bottom layer (sharp layer). With only the top layer active (visible), it was easy to see exactly what I was doing. The digital speed effect works especially well when a subject is posed against a black or very dark background. |
|||
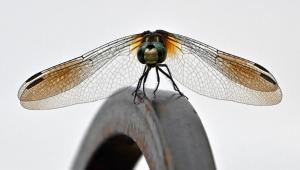
Photo 4: To enhance the scene and to take up some of the "dead space" in the photograph, I used the Lens Flare filter found in Filters>Render, which, when the point of light is placed in a dark area, creates a spotlight effect. The color of the frame around the picture, as you may have noticed, perfectly matches part of the dancer's costume. That's because I selected the color with the Eye Dropper tool. To create the frame, I selected a small section at the edges of the picture, clicked on Inverse and clicked Cut. Using the Paint Bucket tool, I filled in the cut area with the selected color. Have a keen eye? Look closely
and you'll see that I brightened the whites of the dancer's eyes just
a bit. I did this using the Dodge tool. Fashion photographers often use
this technique to give their models a more youthful look. |


![]()
Get the Latest Photo Tips, News & Reviews from Shutterbug!
| Camera Reviews Other Reviews | Mobile Reviews Photography Reviews Columns | News | Features | How-To | Resources |
 © 2025 Shutterbug
AVTech Media Americas Inc., USA
All rights reserved