- REVIEWS
Camera Reviews 
More Reviews Mobile Reviews Photography Reviews - GALLERIES
- VIDEOS
- BUYER'S GUIDES
Personal Project; Digital Capture Input: “Alternative” Output
Over 200 years ago, scientists and photographers experimented with light-sensitive
chemicals and developed a photographic printing process that utilizes watercolor
paper coated with a base of gum arabic solution with dichromate salt and pigment.
This solution, when exposed to sunlight, becomes insoluble and is able to withstand
the test of time.
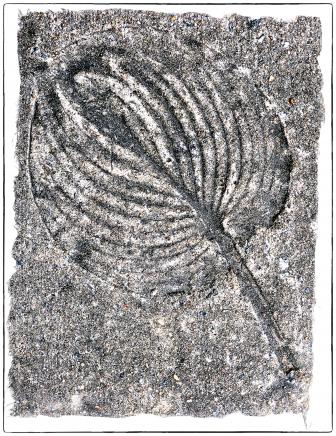
This photographic process was initially criticized for its lack of tonal scale,
a problem that has been overcome by creating multiple print layers, thereby
adding depth to the shadows and extending the tonal scale. The resulting prints
have a soft, rich sheen and painterly quality as found in watercolor paintings.
These multiple layers of the gum arabic/watercolor emulsion crack, adding texture
to the dense areas.
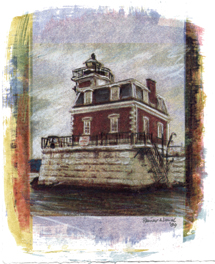
"First Light On The Hudson" |
|
 |
|
|
As an artist, I find that the gum printing has the greatest amount
of flexibility, both in terms of chemistry and negatives used. The watercolor
pigments combined with gum arabic adhere to most porous surfaces. The emulsion
can be applied to paper or canvas. The chemicals that make up the emulsion can
be readily purchased. The gum arabic and watercolors can be bought at most art
stores and the dichromate salt crystals can be purchased separately or as part
of a gum printing kit through Photographers' Formulary (www.photoformulary.com).
They are then mixed: one part dichromate salt solution to three parts gum arabic
and watercolor pigment, just prior to application. The amounts do not have to
be exact. The emulsion is not greatly affected by minimal differences in the
mixture or by temperature or humidity and can be applied in a room lit with
regular lighting. This makes it very easy to use in diverse circumstances.
A detailed description of the process can be found at: www.gallerywenzl.com.
"Crabbing In The Chesapeake" |
|
 |
|
|
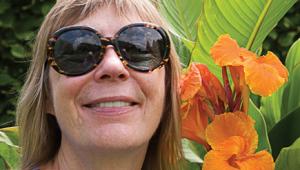
I have experimented with a variety of cameras and film. Initially
I used a standard 35mm camera, a rangefinder camera, and a modified pinhole
camera. I used to create large negatives using litho film, but when I began
to use a digital camera, I thought I would try to use transparencies, printing
them on an old laser printer that I had at my disposal. The results were very
positive. The fine dot pattern was perfect for gum printing. It created a suitable
tonal range, and when multiple layers were printed, the pattern disappeared
altogether, creating the appearance of a continuous tone.
In September of 2003, my son and I embarked on a journey on our 30-foot sailboat.
We traveled from Toronto, Ontario, through the Erie Canal, down the Hudson River,
along the Atlantic, up the Delaware, down the Chesapeake, and south along the
Intercoastal Waterways until we reached Marathon in the Florida Keys, and along
the way took numerous digital images. I had packed all my alternative photographic
printing supplies so that I could produce prints once we were stationed at one
spot for an extended period. Initially I had intended to produce a series of
prints that depicted the various lighthouses along the Eastern seaboard, but
as our trip took us along the many inland waterways, rivers, and sounds, I decided
to focus on life on the water.
Our first stop of any length was in Kingston, New York, on the
Hudson River. There we waited for Hurricane Isabel to pass. While moored there
I started to work on creating negatives from the numerous images that I had
gathered.
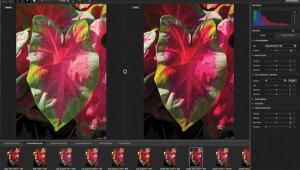
I experimented in making negatives using an inkjet printer. With an inkjet printer
the dot pattern is very fine. I used an inexpensive inkjet printer (Canon i250)
and overhead projector transparency film to create high-contrast negatives.
The gum printing process requires a very high-contrast negative. This was achieved
by using Adobe's Photoshop. Two of the menu items in Photoshop are "Variations"
and "Posterize," they can be found under Image>Adjustments. "Variations"
allows the user to adjust the highlights, mid tones, shadows, and saturation.
"Posterize" allows the user to adjust the levels of color or gray.
I posterized the negatives such that there would only be 4-8 shades of gray.
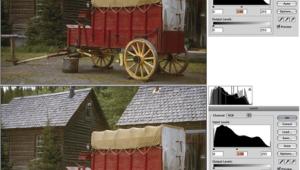
Another option that I used was to print the negatives with a screen effect, an option available in Photoshop's printer options. These two adjustments are the ones I most commonly use in order to create negatives of different densities for the various colors that I intend to use in the multiple layers.
"Tight Quarters" |
 |
I plan what color I want to print and where I want it printed, making negatives to match. An important point to remember is the rule that is associated with watercolor painting; white is the color of the paper and only a color darker than the previous color can be placed over top of it. One has to be careful when making multiple layers; too many colors on top of each other create a very dark and brownish print with very little detail.
The next couple of months were spent on sailing, exploring and
taking many more photographs. Our next stay of any length was our anchorage
in Miami, an area that used to be the Marine Stadium. There I continued to make
more negatives. I thought that some of the images were not complete; they did
not capture life on the water as I had experienced. Therefore, I began to add
to the digital images. I took parts of other photographs and added them to another
image to create a new digital photograph.
We arrived in Boot Key Harbour, Marathon, in November. After three months of
traveling I was finally able to work on creating prints from the numerous images
that I had collected and the negatives that were created thus far.
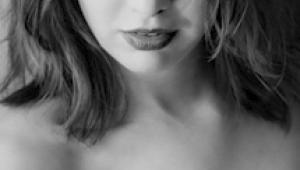
The interior of the boat is a very small space, with no area that could be set
aside as a darkroom; therefore, I had to sensitize the paper in the evening.
The dichromate solution is sensitive to sunlight/UV light, which allowed me
the ability to prepare the prints in an area lit by regular light. The challenge
was to find enough flat surfaces inside the boat for the prints to dry once
the emulsion was applied.
"Emulsion Process" |
|
 |
|
|
In the morning, after 10 (I was on a sabbatical after all), I would expose the prints to sunlight using a contact-printing frame. The contact-printing frame, also available from Photographers' Formulary, allows you to open one side of the back without moving the image in order to inspect the exposure process.
|
| |||||||||


![]()
Get the Latest Photo Tips, News & Reviews from Shutterbug!
| Camera Reviews Other Reviews | Mobile Reviews Photography Reviews Columns | News | Features | How-To | Resources |
 © 2025 Shutterbug
AVTech Media Americas Inc., USA
All rights reserved