Lesson Of The Month
The Power Of Layer Masks
Taking macro shots can be
quite fun, particularly if you're shooting some interesting subject
matter. It's good to remember that there are times when your depth
of field can get so shallow as to throw parts of your subject out of
focus, especially if you're using a macro lens attachment and
shooting with your aperture wide-open. |
|||
Recently, I came across a
beautiful grasshopper and thought that with all of its color and stark
lines that it would make a great subject for a macro shot. I quickly grabbed
a plastic container and trapped it on the outside table where it had landed.
I then decided to replace the plastic container with a clear glass vase
so that I could take some pictures of it without having it hop away. I
rinsed out a glass vase and carefully swapped out containers. |
|||
I then made some adjustments
to the camera. I set the Exposure mode to Manual; the Focusing mode to
MF; the ISO to its lowest setting (80); the Resolution to SHQ; and the
White Balance to Daylight to match the color temperature of the sun (5500K). |
|||
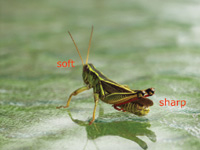
After a while, the grasshopper
jumped off of the wall of the vase and onto the table surface. I really
wanted to get a shot of the grasshopper without the vase in the shot,
so I positioned the camera to get a 3/4 view of it and set the focus on
the antennae. With my finger on the shutter, I lifted the vase and took
a shot (#4). |
|||
Without moving the camera,
I refocused the lens so that the hind legs were in sharp focus and took
another shot just before the grasshopper started feeling camera-shy and
"hopped" |
|||
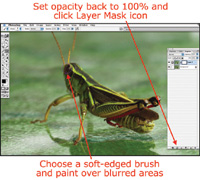
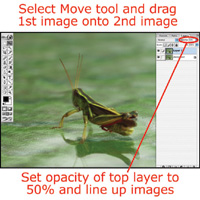
So I decided to merge the
two images together using a Layer Mask technique. With the two images
side by side, I selected the Move tool and dragged the second image on
top of the first. To make sure the images lined up as close as possible,
I set the opacity of the top layer to 50 percent so that the bottom layer
would be revealed at 50 percent as well (#6). |
|||
Once the grasshopper appeared
sharp from front to back, I saved the layered version (in case I ever
wanted to go back and make more adjustments), then flattened the image
by choosing Layer>Flatten Image, and saved a flattened version. If you would like to continue your digital step by step education lessons on editing, printing, and e-mailing your photos it will be on the private section of the Web Photo School. To enroll for WPS just go to www.shutterbug.net and click on WPS Free Lessons. |


