Improve Your Outdoor Portraits
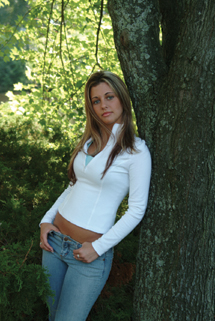
Tips From A Pro On Lighting, Posing, And More
Photos © 2004, Steve Bedell, All Rights Reserved
I love shooting outdoor portraits! As a matter of fact, it has become my "signature style." During my busy season, I may take over 400 outdoor exposures in a single day, so I'd better be able to do it well and do it fast. An element of my style is that I don't use flash. Many photographers do, and they do it very well, but that won't be covered in this article. I'm going to give you a few insider tips that will make an immediate and dramatic impact on your outdoor portrait results. And remember, these tips are going to help you achieve great results, but rules are always made to be broken--once you understand them.
1) Watch The Background
When people ask me to look at their work, one of the first things I usually
notice is that they concentrate on their subject and completely ignore the background.
This is not a good thing. Your background is critical to a complete image. It
should compliment, not detract, from your subject. Colors should compliment,
not detract, from the subject. Watch for lines and objects sticking out of people's
heads. Probably the best way to teach yourself to watch backgrounds is to use
a tripod. After you have your subject where you want them, take the time to
study the background. If your camera allows it, use the depth of field preview
button so you can see just what will be sharp and what will be soft at the taking
aperture. Remember, you're always looking at the scene in front of you
with the lens "wide-open." That means if you're using an f/2.8
lens you're seeing what the picture will look like at f/2.8; it will look
completely different at f/16. Sometimes the difference can be a rude awakening!
 |
|
|
2) Avoid Bright Highlights
There's an old saying in photography: Light attracts, dark recedes. To
quote Blazing Saddles, and Tweety Bird, "It's twu." Your eye
will be attracted to the bright areas. They will be very distracting in the
photo, and take attention away from your subject. And while bad enough on the
background, they can be downright disturbing on your subject. I have an area
I like to use that has some big bushes that form a canopy. It blocks the overhead
light and the opening gives me a nice source of light. The only problem is,
sun can shine through the canopy, creating splotches of light all over my subject
and their clothing. Very distracting. The solution? I carry a big collapsible
reflector that I put up in the branches to block the direct light, thereby avoiding
"the splotches." You may not be carrying around a reflector, but
always look for the splotches and move to avoid them. They'll cause overexposed
highlights. Film is more forgiving of them than digital.
 |
|
|
3) Use A Long Lens
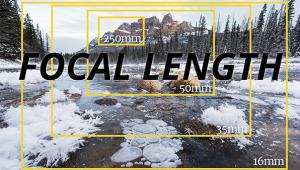
Using a long focal length lens will really make your work shine! There are three
primary reasons for this. The first concerns the narrow angle of view. The longer
the lens, the narrower angle of view, or the less in a given photo at any given
distance. Why is this a good thing? Because most photographers (see #1) get
too much in the background. Using a long lens narrows things down so you get
less background. Since most contemporary shooters use zoom lenses, in many cases
it's just a case of racking that baby out. As a rule of thumb, a lens
at least twice the "normal" focal length should do just fine. So
for a 35mm camera, 100mm and up will work great. For most digicams that have
a factor of about 1.5 when compared to 35mm, any length over 75mm or so will
do. The longer the focal length, the more image magnification at a given distance,
so watch for camera shake. Also, your zoom lens may not have a constant aperture,
so at longer lengths you need more light.
The second reason long lenses are recommended for portraits is perspective.
Try taking a head-and-shoulder portrait with a "normal" lens and
you'll find yourself 2 or 3 ft away from the nostrils, with the eyes being
significantly farther. This is often incorrectly identified as "lens distortion"
when it is in fact a function of distance. Close one eye, then get about 8"
in front of someone's face. You'll see they look kind of weird.
Then back off to about 6 ft. Don't they look better? It's a more
pleasing perspective, but it's caused by distance, not the lens. Put your
camera on a tripod, take a zoom lens, and take the same photo at wide, normal,
and long lengths. While some have more in them, the perspective is the same.
In fact, if you cropped the wide image to match the angle of view of the long
lens, they'd look identical and depth of field would be the same as long
as they were taken at the same f/stop! (Note that quality would be an issue.)
- Log in or register to post comments
