How To Use Ulead CD & DVD; PictureShow 3 Deluxe
Further Information
Ulead CD & DVD PictureShow 3 Deluxe
http://www.ulead.com
Finding a convenient way to share your photos with others is often a challenge.
Printing extra copies of your images gets expensive, and building web pages
to share your images can be a time consuming task. Ulead CD & DVD PictureShow
3 Deluxe solves this problem by providing an efficient new way to share your
photos: burning them to a CD and then displaying them using a DVD player and
TV.
When I tell people about this technology, I'm frequently asked two questions:
"Does this require a DVD burner?" and "Do I need an expensive
DVD player to view the CD?" The answer to both questions is "No."
The CD can be burned using any typical computer CD burner, and the technology
to play computer burned CDs is available on just about every DVD player made
within the last 5 years, regardless of how much (or how little) it cost.
There are several CD\DVD software packages available in today's market.
What I like most about Ulead's package, is that it easily creates professional
DVD quality results, complete with music, transitions, and menus, at an affordable
price. The MSRP is $49.99, and a free trial is available via download from www.ulead.com/dps/.
Step 1: Organizing Your Photos
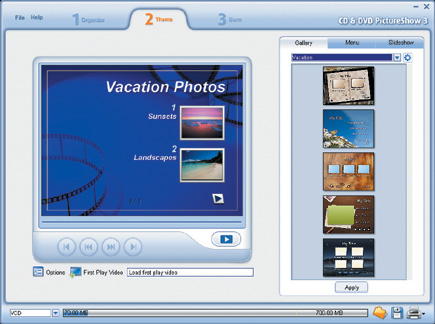
Ulead CD & DVD PictureShow uses a three step interface that walks you through
the entire process of creating a slide show (see #1). The first thing you'll
need to do is start a new project by clicking the New Slide Show button (located
right underneath the File menu) and then clicking "New Photo Slide Show."
The "Add Photos" dialog box opens, which is used to select the photos
that you'd like to use in your slide show. You can add photos from anywhere
on your computer, and/or use the New Slide Show button to access photos directly
from your digital camera, by clicking "Get from Digital Camera."
Step 2: Adding Features Using The Theme Tab
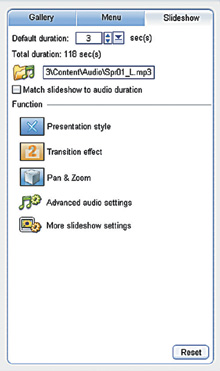
The Theme Tab is used to add a background theme to your slide show, and to determine
how features such as background music and transitions will operate. When you
click on the Theme Tab, a preview of your slide show will appear on the left,
and a menu will appear on the right (see #3).
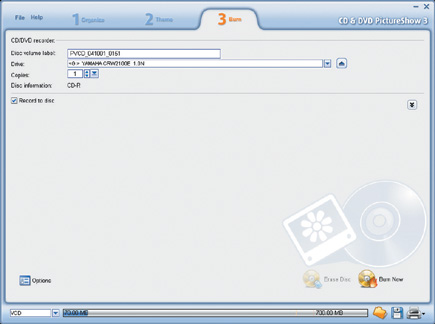
Step 3: Burning Your Slide Show To CD Or DVD
This is the easiest step, since your CD or DVD burner and CPU do all of the
work. Click on the Burn Tab to set options for burning your slide show (see
#6). If you have more than one CD and/or DVD burner, select which burner you'd
like to use from the drop-down box. If your computer has just one burner, it
will be selected automatically.
Additional Features: Printing A CD Label And Using Ulead Photo
Explorer 8.5
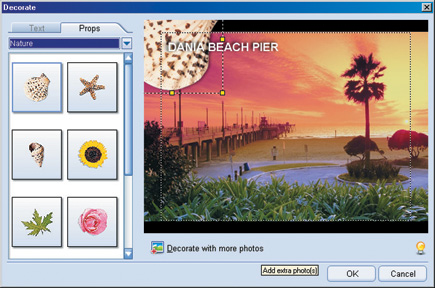
If you'd like to print an attractive label for your CD or DVD, you can
do so by clicking the Printer icon on the lower right side of the screen. You
can select from a wide variety of name brand CD and DVD labels, or choose the
"Generic" option. You can then click on "Image" to add
an image to label, and click "Text" to add Text to the label (see
#7).
 |
|
|
|
|
 |
|
|
|
|
 |
|
|
|
|
 |
|
|
|
|
 |
|
|
|
|
 |
|
|
|
|
 |
|
|
|
|
 |
|
|
Tony Celeste appreciates feedback from his readers. You may contact him at
aceleste@comcast.net.
- Log in or register to post comments


