The Digital Road To Infrared; Software, Cameras, And Filters For A Trip To An Often Surreal World Page 2
An effect that looks great for a small print can appear unrealistic and exaggerated in a larger image.
 |
|
|
Enhancement Options
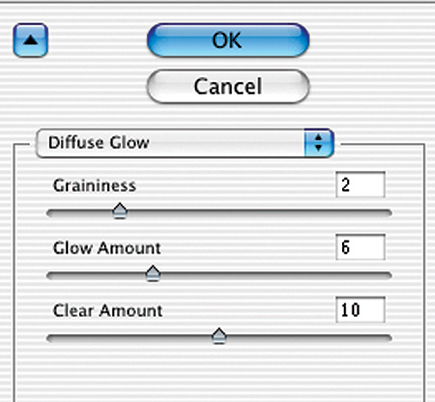
Yet another Photoshop filter that enhances the IR effect is Filter>Distort>Diffuse
Glow, #7. Try it instead of Gaussian Blur or add it after you've applied
blur. With Diffuse Glow, you can add both glow and grain in one step. However,
your background color must be white--press the letter d on your keyboard
to reset this. In the Diffuse Glow dialog box, try these settings: Graininess:
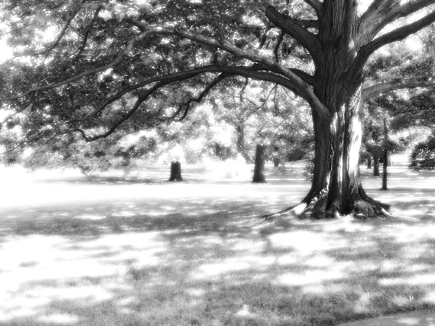
2-6; Glow Amount: 3-6; Clear Amount: 10-15. Applying settings of 2, 6, and 10
to one of my tree landscapes resulted in the effect seen in #8. A lower glow
value and higher clear value makes the effect less pronounced.
 |
|
|
For further fine-tuning, you can select areas of your image and apply controls and filters to specific areas. For example, if the sky isn't dark enough, select it and use Curves, Levels, or even a Gradient to get it where you want it. Similarly, you can selectively apply grain or glow.
Plug-In Software Solutions
Remember when I said that converting a color digital image to black and white
IR wasn't as easy as just selecting a filter? Well, I lied. There are
plug-ins that will do the work described earlier for you, if you're willing
to give up some control. One good choice is the Infrared: Black and White filter
that ships as part of the nik Color Efex Pro 2.0 package of 75 potent plug-ins,
$299, from www.nikmultimedia.com.
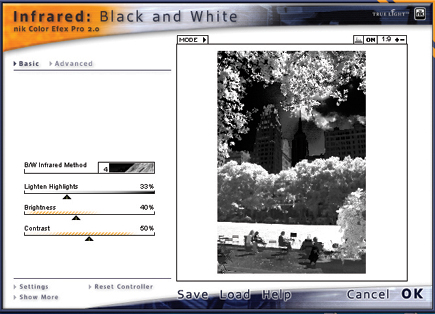
This filter does a great job on many subjects and offers several controls, as
well, #9.
 |
|
|
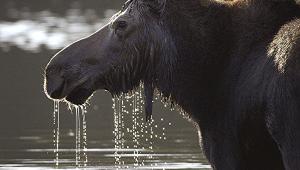
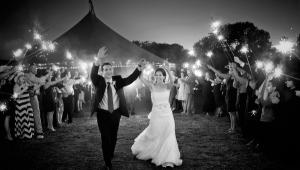
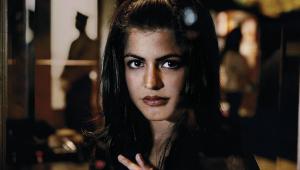
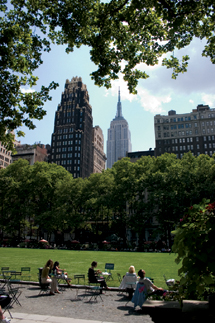
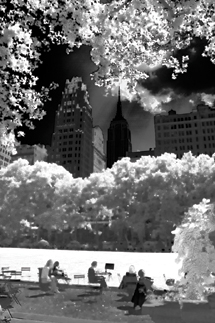
Starting with a digital color original, #10, I applied the settings shown in #9 with the dramatic IR result seen in #11--dark sky and white foliage. But black and white IR isn't just for landscapes. The effect can enhance portraits, buildings, and other objects as well. Starting with a portrait, #12, I applied the nik Infrared: Black and White filter to obtain the very pleasing effect seen in #13, complete with high contrast and glow effects.
 |
 |
||
|
|
Sliders allow you to adjust Brightness--the overall lightness of the image--and Contrast. "Lighten Highlights" controls the luminosity of the highlights, so you can brighten clouds and other light-toned objects. Finally, the "B/W Infrared Method" drop-down menu lets you choose from emulations of different IR film emulsions, with different color filters over the lens that produce different contrast and tonal results. Further, you can selectively apply this IR filter by using a Wacom graphic tablet. To see sample images and tutorials, go to the nik multimedia website.
 |
 |
||
|
|
Another plug-in option is the SilverIR filter, $55, from Silver Oxide, www.silveroxide.com. While it, too, can produce great results and provides different control options, it requires an additional step: you must apply the Photoshop (or Elements) Diffuse Glow filter as the last step. For landscape shooters, it offers powerful options, letting you choose different tonal schemes for different subjects. To my taste, while it's great for landscapes with green foliage, it's less successful if you want to achieve the classic IR look with people and objects. Further, it is rather slow, taking 5 minutes to apply to an 18MB file on a 1GHz computer. See the website for excellent examples, comparisons, and detailed tutorials.
The Hardware Connection
One company, IRDigital, actually converts certain digital cameras to shoot black
and white IR. This option is for serious IR shooters only though, as the conversion
is a one-way trip (the camera can't be returned to its original state),
and the converted camera can only shoot black and white IR. The modification
is currently available for the Canon EOS D30, D60, 1D, and Digital Rebel (300D),
as well as the Nikon D100. To locate one of these older camera models, try Shutterbug
ads or eBay. Conversions cost $350 for all except the Digital Rebel, which is
$500. See www.irdigital.net
for more details and examples of landscape and portrait subjects.
Filter Factors
To get the IR look on a non-converted camera you'll need an IR filter
that blocks nearly all visible light while giving IR wavelengths a free pass.
Wratten designations in increasing strength are the 89B, 88A, 87, and 87C filters.
Popular IR filters include the nearly opaque Hoya R72, B&W 093 (Wratten
87C), Tiffen TI 87 (Wratten 87), Harrison and Harrison 88A, and the Cokin 007--shades
of James Bond--(Wratten 87B). While these filters technically pass different
amounts of IR and/or visible light, they yield black and white IR images very
similar to each other pictorially. Most of these filters are not inexpensive.
IR filters can be ordered from suppliers including B&H (www.bhphotovideo.com)
and Adorama (www.adorama.com).
Our colleague, pro photographer Joe Farace, is a major fan of the IR look. He
suggests using a Hoya Infrared R72 or a Cokin 007 filter and ISO settings of
200-400. His exposures range from 1/3 to 1/7 sec at f/2.8. To see Farace's
techniques and images check out the archives at www.shutterbug.com/0206infrared.
IR-Ready Digicams
Most digital camera sensors are sensitive to invisible near-infrared wavelengths
of light. Most models, however, incorporate a built-in filter to block IR. However,
there are a number that are still sensitive to the near-infrared range, or offer
other IR options. These you can use for black and white IR right out of the
box, though most require a filter. Slip an IR filter over the lens and your
camera will usually expose accurately and even autofocus for the infrared wavelengths!
Furthermore, you can see the results on the camera's LCD monitor or electronic
viewfinder. Many IR-friendly models are older cameras now out of production,
but they may be found in Shutterbug ads or online auctions. Some that we know
will work are the Canon Powershot Pro 90 IS, Nikon Coolpix 950, Sony Cyber-shot
DSC-F707 and F717 (use the Infrared or Night Shot mode), the Minolta DiMAGE
7 (from 2001), and the currently available Fuji FinePix S20 Pro (2004).
Some models from the following manufacturers are said to be IR-friendly: Canon,
Sony, Nikon, Olympus, Fuji, and Konica Minolta. While we don't have a
complete list, here's how you can check if your digicam is sensitive to
IR radiation: Simply point your TV remote control at your camera with the filter
in place while pressing the volume (or any other) button. Now, look at the image
on the LCD screen or through the electronic viewfinder, or take a picture and
then examine it on the LCD monitor. If you see a continuous or blinking white
point of light emanating from your remote, you are ready to rock 'n roll
with IR.
Website Resources
· www.InfraRedDreams.com
· www.bythom.com/infrared.htm
· Google "Infrared digital b&w photography" for enough
links to keep you off the streets for days
- Log in or register to post comments


