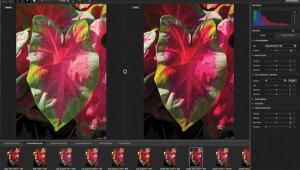
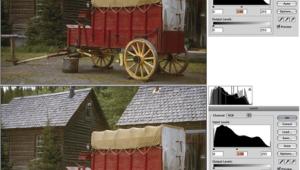
The Digital Darkroom
Working With The Desktop

I've worked in a conventional, wet darkroom almost all of my life. I can remember see-sawing black and white film back and forth through open trays to develop it when I was about 10 years old. I've been there and done that.

I still have my fully equipped color darkroom. With my desktop darkroom, I can do things that just aren't realistic to do in a conventional dark-
room.

My desktop darkroom consists of a PC, custom-built computer; two different scanners; and two different printers. Up until now I have continued to use my old, regular cameras and have continued to shoot C-41 film. However, I'll be getting a new digital camera and will start trying it out.

Digital cameras have now reached the stage where, for less than a $1000, you can buy a camera that can capture enough data to allow you to make perfectly acceptable 8x10 prints.

Up until now, I have shot C-41 film and scanned the images into the computer directly from the film. I use a Nikon Super CoolScan LS-2000 scanner for 35mm film, and a UMAX PowerLook (flat-bed) scanner for the medium format film. From both scanners I can get enough data to allow me to make gorgeous 16x20 prints. Unfortunately, I don't have a printer that will make prints as large as 16x20. Let me play devil's advocate for a minute. How many of you have a RA-4 processor that will make 16x20 prints? If you were to buy such a RA-4 processor, how much would you expect to pay for it?

I have a RA-4 processor that will make 16x20 prints. It is a DoMac Processor. I love it. It sells new for about $2000. Most 16x20 processors cost a lot more than that. I can tell you flat out, if I can find an ink jet printer for $2000 that will make 16x20 prints, I'll buy it. Right now I have an Epson, model 1520, ink jet printer that makes 13x20 prints. It sells new for about $500. I'm hoping that Epson will soon offer a slightly larger one. The 13x20 size is about the aspect ratio of a full frame, 35mm image. In the six months that we have had the printer, we have not had to go to an outside service bureau once for a larger print. Almost all of our customer's needs can be met with our Epson 1520 printer. Still, I'd like to be able to print a little larger if I could. Guess I'm greedy.

When we scan 35mm film, our scanner produces a 28.8MB file of original, optical, data. We can then take that data and boost it up in Photoshop to allow us to have enough data to produce gorgeous 13x20 prints on our Epson 1520 printer. It takes about 67MB of data to make a print that is 13x20". We always adjust all of our photo-quality picture files to 300dpi so that we will have plenty of data for our Epson printer to work with.

A print that is 16x20" in size requires a file that is 82.4MB is size. That's about as much as you want to enlarge a file that started out with only 28.8MB of original optical data.

If you need to make a larger print, then you need to use a more powerful scanner and collect more original optical data from the negative. Just as in a wet darkroom, if the original image was shot on grainy film, you might not be able to enlarge the picture to 16x20 without getting really excessive grain. With picture files that large, you can see why it is important to have enough horsepower in the computer to pull the load.

I like the way my desktop darkroom allows me to make critical adjustments in color balance, color saturation, density and contrast that simply are not possible in my wet darkroom.

I recently added a neat little accessory to my desktop darkroom. It is a program--a plug-in--to Photoshop. It allows me to do just what the television studios have done for years. I can photograph people and things in front of a blue background (blue screen) and then, electronically drop out the background and replace it with anything I can imagine. Remember how in the old days we used to photograph things in front of a white paper background so that we could drop out the background? Remember how difficult it was to be sure that the lighting on the white background was just right? If we hit it with too much light we got lens flair and a low contrast image. If we didn't use enough light on the background, then instead of being pure white, the background would be gray. With blue screen photography, the background always drops out instantly and perfectly. It's just one more little trick in the gadget bag.

My other desktop printer is an ALPS MD1300. It makes great 8x10 dye sublimation prints. It lays in a clear overcoat on the print, all automatically. A few years ago, dye sublimation was considered the only way to go for really high quality printing. That is changing. Today, ink jet printers are producing images that are simply stunning. With the new archival inks and papers that are rated for 65-75 years, there is little to be gained from dye sublimation printing. Of course, dye sublimation printers are still used for making transfers to put on T-shirts, coffee cups, dinner plates and the like.

An important part of my desktop darkroom is my 21" ViewSonic monitor. It is large enough to allow me to really see what my image is going to look like when it is printed out. Smaller monitors certainly cost less, but they just can't give you the information you need in order to be able to adjust the image the way you want it. My monitor is capable of delivering a resolution of 1600x1200. However, I usually drive it at 1280x1024. At that setting I generally have enough resolution to allow me to make critical judgments, without causing the words on the screen to appear too small for easy reading.

Later this summer, I will be adding a second monitor to my desktop darkroom. Under Windows 98 it is now possible to use two monitors simultaneously. Most folks who are using two monitors use a large, 21" monitor on which to view the main image that they are working on, and a smaller 15" or 17" monitor onto which they place all of the tool pallets and menus. This practice leaves more room on the large monitor for working space.

Amazingly, I have found that a desktop darkroom is exactly like a conventional, wet darkroom in that I can add pieces of equipment as I need them and can afford them. For example, my current computer uses a motherboard that has a 66MHz bus. That was state of the art only a couple of years ago. A computer bus is a sort of superhighway that allows data to travel around inside the computer between the Central Processor (the Pentium chip) and the hard drives; the monitor; the printer; the scanner, etc. You can think of it as sort of like having a superhighway with 66 lanes for traffic. Later this summer I plan on doing a little "highway construction." I'll replace my current motherboard with a new one that will have a bus speed of 100MHz. I might add some additional hard drive storage capacity. I have about 13GB of hard drive storage now, but more is always better.

By upgrading to a little faster motherboard, I'll get faster performance, and the ability to handle larger files a little easier, but I am not going to scrap my entire computer. I'll simply replace one or two components and continue to use most of the other components. Think of it as sort of like buying a new lens for your enlarger. So many folks think that if you want a better computer, you have to buy a whole new one and throw the old one away. If you started off with a very inexpensive computer, that might be mostly true. Real cheap computers don't have much room for growth. As you evolve upward to better equipment, you have more built-in opportunities to simply upgrade a little at a time.

Sometimes folks express a feeling to me that if they get into digital imaging, they will have to learn too much new stuff. How sad. I find it fun to learn new stuff. Besides, most of the old stuff that I already know about photography is very useful when using these new digital tools.

Color balance, density and contrast still have to be adjusted correctly, but the new digital tools make it a lot easier to do it. The digital tools allow me to make changes that I could not have done with the old, wet tools. If you don't believe me, the next time you go into your wet darkroom, just try making a color print and increasing the color saturation without losing shadow detail. For that matter, try lowering the overall contrast of a color print so that you can have better shadow detail and better highlight detail.

If you'd like more information about desktop darkrooms or help with your wet darkroom problems, you can e-mail your questions to me at colorbat@desupernet.net.

X