The Digital Darkroom
Making Selections With The Pen Tool; Straight Lines Made Easy Page 2
Unfortunately, nice straight lines are usually not enough to satisfy the need for a selection. Frequently, you'll need some areas selected in addition to the straight lines that are not so straight. Here's how we do that:
 |
|
|
We will convert the selection into the Quick Mask by clicking on the Quick Mask tool at the bottom of the main toolbar. When you do that, a red-colored mask will appear in the areas that were not selected in the previous steps (#5). Now, it's time to adjust the Quick Mask to deal with any non-straight areas that also need to be included in the total selection.
 |
|
|
Use the Erasure tool and a very small soft-edged brush to remove the red-colored
mask from areas that need to have the
red-colored mask removed. Use the Paintbrush tool and a very small soft-edged
brush to add a red-colored mask to areas that need to be included in the mask.
See (#6) for a sample of how I added a red Quick Mask onto the chandelier that
was hanging in front of one of the windows. Continue using the Erasure tool
to remove Quick Mask and the Paintbrush tool to add Quick Mask to all the areas
that need adjustment.
 |
|
|
When the Quick Mask is complete, you will have successfully created a great
selection. It is important to use a soft-edged brush when doing this. And, it
is important to work on a very highly magnified image so you will be able to
do accurate work easily. Remember, in Photoshop, CTRL+ magnifies the image and
CTRL- reduces the magnification. There are scroll bars around all magnified
images so you can navigate around in the image area and have access to the areas
that you need to work on.
When your Quick Mask is completed, you can convert it back to a regular selection
by clicking on the Quick Mask "off" button at the bottom of the
main toolbar. It is located right next to the Quick Mask "on" button.
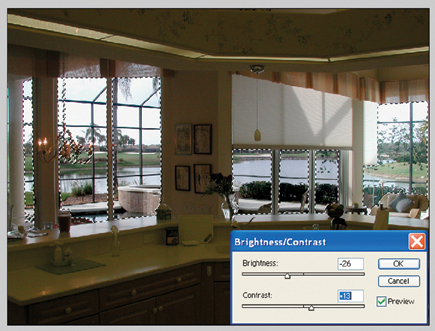
Now, that you are back to a regular selection again, just use the regular tools
to alter the color balance and/or density of the two areas of the image--the
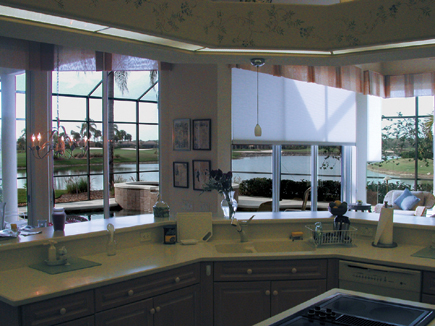
indoor area and the outdoor area (#7). By inversing the selection you can apply
the mask to either the indoor area or the outdoor area to allow you to work
on both areas, one at a time. It is easy to switch the selection back and forth
until you have both areas just the way you want them. Image (#8) is my finished
result for this picture. The indoor color balance is still not perfect, but
the image is a whole lot better than what I started with in (#1).
 |
|
|
For more information on digital imaging, you might want to visit my website at: www.colorbat.com.
- Log in or register to post comments
