Digital Camera Options
Here are some typical settings and options you can make when you shoot with a digital camera. Note that not all cameras offer all the settings listed.
1) ISO speed: Or level of sensitivity to light. This is changed
by altering the "native" speed of the sensor by applying gain (additional
electrical charge) across the sensor. This allows you to go from, for example,
ISO 100 all the way to 1600, and in some cases 3200. As you are increasing the
electrical field more noise enters into the recording as you go higher in sensitivity.
2) White balance: Or rendition of color under various light
sources. This works with the Kelvin scale and is similar to placing color correction
filters, such as an 81A, over the lens when shooting film. The change places
a cast on certain colors to counteract the prevailing light source to yield
"true" colors. You can also use this as a filter effect, such as
using Flash white balance to add more warmth to your image.
3) Color space: Or gamut of colors recorded. The gamut of colors
refers to the breadth of colors that are recorded and whether they are saturated
or more neutral. If you print choose Adobe RGB. The default in most cameras
is sRGB, nice and rich but somewhat more limited than Adobe RGB. Some cameras
have a "landscape: RGB, but this is just a more saturated sRGB.
4) File format: Or JPEG, TIFF or Raw. JPEG compresses image
information and is fine for most small to medium size prints and especially
for email and web photos. TIFF is "lossless" but takes up lots of
space on the memory card. Raw is best for printing larger prints and when you
want to get the most out of the image, but it does require extra work later,
as the image information is Raw when recorded on your memory card and must be
processed by you after downloading.
5) File compression: This applies to JPEG only. Generally,
use the lowest compression ratio. If you are shooting for the web you can use
a greater compression ratio.
6) Image attributes: Or saturation, contrast and sharpness.
This can be applied to all formats, although when doing so to Raw can be easily
reconfigured later. Doing so on TIFF or JPEG files makes it a bit more difficult
to change later.
7) Consecutive shooting: When shooting digital, motor drive
modes are limited by processing speed and the buffer (temp storage area for
images awaiting processing). The speed and number of images you can take consecutively
is usually defined by burst rate and buffer capacity.
Here are some particularly digital considerations:
1) Sensor care: Sensors are like small static electricity systems,
thus are prone to attracting dust. Change lenses with care and in a bag, if
possible, and shield from any and all chances of attracting dust.
2) Focal length multiplication: If the sensor is less than
full frame (less than 24x36mm) focal length of lenses might be multiplied by
1.5 or so to arrive at effective focal length. Great for telephoto reach but
poor for wide angle work.
3) Memory cards: Formatting a card usually wipes out all images
on the card, vs erasing or "trashing" individual images. Always
format in the camera. Note the FAT of your camera before buying very high capacity
cards. Buy "fast" cards, but only if your camera can deliver the
write speed indicated.
4) Downloading: Use a memory card reader. Here are the steps:
a. Unload the card from the camera with the power off. Never load with power
on.
b. Put the card in the reader and wait until the computer recognizes the reader
as a drive.
c. Drag the folder with the images to your desktop.
d. Burn a CD as a backup of all image files.
e. Edit and fix, or process Raw images from folder on desktop.
f. Burn a CD of the finals.
g. Make an archive of the images within an image editing program from the CD
or desktop file.
h. Dump the desktop file.
Exposure
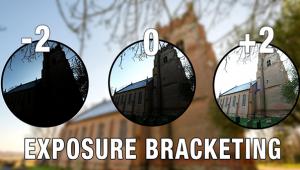
Digital sensors have one major "flaw"--recording in a high
contrast lighting situation. Like slide film, you must learn to control highlights
and have faith in the shadows. You can do this by biasing exposure for the highlights,
looking at image histograms and learning to "move" highlights within
the recording range.
Raw Mode
Working with Raw is akin to processing your own negatives. The Raw file is very
malleable and you can change exposure, white balance, color space, image attributes,
etc. with ease. You must use the camera or generic Raw software for this before
finalizing the image as JPEG or TIFF.
- Log in or register to post comments


