- REVIEWS
Camera Reviews 
More Reviews Mobile Reviews Photography Reviews - GALLERIES
- VIDEOS
- BUYER'S GUIDES
A Basic Guide to Lightroom's Powerful Tone Curve Tools (VIDEO)

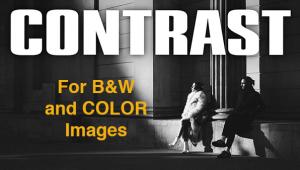
Lightroom's powerful Tone Curve can dramatically improve your photographs and it's incredibly useful for adjusting both color and b&w images. In the quick tutorial below instructor Robin Whalley demystifies this important tool, describes what goes on under the hood, and demonstrates when and how to put it to work.
Whalley is a professional landscape photographer based in the UK who posts weekly videos on editing images for maximum effect. He kicks off the episode by saying this: "The Lightroom Tone Curve is an extremely powerful but potentially confusing feature." His goal is to cover all of the basics to you can unlock the magic of this tool and start using it today.
You'll find the tone Curve in a dedicated panel within Lightroom's Develop module. Whalley explains that it exists in two similar forms, yet the differences are important to understand. The first option is known as the Parametric Tone Curve where sliders are used to adjust the image, and this is the topic of the video below.
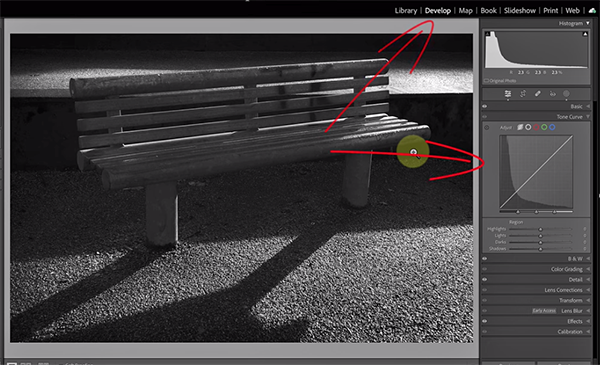
Your other choice is the Point Tone Curves, that will be covered in later lesson. By default the Tone Curve is a straight diagonal line indicating that "the curve doesn’t have any effect on your original image." Manipulating this line is what you'll learn how to do today for making various adjustments to the photo at hand.
Whalley's first example illustrates what happens when you drag the Darks slider to the right. In this case the shadow tones become lighter revealing hidden detail. You'll notice when you do this that the Curve moves up above the diagonal position. Conversely when you move the Tone Curve in the opposite direction the image is darkened.
If you want a do-over there's a quick way to reset the effect so that the Curve reverts to the default position. If you prefer not to use sliders, simply click on the diagonal line and drag it until you see the effect you're after. Just remember that when you move the Curve up the image is lightened, and when you it down the reverse occurs.
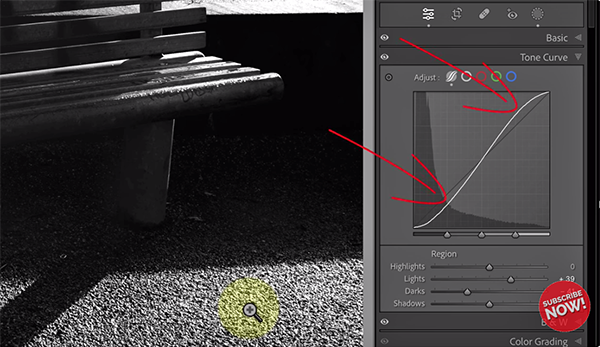
In many cases you may want to do both, as represented by a Curve whereby it's above the diagonal for the highlights and below it for the shadows. Thus bright areas become brighter and dark areas become darker.
The foregoing is just the beginning of what you'll learn by watching this episode, and by the time the video concludes we bet you'll use the Tone Curve frequently and add it to your Lightroom bag of tricks. All you have to do to find more videos like this is pay a quick visit to Whalley's informative YouTube channel.
We also encourage you to watch a very important tutorial we posted recently from another post-processing expert, in which you'll learn the best way to organize your Lightroom catalog for maximum efficiency so you never lose a photo again.
- Log in or register to post comments


![]()
Get the Latest Photo Tips, News & Reviews from Shutterbug!
| Camera Reviews Other Reviews | Mobile Reviews Photography Reviews Columns | News | Features | How-To | Resources |
 © 2025 Shutterbug
AVTech Media Americas Inc., USA
All rights reserved