Background Magic: Digital Anarchy’s Primatte Chromakey Plug-In
The green screen removal process in Photoshop can be a tedious, time-consuming project that may leave you wondering why you ever shot with a green screen in the first place. If only Photoshop’s Tools were more instinctive.
This is where Digital Anarchy’s Primatte Chromakey can become a key tool in your plug-in toolbox. Primatte Chromakey is designed to remove green and blue screen backgrounds from your photos, and do so in a more efficient and less destructive manner than Photoshop.
Downloading And Installing
As with most Photoshop plug-ins, Primatte Chromakey is available as a download from www.DigitalAnarchy.com. Unlike many Photoshop plug-ins, the package is small and downloads in seconds on broadband. The Mac version is just 4MB, and the Windows version weighs in at 11.5MB. Both versions installed quickly and error free for me on Mac Snow Leopard 10.6 and Windows 7.
(One brief note: For the sake of discussion, I’ll be referring to “green screens” in most of this article, but Primatte Chromakey works equally well at removing both green and blue screen backgrounds.)
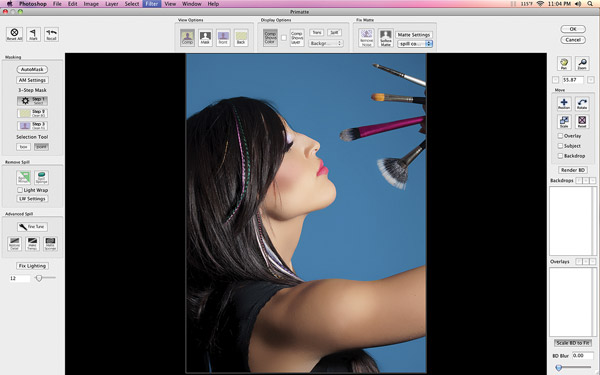
When opening Primatte Chromakey from the Photoshop Filters menu, Chromakey opens as a full screen interface, giving you plenty of room to work on your photos, (#1). Commonly used Tools are placed along the left side of the program. These include the AutoMask button, which will sometimes offer a single click solution to removing the green screen from your photos.
All Photos © Anthony Celeste
Along the top of the Primatte Chromakey interface are 2 critical sets of Tools: View Options and Fix Matte. The View Options tools enable viewing your photo along with its current changes to the green screen. The Fix Matte tool is a powerful option for use when your photo’s foreground does not blend properly into the background after removing the green screen. The Fix Matte tool can help to perfectly blend your foreground image into your transparent background.
The Tools along the right side of the interface are primarily navigation oriented, such as Pan and Zoom buttons, and Tools for Rotating, Scaling and Repositioning your image.
The 3-Step Process
Before getting started in Primate Chromakey, I highly recommend opening Photoshop’s Layer window, right clicking on your Layer’s name and clicking “Convert to Smart Object”. Since Primatte Chromakey is “Smart Object” aware, this will save the changes you make in Chromakey inside your Photoshop PSD file, so that those changes can be removed or updated even after closing and reopening Photoshop.
Green screens can sometimes be removed by simply clicking the AutoMask button in the upper left corner of the Chromakey interface. However, this really requires a perfectly shot green screen image, so you usually won’t get lucky enough for a single click fix. This is where knowing how to use Primatte Chromakey’s toolset becomes valuable knowledge.
When first opening an image in Primatte Chromakey, the software will notice the green or blue background (#2). To begin removing the background, click the “Step 1 Select” button on the upper left side of the interface, and then select an area containing the blue or green background. If there are different shades of blue or green, as seen in #3, select as many of the shades as possible (#3). This process is made easier my making sure that the Box Selection tool, instead of the Point Selection tool, is chosen (these options are made available under the Step 1, Step 2 and Step 3 buttons).

This process will select and remove most of the blue or green background color. However, because of the gradient blues that were present in the background, it will not be removed completely. Dirty or noisy areas of incomplete transparency will be left behind (#4). To remove this background noise, click on “Step 2 Clean BG” and select an area containing the noise (#5). You might need to repeat this step more than once, if there are many unconnected areas of background noise. In this image, only a single step was needed. The result is a background with the blue screen and all background transparency noise completely eliminated (this can be represented by your choice of color, I’ve selected the pure white background in #6).
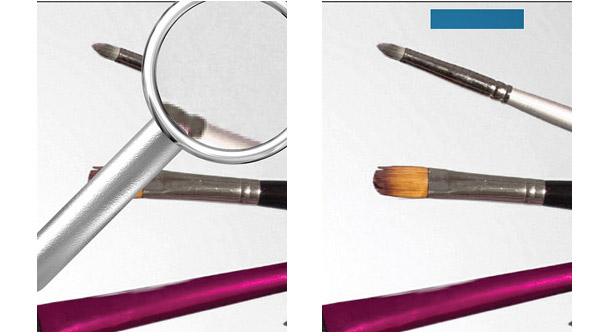
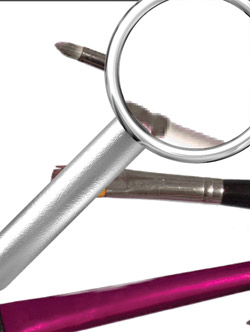
The next step is to clean up the foreground area of the image from any transparency that it may have picked up during the process of cleaning up the background. When displayed on your RGB (Red, Green, Blue) monitor, all hair and skin tones will have some amount of green or blue in them, which may have become partially transparent. In this particular image, the model is wearing a navy blue top and bluish green hair decorations (the shot was chosen for its challenges) that will add to the difficulty of removing any foreground transparency. Fortunately, Primatte Chromakey makes this process a simple one.
To begin cleaning up the foreground, click the Mask button at the top of the screen. Opaque areas of the foreground will appear white, while semi transparent areas inside the foreground, which still need to be cleaned up, will appear as various shades of gray (#7). As you can see, the model’s skin tone correctly appears opaque, but her eyes, hair, hair decorations, shirt and the handles of the paintbrushes; all show up as semi transparent.

To correct this issue, click the “Step 3 Clean FG” button, and make a selection across an area containing the semi transparent pixels, such as the model’s hair. As you can see in (#8), most of the semi transparent pixels have been removed, just a few stubborn ones, such as those in the hair decorations, have been left behind. Making another selection in this area will completely remove any remaining semi transparent pixels from the foreground.
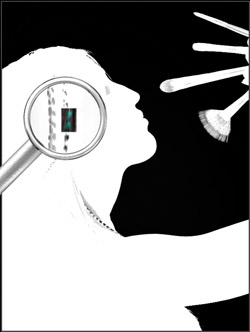
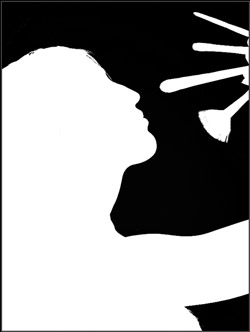
As you can see in (#9), the result is a perfect mask. The foreground is white (completely opaque), the background is black (completely transparent), and there are gray areas of semi transparency around the model’s hair and the bristles of the large paintbrush.
All that remains is some fine-tuning work. Clicking on Comp at the top of the screen takes you back to the composition image that will be opened in Photoshop. The only error that I could find was a touch of blue “spill” that remained on the bristles of the paintbrush (#10). This is easily removed by clicking the “Point” Selection tool, and then the “Spill Minus” or “Spill Sponge” tool on the left side of the screen. (Spill Minus is for minor color spills, Spill Sponge is for more intense color spills.) Simply drawing a line over the color spill removes it from the image, resulting in a perfectly fine tuned image with the green (or blue screen in this case), completely removed (#11).

A background of your choice may now be added in Photoshop (#12), simply by placing the background layer under the original layer, and making sure that both layers are set to visible.

Conclusion
Primatte Chromakey has a steeper learning curve than most Photoshop plug-ins. Despite that, I could not be happier with the results. I can’t imagine going back to the tedious process of green screen removal in Photoshop now that I’ve discovered Primatte Chromakey’s 3-Step Process. At $299 for the Photoshop plug-in, it will pay for itself quickly in the time saved and the excellent results. A trial version is available for Mac and Windows from www.digitalanarchy.com.
For more on shooting the perfect green screen image, see the Digital Anarchy Chromakey Studio at www.digitalanarchy.com/demos/chroma_setup.html.


