Aperture In Black And White; Conversion Strategies For Mac Users
Mac users can use Aperture to attain good foundation monochrome images from
digital camera and scanned RGB files. Because Aperture treats the original raw
file as sacrosanct, and works in Versions from what it dubs the Master, many
options can be explored before exporting the file to image-manipulation software
for further refinement. As with any conversion software, I suggest creating
no more than a first step, what I call a foundation image, during this phase
of the process. True, Aperture and other raw converters have very sophisticated
tools for contrast control, etc.; my approach is to use Aperture's Monochrome
Mixer and other such tools to deal with how color values translate to various
gray scale tonal values, and that's it. I then export or move the image
to Photoshop for further work.
Aperture and other programs' monochrome conversion workflows are like
having selective color contrast filters over your image, with each filter defining
selectively how tones are to be expressed. It can be quite amazing in how it
enhances an image. And Aperture's use of Versions is like having an automatic
Save As step built into the process. This encourages experimentation and allows
you to work on an image, export it to a program like Photoshop and then return
to the original for another approach. What follows is an indicative workflow
using an image I made just north of Abiquiu, New Mexico.
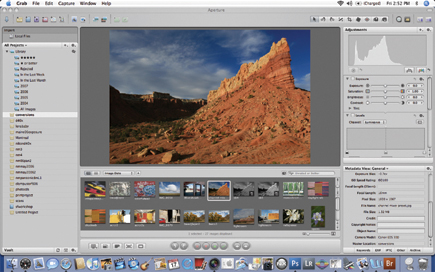
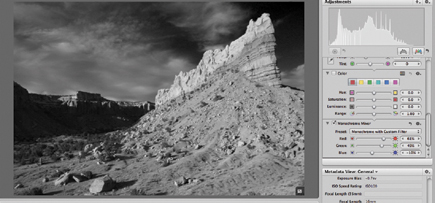
1) I took this shot with a Canon EOS 30D with +1 Saturation setting. In color this shot sings with the light of a setting sun, but I wanted to see how it would work in black and white. I show it here in the Aperture work space.
 |
|
|
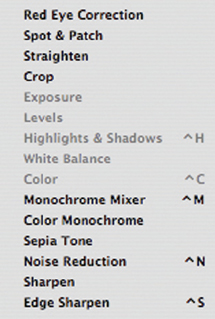
2) On the same level as the Adjustments setting in the upper right of the work space is a "+" symbol. Click on it and you get a drop-down menu; highlight "Monochrome Mixer."
 |
3) When you choose the tool the image goes to monochrome. The monochrome toolbar looks and works very much like a channel mixer. You can easily revert to color by unclicking the monochrome box.
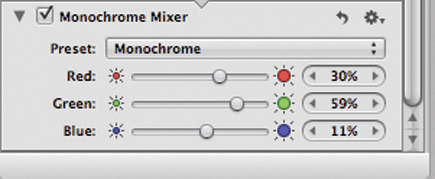 |
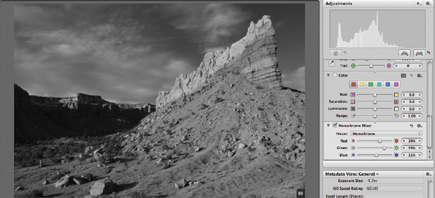
4) Move the sliders as you see fit, watching the histogram for clipping and keeping the total at 100 percent (or so). If you want to go back to default just click on the revert arrow in the toolbar. Here's the default conversion (top below) and a somewhat overdramatic +red/-blue version (bottom below).
 |
 |
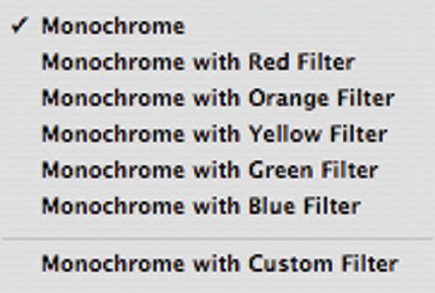
5) Another option is to work with various presets, such as you might have in your camera's Monochrome mode. You get them by clicking on the gear symbol drop-down menu in the Monochrome Mixer tool.
 |


