- REVIEWS
Camera Reviews 
More Reviews Mobile Reviews Photography Reviews - GALLERIES
- VIDEOS
- BUYER'S GUIDES
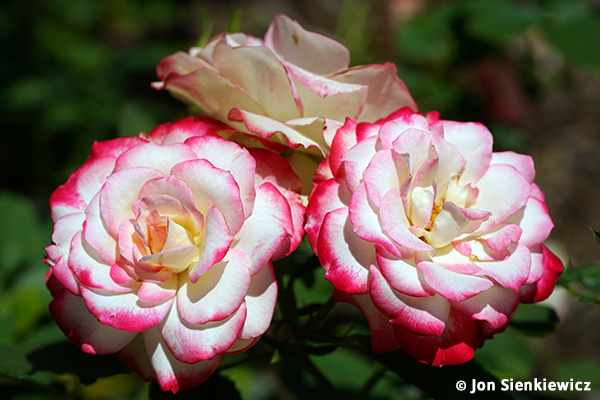
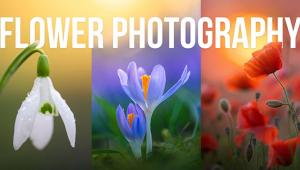
7 Flower Photography Tips For Beginners
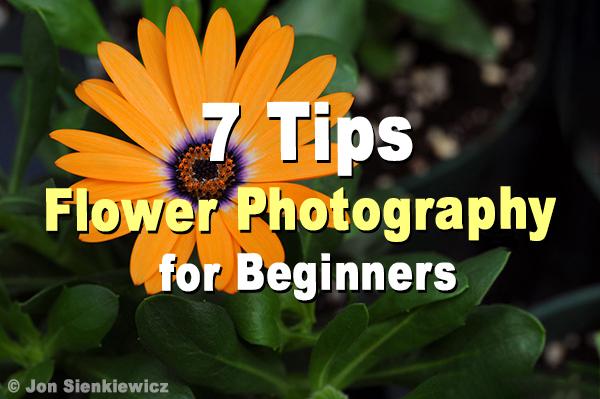
Photographing flowers is a lot like cooking breakfast. Anyone can crack an egg, but can anybody eat the omelet without gagging? Here are seven brief but important tips every budding flower photographer should know.

Some say spring flowers are Mother Nature’s way of rewarding us for enduring winter. Others suggest flowers were invented by a honeybee. Whatever their mystical origins, they make great subjects for photographers of all skill levels. The following seven tips are for newbies who wish to partake in one of the most popular rituals of spring, but intermediate and advanced photographers might find a blossom here, too.

1. Proper Equipment is Important
Time and time again we remind you that cameras don’t take pictures, people take pictures. While that’s eminently true, you’ll get better flower pics if you mind the gear. While some high-end smartphones are capable of capturing reasonable close-ups, you’ll generally get better results with a close-focusing compact camera, DSLR or mirrorless.
We’re not suggesting you break the bank and buy a new camera to capture a few crocuses—unless of course you think that flower photography is likely to become a big deal for you going forward. Instead we’re reminding you to match your expectations to the level of tools available to you.

Mirrorless and DSLR owners, consider a macro lens. More on them below. Short of a dedicated macro, take a look at screw-in close-up lenses like the Kenko +10 ($12.90 from Amazon). They’re inexpensive and work reasonably well. Be sure to check what size screw-in filter your lens needs before ordering.
Tripods are indispensable for all close-up photography. If you shoot with a smartphone you need an adapter to attach it to a tripod. Check out the PodZilla and GorillaPod lineups. They work well and have budget-friendly prices, but they’re rather short, so buy one only if you are willing to get down on the ground, close to the subject.
Although you’ll get better results on cloudy days or by working in the shade, consider buying a reflector to fill in shadows and overall enhance available lighting. They’re affordable and easy to pack, deploy and use. If possible, have a second person hold the reflector in the right position. Alternatively, prop it against a second tripod, lawn chair or other stable object and secure it with removable painter’s tape.

2. Distance Matters
The size of the minimum field-of-view is the critical factor here. If you can get close enough that your camera can capture an area about the size of a single sheet of copy paper (8.5 x 11, or A4 for our European readers) and nothing else, you can get close enough to get satisfying results. If you can cover a smaller field, say, a 3 x 5 index card, then you’re really onto something. When photographing flowers it’s important to isolate the flowers and exclude the distracting background, and you can’t do that from three feet away, usually.

If you own a mirrorless or DSLR camera, the 18-55mm kit zoom it came with probably falls short here. For truly great flower snaps, consider a macro lens or a zoom lens that focuses close. The Tamron 70-180 f/2.8 zoom comes to mind (read our review here). With a lens like that you can capture a small field from a distance. And the versatile lens is also ideal for portraits, sport and wildlife.

Flowers grow on trees, too. Dogwoods flowers are great subjects. A close-focusing zoom is more suitable than a straight macro for flowers above your head.
3. Breeze is Bad
During close-up photography, exposure times (shutter speed) can be very short. This is especially true if you’re using a macro lens and small aperture for greater depth-of-field. Even the slightest breeze can move the flowers and corrupt sharpness.
The most simple countermeasure is to block the wind with your body as much as possible. A better (but more cumbersome and strange-looking) approach is to use two sides cut from a large corrugated box. Alternatively you can ask a helper to hold a sheet of plywood, Masonite or cardboard as a windshield.
You can make pleasant blurry images of flowers gently moving in the airstream too, but frankly, looking at those shots gets old fast and you probably won’t want to collect too many of them.
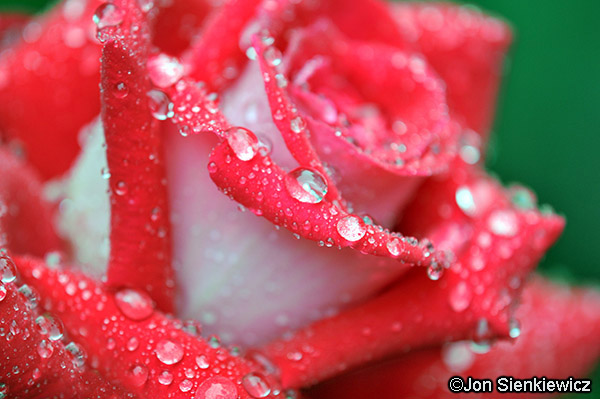
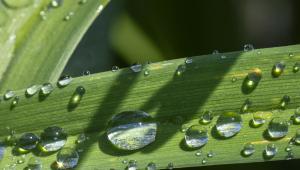
4. Rain is Good
Don’t stand out in the rain; keep your equipment dry at all costs. But welcome rain and the raindrops that sparkle in your images. Short of a thunderstorm, you can assault your flower garden with a hose or sprinkler can and get similar results.
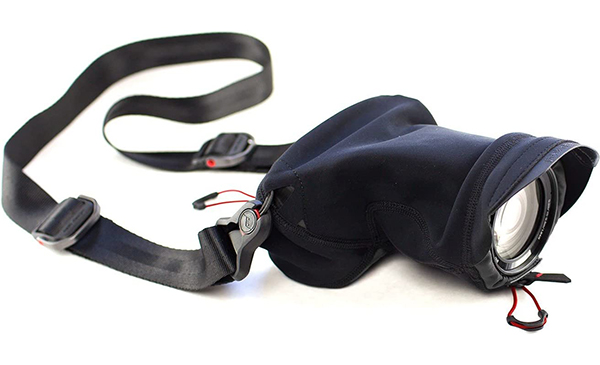
Peak Design, manufacturer of some of the finest camera backpacks, shoulder bags and straps in the business, offers The Shell, a glove-like waterproof wrapper that provides excellent protection from the elements.

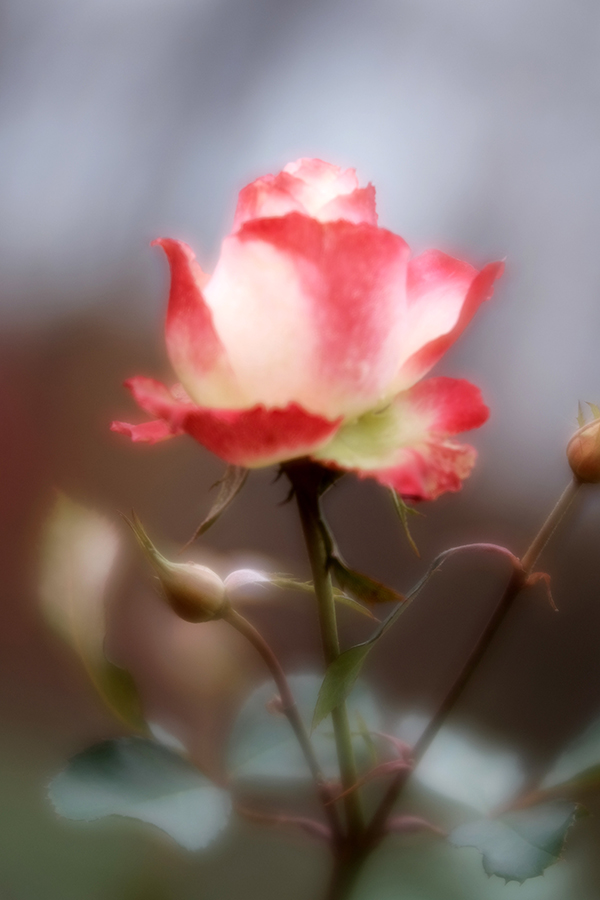
5. Out-of-Focus Can Be Cool
Because flowers are typically very colorful, you can make appealing abstract images by intentionally shoot out-of-focus shots. The best results come from a lens like Lensbaby which focuses manually and is purposefully full of rich unsharpness, aberrations and blur. Read our review of the Lensbaby system here.
If you like the blur effect, you can imitate it when you edit the image or you can use a soft-focus/diffusion filter, or other special effects filter like the Cokin Dreams Filter or Tiffen Glimmer Glass.
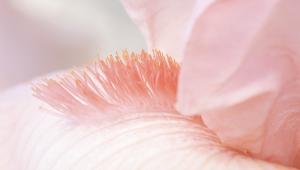
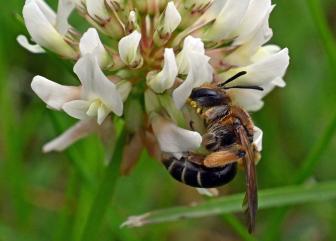
6. Bugs Often Hide From Your Eyes But Not Your Lens
Unless you have an allergy or melissophobia, don’t worry about the bees—they’re not interested in you. Worry instead about the tiny bugs that haunt your images even though you didn’t see them when you took the picture. Spider webs magically appear sometimes, too.
Unseen surprises happen all the time, and they’re hard to avoid. You can give the plant a gentle shake, quick brush with a Swiffer Duster or other common sense remedy, or you can become highly skilled with the blemish removal tool in your image editor.
No image editor? Check out Zoner Photo Studio X. It’s powerful but affordable ($5.99 per month or $59 for a full year) or Adobe Photoshop Elements (around $99 and sometimes on sale for around $79).
7. You Can Practice All Year Round
Obviously, if you grow flowers indoors you have a year-round gallery. But when you’re tired of the same rosebuds and African Violets, take a ride to a local greenhouse or garden center. The ones we often visit have no objections to photography, but it’s always better to ask first. And leave the tripod at home unless you have a special arrangement with the shop owner.

After the flowers die, let them dry and continue to photograph them. Even wilted and desiccated they can still deliver up some attractive images.
See Your Flower Pics on Shutterbug
Now that you know more about capturing images of flowers, send us your best for consideration as a Shutterbug Photo of the Day. Check out this recent article for more information: Start 2023 Right: Share Your Images & Be Featured in the Shutterbug Photo of the Day Gallery.
Become a Member of the Shutterbug Community
Register for a free account. Sign up for our newsletter. Spend five minutes (or less) uploading your best shots once every week or so. Potentially become a Photo of the Day winner. Enjoy viewing the fantastic work being done by thousands of photographers all over the world—and add your images to the enduring collection.
—Jon Sienkiewicz
(As an Amazon Associate, Shutterbug earns from qualifying purchases linked in this story.)
- Log in or register to post comments


![]()
Get the Latest Photo Tips, News & Reviews from Shutterbug!
| Camera Reviews Other Reviews | Mobile Reviews Photography Reviews Columns | News | Features | How-To | Resources |
 © 2025 Shutterbug
AVTech Media Americas Inc., USA
All rights reserved