- REVIEWS
Camera Reviews 
More Reviews Mobile Reviews Photography Reviews - GALLERIES
- VIDEOS
- BUYER'S GUIDES
4 Ways You Can Shoot AMAZING Photos Using an Inexpensive Handheld Prism

By definition a prism is a geometrical glass figure with...wait, stop; forget that. Just take a look at the cover of Pink Floyd's Dark Side of the Moon album. That's a prism, and that's basically what it does.
What a prism for photography does is provide a creative, spontaneous...oh, forget that, too. Just take a look at the otherworldly photos in this story.
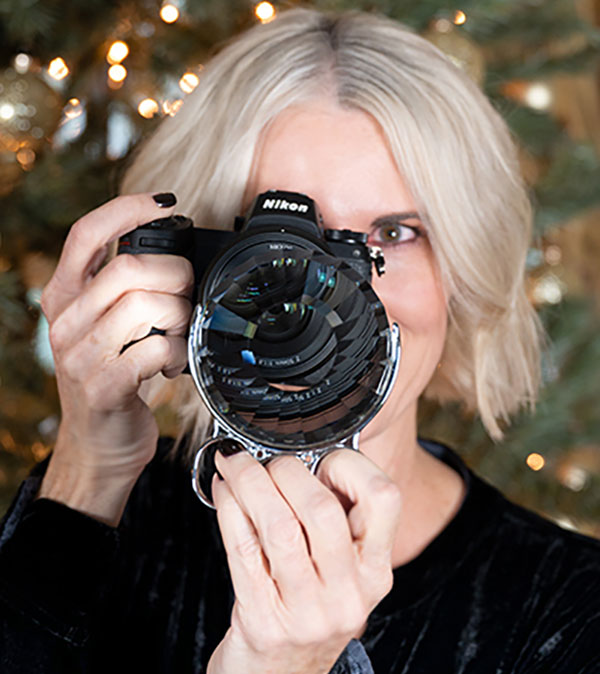
What I'm saying is, get a prism and have some fun. The handheld prism I use for my photography is from Fractal Filters and sells for $99 on Amazon.
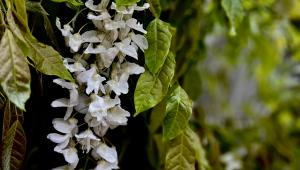
Prisms come in different forms and shapes, and they differ in specific results. The principle behind them, however, is the same: they bend and shape and play with light and reflection. Hold one in front of your lens and you'll see instantly the effect you're going to get. Make some small changes in angle and distance and you'll see what those changes bring to the image.
Simply, you're going to have a good time and make some dazzling pictures as the magic glass of a prism creates brilliant reflections, accentuates colors and basically changes the dynamic of the photographic experience.
Here are the four ways I use a prism in my photography to get the best results.
1. Get a Grip
Positioning the prism—its distance from the lens and the angle at which you hold it—will determine the results, and there's no right or wrong way to do it; it's pretty much an ongoing experiment.
There are several companies that make these magical looking-glass devices in a variety of shapes and holder choices. I chose the Classic Set ($99) of three prisms—called the Julia, the Penrose and the Pascal—from Fractal Filters (you can check them out here). Each has its own finger-friendly holder, and that was a selling point for me—an easy, comfortable and steady grip. Just add knuckles and you're ready to go.

You should also be ready to attract attention, first when people notice the look of the holder and then when they see the results on the back of your camera. Of the three filters in the set, the Julia is the one I use the most because I like the repeating patterns and spirals it creates.
2. Look Sharp
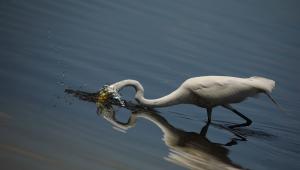
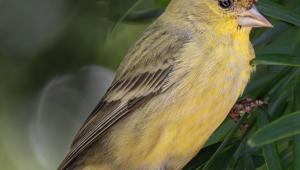
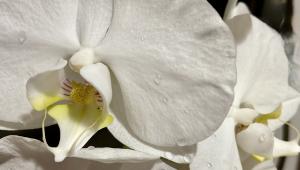
Just about any subject is a prism possibility, but in general it's color, shape, and contrast that I look for. Sometimes, though, the main attraction is me thinking, Okay, let's see what the prism will do with this.

First and foremost, though, the subject is something I'm attracted to for its own intrinsic photogenic qualities. I'm always thinking about color, shape, pattern, and the subject's place in the composition.
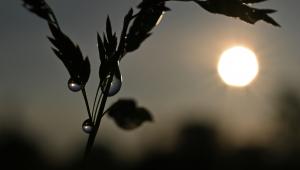
Something brightly colored, against the background of a dark sky, will usually merit a photograph; then I think, Okay, let me amplify it, make it more striking by using the prism. Single- and multi- color subjects work equally well, and sometimes I create my own backgrounds to suit them.
To ensure precise focus in all of my prism photos, I use single-point AF—without the prism in place—to choose and lock focus.
3. Take a Stand
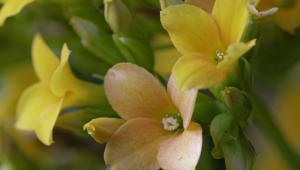
Most often my subject is something I've seen at a location, or it's the location itself, and getting the shot means getting into position and making adjustments. When I want to photograph something close to or at home to explore it through the prism's view, the first step is to get it to stand up and hold still.

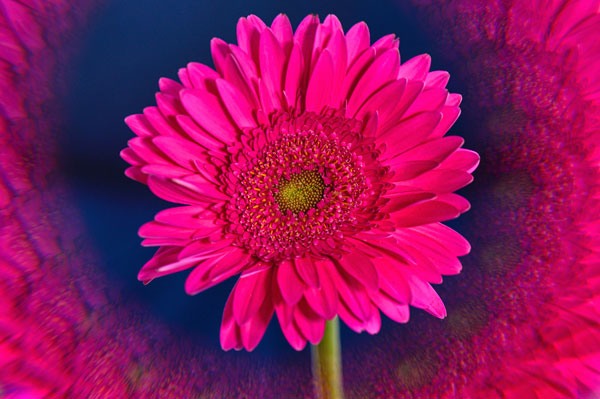
My method is invariably low tech and highly effective—as in the sunflower photo, for example. Ingredients are the subject itself, my Platypod camera support, its accessory bendable goose-neck rod, and a length of painter's tape. It's also nice to have these items along with me on location in case something catches my eye and imagination, but for the most part this setup is used around the house.
By the way, the painter's tape isn't a casual decision. It's easy to tear, easy to manipulate, easy to remove to re-position the subject, and it leaves no trace.

4. Hold Steady
Almost all of my prism photos are taken hand-held in keeping with the spontaneous, fun-factor nature of prism photography. Which means I'll be holding the camera in my right hand, the prism in my left. Which in turn means that I want a lightweight camera-lens combination that'll keep prism photography from turning into a chore.
My Nikon Z6 is perfect in the role of lightweight camera body, and to keep things simple, spontaneous, and reasonably versatile, I limit my glass for prism photography to a duo of lenses: the Nikkor Z 50mm f/1.8 and, with the FTZ adapter, the Nikkor 105mm f/2.8 micro.

You'll see that a lot of my 50mm prism photos are taken at night, as that lens on my Z6 makes for a great low-light combination. With the 105mm I can get closer to my subject and fill the frame.
It's a heavier lens, so while I tend to shoot wide open with the 50mm, I'll often shoot the 105mm stopped down a bit for depth-of-field sharpness help. My general rule of thumb is 50mm for exterior and lower light/night; 105mm for interior and getting-closer-to-the- subject shots.

Ultimately, prism photography is all about possibilities, and when shot with a mirrorless camera, you'll get to instantly see what's possible—and what happens when you make adjustments. I like it for its freewheeling fun.
With the holidays coming up, if you're thinking of drive-by captures of neighborhood Christmas lightshows with a prism in front of your lens...well, so am I.

You can follow Deborah Sandidge and her photography on social media at instagram.com/debsandidge, twitter.com/debsandidge, and facebook.com/debsandidge. Her website, deborahsandidge.com, offers a variety of images as well as photo tips and techniques.
- Log in or register to post comments


![]()
Get the Latest Photo Tips, News & Reviews from Shutterbug!
| Camera Reviews Other Reviews | Mobile Reviews Photography Reviews Columns | News | Features | How-To | Resources |
 © 2025 Shutterbug
AVTech Media Americas Inc., USA
All rights reserved