3 ESSENTIAL Curves Layer Tricks for Photoshop Beginners (VIDEO)

This quick tutorial is intended for inexperienced Photoshop users who don't understand how easy it is to employ Curves Adjustment layers and the huge difference they can when editing images in Photoshop. The video comes to use from the Creative Layers YouTube channel, and it demonstrates three "essential" tricks for getting started today.
These straightforward techniques will enable you to handle a trio of common tasks and achieve surprisingly effective results in a hurry, and the whole process take barely three minutes to explain. Then you'll feel more confident moving on to more advanced photo-manipulation methods using Curves.
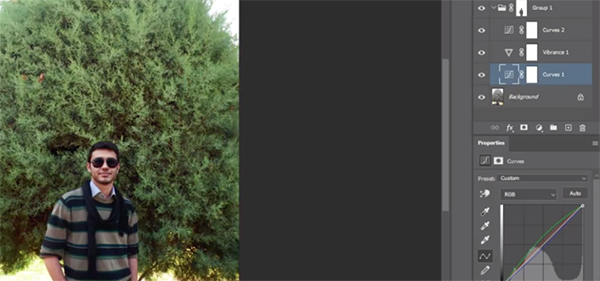
Tip #1 demonstrates how to harness the power Photoshop's Curves Adjustment layers to rehabilitate faded images. Today's unnamed instructor pulls up a flat and boring environmental portrait with his subject standing the foreground of the frame, with a dingy, dull green tree as the backdrop.

The first attempt relies upon Hue/Saturation sliders to boost vibrance in the shot, but this approach fails for two reasons: First, the colors aren't significantly improved and, worse yet, the subject's skin tones take on an ugly and unrealistic reddish orange tint. But watch what happens when a Curves Adjustment Layer is created for quickly transforming the shot from a throwaway to a keeper.
Understanding how to maintain color consistency throughout an image is the second topic of conversation. As our instructor explains, "You may have experienced that when you try to change the light values in an image using Curves, the light changes but so do the colors"—and sometimes not in the way you intend.
All that's necessary to get things right is setting the Blending mode of the Curves layer to the Luminosity option. As you can see in the example of a blue sky with fluffy clouds, this enables you to modify light values without affecting blue tones in the sky. In essence, this is a two-second fix.

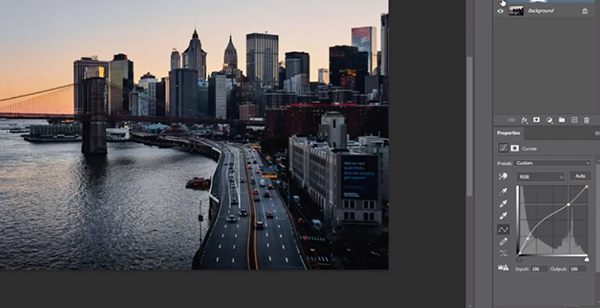
Last on the list is restoring dark areas in an image in a way that doesn't blow out highlights and degrade other characteristics of the photo. The demonstration image is nice cityscape scene captured with the sun low to the horizon and a pretty sky full of soft blue and orange tones. The problem is that the interesting buildings and roadway in the foreground are far too dark and devoid of sufficient detail.
Once again, the fix is fast and dramatic. All you have to do is to add control points to shadow and highlight areas and use a Curves Adjustment layer to balance out the tones and restore details throughout the shot. There are many more beginner tips on the Creative Layers YouTube channel so be sure to check it out.
We also suggest watching a tutorial we featured recently with another post-processing instructor who demonstrates an easy image-editing technique for enhancing nature and wildlife photographs in Lightroom Classic.


