- REVIEWS
Camera Reviews 
More Reviews Mobile Reviews Photography Reviews - GALLERIES
- VIDEOS
- BUYER'S GUIDES
Find and Remove Ugly Image-Killing Hot Pixels in Lightroom (VIDEO)

The term "hot pixels" describes those annoying artifacts caused by pixels that randomly appear as red, great, blue, or even white dots in an image when an individual pixel is significantly brighter than those in surrounding areas within the frame. This tutorial from the Photo Feaver YouTube channel demonstrates how to easily "scan" and remove them in Lightroom.
The problem occurs when a pixel generates more electrical charge or a higher signal than it should. It's an issue that's particularly acute when using high ISO settings or when capturing long-exposure photographs and can really spoil on otherwise great shot unless you understand the simple process for cleaning things up.
Instructor James is a successful freelance photographer/filmmaker who posts twice-weekly basic tutorials designed to help beginners elevate their shooting and editing skills. It can be very time-consuming to edit out these image-killing artifacts by conventional means. But James promises that in this installment of his "Two-Minute Tutorials" series you'll discover a quick fix.

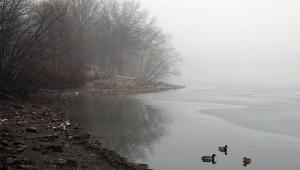
The first step is identifying these unsightly spots and James demonstrates how this is done with a really nice shot of London's Battersea Power Station that he captured after dark with a 30-second exposure. In other words, "it's a worst case scenario." He notes that he turned off the camera's Long Exposure Noise Reduction setting because doing so can sometime reduce or eliminate the problem.
He begins by going to Lightroom's Remove tool and zooming in on the image. Even then, the hot pixels can be difficult to see. This is where the Visualize Spots slider comes to the rescue. All you have to do is enable this feature and follow the instructions that James provides, at which point the spots in need of repair will pop into view.
The all-important step once the hot pixels are identified is banishing them with the normal Remove tool and it only takes James a minute to describe the straightforward process. Simply choose the appropriate brush size and paint them away. He notes that the longer the exposure, the more spots you're likely to confront.

In any case, the technique is clean, effective and super simple. Once the lesson concludes you may want to visit the popular Photo Feaver YouTube channel and peruse the many instructional videos that are available.
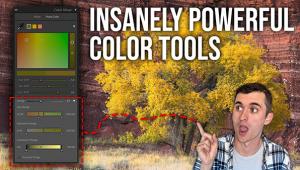
And speaking of unsightly annoyances, don't miss our earlier tutorial in which another post-processing expert demonstrates four powerful Photoshop techniques for eliminating ugly color casts from the photographs you capture in the field.
- Log in or register to post comments


![]()
Get the Latest Photo Tips, News & Reviews from Shutterbug!
| Camera Reviews Other Reviews | Mobile Reviews Photography Reviews Columns | News | Features | How-To | Resources |
 © 2025 Shutterbug
AVTech Media Americas Inc., USA
All rights reserved