Want Beautiful Blue Hour Photos? Edit Them Like This (VIDEO)

Earlier this month we featured a Lightroom tutorial explaining how to edit sunset photos to enhance those gorgeous golden colors so your photos are as captivating as the scene you saw through the viewfinder. Today we're taking a different approach to maximize the impact of Blue Hour images.
Blue Hour is that magical time just before sunrise and immediately after the sun drops below the horizon in early evening when the landscape is bathed in blue light that imbues photos with beautiful soft, cool light that conveys a sense of peace and tranquility. For some reason sunset photos are more common among landscape photographers, but images shot at Blue Hour are just as captivating.
We often turn to German landscape photographer Christian Mohrle who isn't shy about sharing the editing techniques that contribute to his stunning imagery. You may want to download today's demonstration image so you can follow along and mimic his edit as the steps are explained.

With most post-processing techniques it helps to make a few basic adjustments before jumping into selective enhancements like color grading and masking, and that's what Mohrle does here to embellish his pretty Blue Hour seascape. He first changes the profile from Adobe Color to Adobe Standard, which immediately lessens contrast.
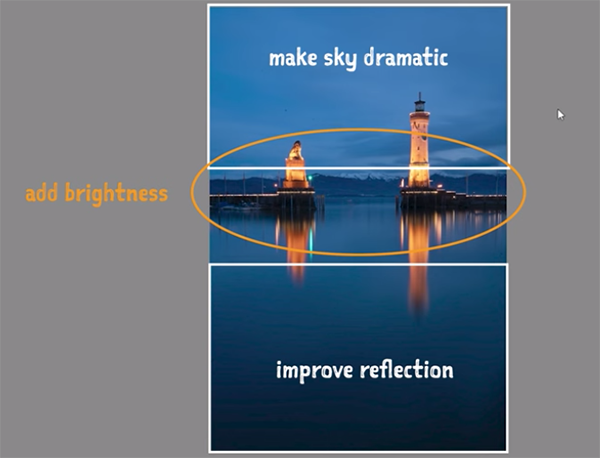
Other preliminary adjustments are geared toward improving exposure because the overall shot includes areas with very deep shadows, while highlights in the sky also need to be enhanced. It's important to take a subtle approach when increasing exposure in images like this to avoid overexposing highlights in key elements and their reflections on the water. Otherwise details will be lost.
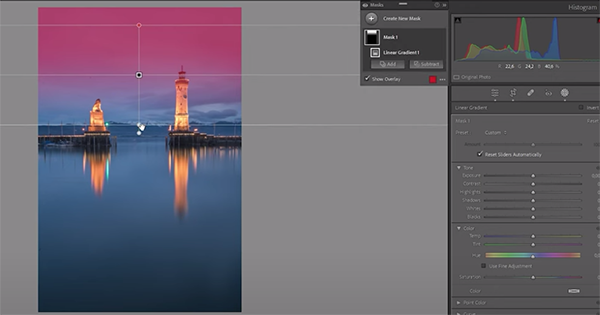
Mohrle walks you through the initial global adjustments and then turns his attention to making selective enhancements to specific area within the frame. He applies a linear gradient over the top of the image to darken the sky, and another liner gradient to make reflections clearer and enhance the tones of the water in the foreground.

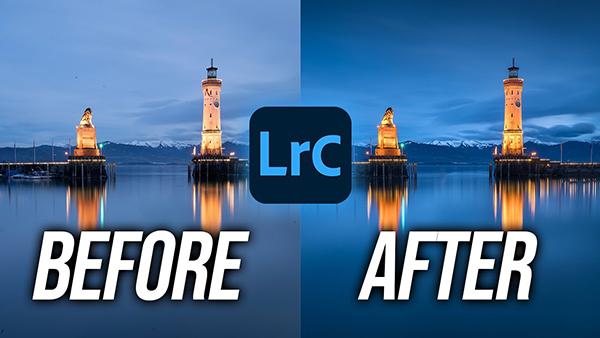
Now it's time for some simple color grading, and Mohrle pulls up Lightroom's Color Mixer for some quick and easy refinements. All that's left to complete the job is a bit of sharpening and cleanup. The final result is very impressive as you can see by comparing Mohrle's before/after images.
Landscape photographers owe it to themselves to explore Mohrle's instructional YouTube channel where's there's much more great advice for elevating their work.
And be sure to watch the tutorial mentioned above, so you understand how to bring out the best in every unset photo you shoot.


