Choosing And Using Lenses: Create A Unique Point Of View
One of the main tools we have for creating visual effects are lenses, the photographer’s eye on the world. Every choice of lens has implications about what you can and cannot include in the frame, how subjects within the frame relate to one another and how we use aperture settings and focal length to create a special point of view. In this chapter we’ll explore lens choice as well as lens controls that are essential to creative photography, including depth of field and focusing options.
Along with exposure, good focusing technique and utilizing various depth of field effects can have a profound influence on the success of your photography. With depth of field you can pinpoint what will be sharp and unsharp in the frame, showcasing the main subject against a “soft” background, or creating images with sharpness from a close subject to faraway objects. It is a way to create content within context, a unique tool available to the photographic “eye.”
Use enhanced “peripheral vision.”
The peripheral vision a lens yields is referred to as its “angle of view.” Think of angle of view as an arc that extends from your eyes as you look out onto a scene without turning your head. Use it as a way of choosing the focal length of a lens to use for each subject and scene.
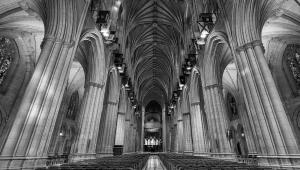
A lens with a lower focal length number yields a wider arc; the higher the number, the more that arc narrows. Wide angle lenses (like a 24mm lens) can expand your normal peripheral vision; super-wides and fisheyes verge on the surreal, like in this photo of a cathedral interior made with a 15mm lens (#1).

All Photos © George Schaub
There’s no way the eye could take this entire scene in with one glimpse. The price paid for this is often distortion, with edges bowing and an exaggerated sense of space.
Know the minimum focusing distance of your lens.
How close can you get? Some telephoto lenses make you back off from subjects, although their ability to bring distant subjects closer compensates somewhat for having to stand back. Specially made Macro lenses allow you to photograph within inches. If you enjoy working close-up be sure to know the lens’s minimum focusing distance. In this photo a telephoto lens (150mm) was used to keep the horse from being startled by a close camera (#2). The minimum focusing distance was 4 feet but the lens brought the subject closer, allowing focus to be set on the horse’s eyelashes.

Use image stabilization for low light shots.
Vibration Reduction, Image Stabilization or whatever the individual manufacturers call it can be helpful when shooting handheld in low light or with a long telephoto lens. Some cameras have image stabilization already built in and don’t need a special lens to achieve the benefit, but in all cases you have to choose to have image stabilization on, as it is usually not the default setting of the lens or camera. This photo was made inside the Currier Art Museum in Manchester, NH with a 105mm lens that would ordinarily require 1/125 sec shutter speed for a steady shot (#3). The exposure was 1/15 sec and is steady thanks to the IS feature of the lens. Most camera and lens makers claim that using IS will gain 4 steps of shutter speed in steadiness; just to be safe 3 is a good bet.

There are a number of “modes” for VR. Mode I, or the “Normal” mode covers handheld shots when you are on steady ground. But what if you are on a moving platform? That introduces an entirely different form of motion that the system has to counteract. For that you use what many systems call Mode II, or “Active.” Take note that the caveat in the past had been to always turn off VR when shooting off a tripod. Some of the newer lenses and bodies now can “sense” that a camera is mounted and turn off the VR automatically, so there’s no need to always check.
Use “stacking” effects.
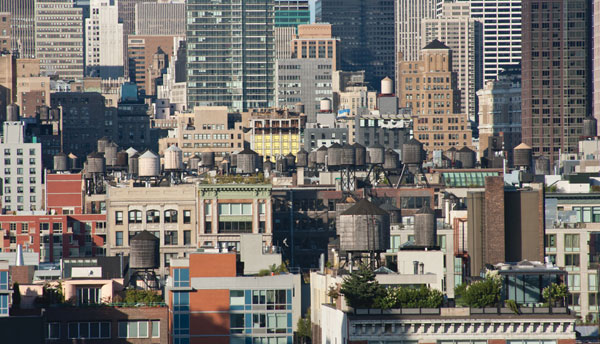
The visual effect of stacking is when objects that are fairly distant from one another are made to seem as if they are bunched together or “stacked” within the frame. This visual effect is achieved with long-range telephoto lenses because of the way they both bring distant subjects closer and “pick out” a small portion of the view before you. In this New York City scene (#4) made with a 200mm lens the distance from front to back covers almost 30 blocks, yet the buildings and the water towers seem to sit on top of one another.
Use foreshortening.
When you work close to a subject with a wide angle lens and use a narrow aperture to maximize depth of field you can create an effect know as foreshortening. The wider the angle of the lens, the narrower the aperture (given you focus on the closest, main subject) and the closer you are to the subject the greater the effect. You can see this in the photo of a boat in dry dock in Nova Scotia (#5), where the bow becomes exaggerated and the house in the background seems tiny, and in the photo of the silver fire hydrant (#6) where it seems as large as the building behind it.


Tilt a wide angle lens.
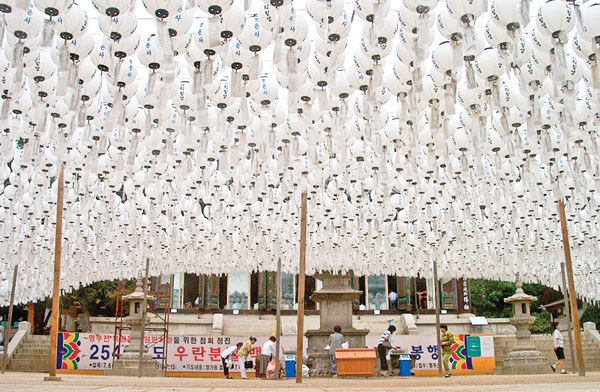
How you point a wide angle lens will affect its tendency to stack, foreshorten or exaggerate space. For example, to increase the feeling of distance from foreground to background when using a very wide angle lens tilt the lens up, as was done in this photo of a temple in Seoul, Korea made with a 20mm lens (#7). The lanterns seem to dominate the frame with the people seeming small in the distance, all an exaggeration created by pointing the lens upward while keeping the horizon straight at the base of the frame.
Play with bokeh.
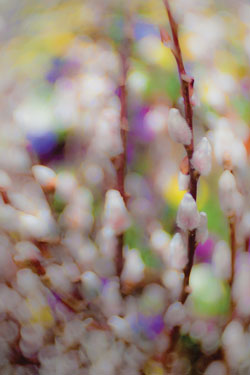
While sharp focus is important in many photos, photographers have created an aesthetic around the creative use of out-of-focus areas and have even given it an “artsy” name: bokeh, which is Japanese for fuzzy. Whatever you call it, those unsharp areas can create a painterly background for any subject, converting real forms to abstract shapes and colors.
In essence, unsharpness is “forced” by working with long range lenses at wide apertures, with tilt lenses that exaggerate the unsharpness (one of the more popular ways of doing this is working with Lensbaby optics, www.lensbaby.com) and by using close focusing lenses at wide apertures positioned close to the foreground subject. This photo was made with a Lensbaby with focus on only one stalk of the plant (#8).
Create “deep” depth of field.
“Deep” depth of field means that everywhere the eye looks in the picture is sharp. While there are reasons to soften backgrounds, a deep depth of field creates a powerful sense of place and context for all subjects within the frame. The subjects may be similar or disparate, close up or far away, but deep depth of field can give equal weight to everything in the scene.
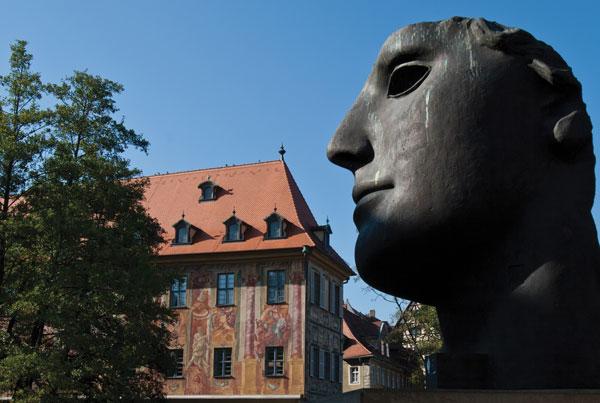
This photo of a statue (and the buildings behind it) in Bamberg, Germany (#9) was made with a 24mm lens and an aperture of f/11; the focus was set to ensure both the statue and the background were sharp. Likewise, this photo of a tent flap and the myriad of balloons in the background at the Albuquerque Balloon Festival (#10) was made with a 16mm lens set at f/16, bringing both close and far into focus.


Use a wide angle for shallow depth of field.
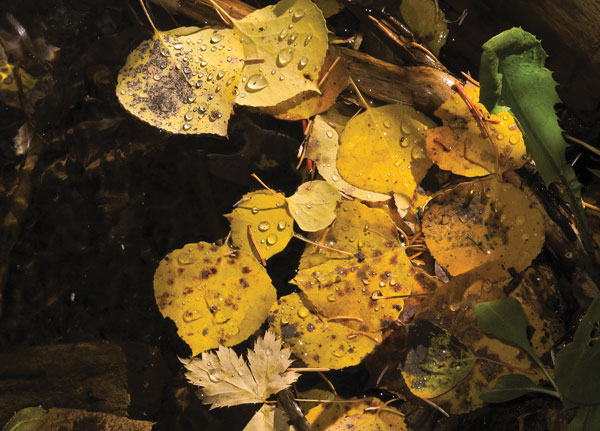
While wide angle lenses are often thought of as tools to get as much of the field of view sharp as possible, you can also use them for great shallow depth of field effects. The trick is to get as close as you can to the foreground subject (wides usually have a very close minimum focusing distance) and set as wide an aperture setting as the lens allows. This photo of fall leaves (#11) was made with a 16mm lens at f/2.8, which made for a painterly background effect.

Get close.
When focusing close the initial point of focus is critical; poor focus on the foremost areas often ruins the shot. Examine the frame when you work to make sure you have acquired focus on the correct area and do not allow the focus to shift away from the closest subject. Keep in mind that most cameras will “seize” the closest subject to focus upon, but only if that subject falls within the camera’s focusing target areas.
To help ensure good results, keep in mind that shooting at the narrowest aperture on the lens yields the deepest possible depth of field, critical to get focus from the front to the back of the scene. This photo of fall leaves in a pond (#12) was made from only a few inches way; the focus was grabbed and then locked on the foreground leaf, and a narrow aperture of f/16 ensured sharpness throughout.
Watch out for too many focus points.
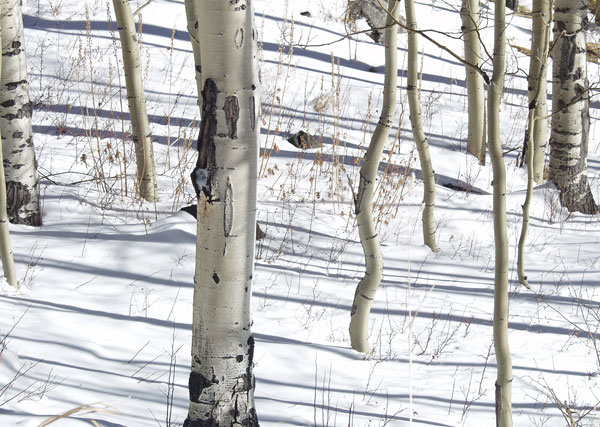
To us this looks like a stand of birch trees in the snow (#13)—to the focusing system in a camera it looks like a lot of confusing and tempting targets. There are 2 ways to work here. You can switch to manual focus, using as narrow or as wide an aperture as you want. Or, you can set the center AF target and place it over the foreground tree until it lights up to confirm focus, lock focus, recompose and expose.
Avoid flare and ghosting.
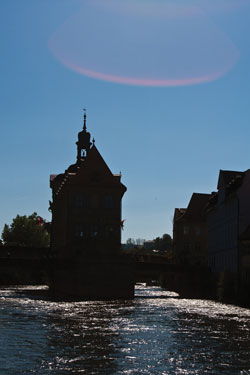
Flare is one of the main causes of poor image quality. Flare is caused by light entering the lens at an oblique angle or from a “point source”, such as the sun or an open (unshaded) bulb. Flare results from the light bouncing around the internal parts of the lens and creating a flaw of light that can affect image contrast and color reproduction. (Obvious shapes formed by flare are sometimes called “ghosts”, but sometimes flare manifests itself as a kind of veil over the image.)
The most obvious course is to avoid pointing the camera directly at a strong light source. But shooting with a lens hood or shade attached to the lens, which blocks stray sidelight, is highly recommended. This will help increase image quality substantially. The lens flare here (#14), the pink ribbon in the sky, results from shooting toward the sun, a problem that could have been avoided by using a good lens shade.
- Log in or register to post comments
