Become Your Own Publisher; Online Photo Books And Albums
In the last several years, the digital revolution has completely changed how photo books and albums are created...and change has been for the better in every respect. It's out with the old--covers without images, prints painstakingly glued in or slipped into boring 4x6" sleeves, improvised captioning (often by hand), heavy pages (often with unappealing acetate covers), and predictable page layouts. And it's in with the new, courtesy of online publishing services--covers with images and your choice of background color and material, numerous page design options, quality printing directly onto the album page, easy captioning, and more. Depending on size and style, these new presentation vehicles start at about $30; add more if you choose a leather cover, an album size larger than 81/2x111/2, or exceed 20 pages in length (it's $1, more or less, for additional pages). No wonder online albums are a fast growing trend, with many suppliers lining up to meet the demand.
 |
|
|
Ease Of Use
Online programs are a relative breeze to use once you get the hang of them,
which shouldn't take more than a couple of hours if you follow the online
publisher's directions. The programs are intuitive, beginning with image
uploading, and then using drag and drop features, easy-to-access template designs,
and a host of options (picture backgrounds, borders, and more) all designed
to give you lots of control while making it easy to experiment...and easy
to change your mind as you proceed. While the programs are fundamentally the
same, the specific navigation and tools vary from supplier to supplier, so it's
impossible to provide generic instructions. You must go to a site (or compare
two or three) to get a feel for how it all comes together.
 |
|
|
While everyone will find their own best workflow, here's my step-by-step
approach:
1) Select the pictures and make sure you're satisfied
with the color, contrast, sharpness, etc. before you upload them. Quality in
improves quality out.
2) Upload the digital files onto the publisher's website
or, with some publishers, load images into their proprietary program that you've
downloaded on your computer. You pay for a minimum of 20 pages (10 pages, two
sides), so you'll generally want to work with at least 20 pictures. I
upload a handful more images than I expect to include in the final album to
give me layout flexibility.
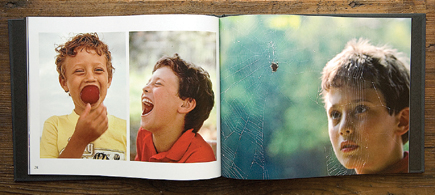
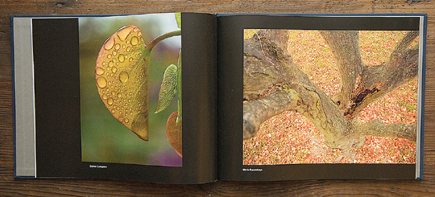
3) Create a picture sequence that makes sense: chronological,
by subject groupings, or whatever. Consider placing pictures next to each other
(on the same page and/or facing pages) that "vibrate" well together
because of color or subject matter or composition. I like it when my eye jumps
back and forth, comparing what's the same, what's different. Think
about putting a photo that captures a subject broadly next to a detail shot
that's related.
 |
|
|
4) Run your strongest pictures large, your weaker pictures
smaller. Whenever possible, delete mediocre images unless they have special
significance; like a sour note at a concert, a weak photo jars the album's
mood.
5) Place several closely related pictures next to each other
on the same page now and again...but running too many pages with multiple
pictures can be too busy, and placing pictures that are very similar next to
each other can be monotonous.
