Create Your Own North Light
Beautiful Daylight, 24 Hours A Day

Photo 1.
Photos © 1999, Steve Bedell, All Rights Reserved

When I look at old photos, I mean circa 1910, not my high school yearbook, I marvel at how beautiful they are. Those old time photographers had things a lot tougher than we do now, what with large format cameras, slow film speeds, and no electronic flash. The single most outstanding quality of their photos is the light. That's because many of the old timers used only daylight for their light source and were quite adept at it. When properly used, it's hard to find a more beautiful light.

When doing wedding photography, one of the first things I do is scope out my shooting area, trying to locate a spot for nice window light portraits. In my studio, as I've written about in a previous Shutterbug, I sometimes use a window as my light source, placing backgrounds on movable flats so that I can position them just where I want--it's much easier than moving the window. There are problems with this technique. Sometimes the window faces the wrong direction. If you've got a southern exposure and it's a sunny day, you'll either have to forget about it or use some type of scrim. Even when you've got a window that faces north, it may be too dark, you may have snow kicking light up from underneath, or worse yet--it could be night. Then what do you do?

Well, you could do what my friend Chris Beltrami did with his Barre, Vermont studio. Make your own north light and make it available 24 hours a day, 365 days a year. You can get beautiful, repeatable results. Tell Mother Nature to take a hike, you're packing your own light. If you want to create your own daylight studio, here's a look at how Beltrami built his plus some tips on revisions he might make after shooting with it for about a year.

First, let's think about why we like north light so much. Every light source has four characteristics--quality, quantity, color, and direction. The defining characteristic of north light is its quality. It's big, soft, and diffused. Since it's coming from the north, it catches the direct sunlight and bounces it off the sky. Maybe that's where the term "skylight" came from. So if we want to replicate "skylight," we need to make sure our source is big, soft, and diffused. What we need is a softbox about 10x12', with a depth of about 4'.

Photo 2.

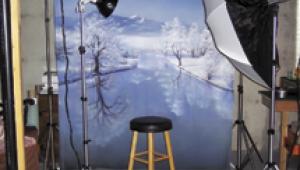
Beltrami has basically created a big "wall bounce" flash and diffused it. Simple. Let's look at the photos as we go along to see how this has been accomplished.

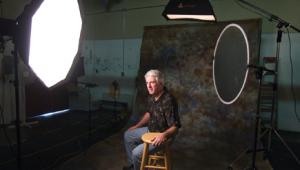
Photo 1 shows the gist of it. He built a hallway about 4' wide, keeping the walls, floor, and ceiling white. The right side of the photo shows the framing. He hung white sheer curtains from the top of the framing to diffuse the light. While not visible in this photo, there is also a built-in window frame that can be included in the photo if desired. Now here's the key to creating the beautiful, wraparound quality of north light. Don't put the light source too close to the background wall. As you can see by the photo, Beltrami has positioned his light 12' from the background wall. Put it too close and you'll be fighting a split light or light from behind.

You might think that you need gobs of power for this setup. Beltrami uses a Photogenic Power-light 750, a moderately powerful flash unit with 750 ws of effective flash power. By putting the power setting at about 75 percent, he gets an f/11 reading using Kodak Portra 160NC. I thought he'd need a 400 speed film to get that kind of depth, but it's not necessary. Of course, if you have lower powered lights, using the faster film is always an option. If you like larger f/stops for individuals and smaller ones for groups, consider setting your lights so that with the 100-160 speed films you're at f/5.6 or f/6.3 and then f/11 with 400 speed films for groups. I much prefer changing films to changing lights, I always forget to change the power settings back again.

Getting back to the photos and layout, Photo 2 gives you some idea of the size and quality of the light. Notice how it "wraps around" the columns with a very smooth transition from highlight to shadow area. Notice the size, too. The ceiling is 9' tall and the light source is 12' back from the far wall. You may see the window frame faintly in the photo.

Photo 3.

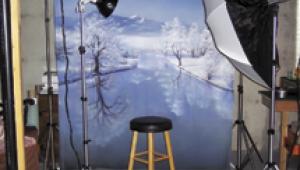
Photo 3 shows the entire width of the studio. There are times when you may want to control the light more precisely than the window light, especially when gelling lights on the background. If your studio is big enough to allow you the luxury to do it, you may want to have separate shooting areas. Note also the white floors and how no fill or reflector is used for the window light setup.

After shooting with this setup for about a year, there are really only a couple of changes Beltrami would suggest. The first--no tile floor to catch the wheels of your tripod dolly. The second concerns the light direction. The current "wall of light" is at a 90° angle from the subjects. Even with the light placed 12' back, you still must guard against split light. Split light is when one side of the face receives light and the other is in the shadow, usually "split" by the nose. To resolve this, he thinks he may modify it by angling the wall so the light direction is perhaps about 60° or so from the subjects instead of 90. All in all though, he's thrilled with the light and the concept. There are no lights to fiddle with, just hook up your radio control, set the f/stop and get going. If there's a blizzard outside, too bad. You're packing your own "daylight." If you would like more information, contact Beltrami at (802) 476-4762. He and his wife Pat are both stellar photographers and among the world's nicest people.

X