Use More Paper Waste Less
Use Test Strips And Work Prints For Better Results

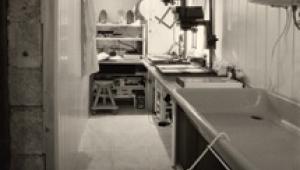
The Darkroom

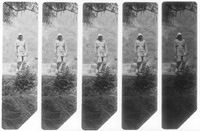
How big should your test strip be? It depends on the size of the final print. This is an 8x10" test strip--but the final print is 24x54". It appears, with me rinsing it, in our book "Darkroom Basics" (Collins & Brown 2000, ISBN 1-85585-812-6).
Photos © 2002, Frances E. Schultz, All Rights Reserved

Beginners tend to be very cautious about the amount of paper they use. Paradoxically, therefore, they waste more than they need to. Rather than making test strips, and then a work print, they will go straight to what they hope will be their final print. Then they are unhappy with it, so they try again. And again. And again. Worse still, they don't try again: they put up with a second-rate print, which is an even bigger waste of paper.

But if you start out by being prepared to "waste" a few sheets of paper--"waste" being defined as "paper that you know won't end up as a final print"--then in the long run you should both save paper and get better prints.

Follow Procedures
Begin by always developing your prints (including test strips, which you should always make) for the recommended time at the recommended temperature. Don't snatch an overexposed print out of the developer when it comes up too fast, or you will get poor tonality and grayish blacks, and don't leave an underexposed print in the developer too long, in the hope of more density or contrast, or it can stain. Don't try to wring a few more prints out of exhausted developer, either.

Cover That Tonal Range
Remember that an undersized test strip can be worse than useless. Don't skimp. Make sure the test strip covers a good range of tones: a quarter of a sheet of paper is not too big. Make test strips for both exposure and contrast. This may mean two or three test strips. That's OK. Once you find the exposure and contrast that looks right, make a work print.

Your Work Print
Think of a work print as a full frame test strip. Look for local areas that would benefit from extra exposure (burning) or reduced exposure (dodging). Once you see the print as a whole, you may realize that the exposure or contrast (or both) are not actually ideal. That's why the work print is only a step on the road to the final print. At this point you have "wasted" two sheets of paper (one cut up for test strips, one for the work print), but the next print will be much better than if you had just jumped in and tried to make the final print, first off.

Ideally, wash and dry your work print before you judge it. This is not always practical if you are using Fiber Base (FB) paper, but if you don't have a fair amount of printing experience, Resin Coated (RC) paper is a better bet anyway. Don't try to run before you can walk. Trying to make "fine prints" on FB paper before you can reliably make a good print on RC paper is definitely trying to run before you can walk, though many try.

Dry-Down Views
Resin Coated paper is quickly processed, and drying time is short.

The idea of washing and drying a print which is just a test may seem strange, but a wet print looks lighter (up to a quarter of a stop) and more contrasty (up to half a grade) than a dry one. If you know a paper well and have been printing for a long time you probably compensate for this dry-down factor automatically. But change papers without checking the dry down, and you waste paper. This is particularly true of semimatte and matte papers because they dry down ferociously.

Drying work prints has other advantages, too. Carry a print into the daylight, and you may be surprised by the difference. You can use daylight inspection bulbs in the darkroom, but the quality of the light is never the same. Think, too, about how the final print will be used. If it is to be hung under tungsten light, inspect your work print under tungsten. If it is to be displayed under fluorescent light, inspect it under that. If it is to be reproduced, a useful trick is to photocopy it, which you wouldn't want to do with a wet print: a print that photocopies well will almost invariably reproduce well.

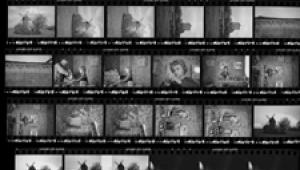
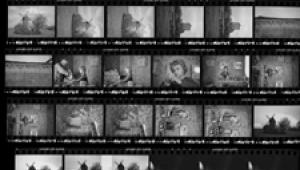
Test strips can give you a lot of information. When Roger Hicks and I wrote "Quality in Photography" (Amphoto 2000, ISBN 0-8174-5634-1) we decided to try controlling contrast on graded paper using two developer baths, one high contrast (Tetenal Dokulith) and one soft working (Tetenal Centrabrom). The test strips shown here were made on Berrger NB3. Both (above and below) were exposed for an identical sequence of times, but one is developed in the high contrast developer, the other in the low contrast developer. After a few more tests, I made the final print, developing it in the Centrabrom for 45 sec and the Dokulith for 1 min and 15 sec.

Exposure And Contrast
Once you have your work print, the temptation is to try to get what you want in just one step. If at all possible, resist this temptation. Even if you are sure that you need to change both exposure and contrast, don't change both at once. If you do, and the new print is still not right, you won't have much more information than you had before. Decide which is more likely to be the problem: let's say, exposure. Make a new work print. You may now find that you do not need to adjust the contrast after all: this one change may get you the print you want. If it does, you have saved a sheet (or two or three) of paper.

The work print can also prompt more test strips. If a light area such as a sky needs more exposure or a change in contrast, you can go back to test strips, rather than using whole sheets. Work out the adjustments you need to the base exposure and contrast. You can do the same thing for areas that are too dark: start with your work print exposure, but mask (dodge) the area for part of the time. When you are sure of what you need, apply the adjustments to another work print. Don't make your adjustments and corrections too small. If you think that a work print is about a quarter of a stop dark, make a new one half a stop lighter. You will be amazed how many times the bigger adjustment is right. And you will only have used one piece of paper to get there. The same goes for contrast. If you think half a grade harder would be right, make a new print a whole grade harder.

Keep A Log
A darkroom log can be invaluable, particularly if you change both exposure and contrast on the way to the final print. I rarely keep track of my initial test strips, but when I get to the first work print I note the base exposure and contrast. That way, if I alter the enlarger settings while making new test strips or new work prints, I can get back to my initial exposure.

The notes for the final print should be comprehensive. Note any dodging and burning, the paper, the developer, and the filtration or the enlarger used (Ilford MGIII filters are different from MGIV, and Durst is different from Meopta). If any single variable changes, the information in the log will not necessarily give you a good work print, though it is still better than nothing.

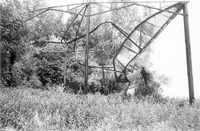
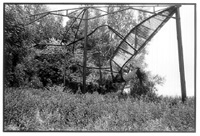
I had determined the correct contrast and exposure for this print, but I still wasn't satisfied with the work print. I took two black cropping "L"s and moved them around on the print to see if a change of shape would help. I think it works much better as a panorama. The crop (below) emphasizes the sweep of the approach and makes the lake and boat stand out much better.

The log can also be useful if you want to duplicate your final print--although, I must confess, I use the information in the log to produce a new work print, and very often make a number of new adjustments before I make my new final print: I rarely want to make exactly the same print again and again.

The other way to keep a record of your printing is to make notes directly on (dry) work prints with a write-on-anything pen. This serves two purposes. It reminds you of how to make the final print, and it also identifies a work print months or even years after you have made it. Another trick for identifying work prints is to cut off a corner.

All of this applies only if you stick to a single kind of paper--whatever you find you like best. I use Ilford (and mostly Warmtone RC at that), but I know other printers who swear by Agfa, Forte, Oriental, or Bergger. Whichever you choose, you can learn exactly what it can do: you know the dry-down factor, you know how it reacts to your enlarger's filtration. The same applies to developers: changing developer can alter the tone and contrast of your paper, and even the paper speed, quite apart from development time. If you constantly chop and change papers and developers, you will find it very difficult to ever become a consistently good printer.

To sum up, then, how does wasting all this paper stop you wasting paper? Simple: you begin to understand what you are doing. By making one change at a time, drying the print, and checking it under the right kind of light, you soon begin to internalize what needs to be done. Instead of two or three work prints, you find you need only one. Think of it as a (very cheap) course in fine printing: one that costs no more than a few sheets of paper.

X