- REVIEWS
Camera Reviews 
More Reviews Mobile Reviews Photography Reviews - GALLERIES
- VIDEOS
- BUYER'S GUIDES
Use Lightroom’s Targeted Adjustment Tool to Enhance Specific Parts of an Image (VIDEO)
As the name suggests, Lightroom’s Targeted Adjustment Tool enables you to “target” and adjust certain portions of a photo without affecting other parts of the image. Unfortunately, this powerful easy-to-use tool is unfamiliar to many photographers.
The good news is that after watching the quick tutorial below, this somewhat obscure tool will earn a prominent place in your Lightroom bag of tricks. Image-editing expert Anthony Morganti demonstrates everything you need to know in just eight minutes.

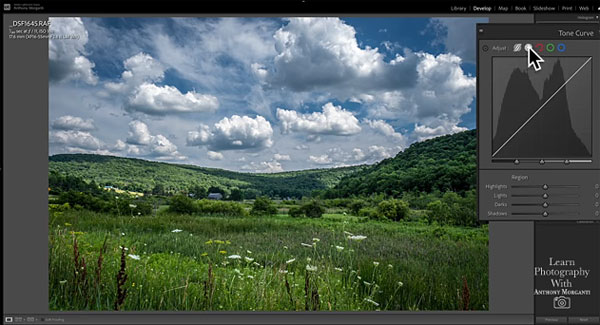
As Morganti explains, there are two ways to access the Targeted Adjustment Tool in Lightroom Classic. One method is to open the Tone Curve and click on the small circle at the top left of the panel. By doing that you can employ the tool is all of the Curve options available.
The Targeted Adjustment Tool can also be found in the HSL Panel where you can use it to selectively adjust hue, saturation and luminance. Morganti begins here, clicks on the Saturation tab, and demonstrates how easy it is to adjust a specific color in his image, without affecting any others.
For example, you could add saturation to blue in the sky, or to the green foliage below. The same approach holds true for hue and luminance. Or for a special effect, you could totally desaturate one tone in a shot, while leaving everything else in color.
As mentioned above, you can also use the Targeted Adjustment Tool in the Curves Panel, and Morganti explains why he prefers doing so with the Parametric Curve than with the other options available.
You can find more helpful editing advice on Morganti’s YouTube channel, and in another tutorial we posted explaining how to make daytime images look like they were shot at night with a few quick clicks in Photoshop.


![]()
Get the Latest Photo Tips, News & Reviews from Shutterbug!
| Camera Reviews Other Reviews | Mobile Reviews Photography Reviews Columns | News | Features | How-To | Resources |
 © 2025 Shutterbug
AVTech Media Americas Inc., USA
All rights reserved