Star Trails, Digital Style; Exposure And Stacking Techniques
The earth rotates tilted on its axis approximately 23Þ. This fact renders
most forms of astrophotography maddeningly complex. There is one form of night
sky photography that is given to us in relative simplicity by our home planet's
relentless spin: star trails. All we need to create gorgeous star trail shots
is a camera, a tripod, and a remote or cable release.
Before I owned a D-SLR I took star trail shots with film cameras made in the
1970s. These classics don't need batteries to keep the shutter open. Today,
battery life is an issue, but digital cameras keep improving, and some of them
are amazingly robust. It doesn't even require a D-SLR anymore, as some
digicams have become so noise-free as to allow considerable opportunity for
sky imaging.
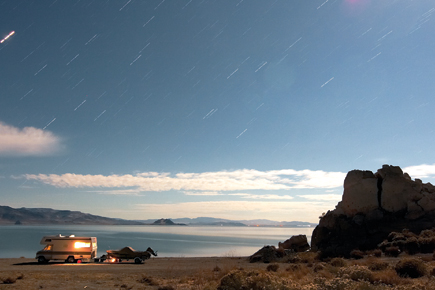
Camper At Pyramid Lake |
|
 |
|
|
One effective way to approach star trail imaging with a digital camera is
to use a technique called "stacking." This allows numerous exposures
of shorter duration to be combined into a single photograph. A star trail shot
can be built over a period of hours, slowly accumulating exposure time. It's
not arcane or difficult. Mostly, it requires patience and a thermos of coffee
or hot chocolate. And it sure saves on battery life.
Location, Location
By sheer cosmic coincidence, the star Polaris, known as the North Star, is located
less than half a degree off of the celestial North Pole. If you stand at the
North Pole, you will see Polaris directly overhead. As you move south, the star
sinks farther and farther in the sky until, at the equator, it vanishes over
the horizon. At the equator, something strange happens to photographic star
trails. They become two arcs, one bending north, one bending south.
Southern Hemisphere photographers have no such touchstone as Polaris on which
to train their cameras. In the Northern Hemisphere, Polaris is easily found.
As a child, I was told to look for the two end stars in the Big Dipper's
bowl. Draw a line through them, and, like an arrow, that line points to a lonely
star of middling brightness: Polaris. Around this star, because of its location,
the entire panoply of the heavens' wheels.
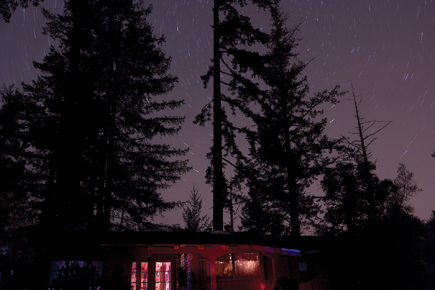
Layer One |
|
 |
|
|
It's a good starting point to take a wide angle lens; locate Polaris,
then set up your tripod and begin taking pictures. A simple formula describes
how long it takes for stars to move from discrete points to blurs, and then
into arcs. Divide the 35mm equivalent of your lens' focal length into
the number 600. If you're using a 20mm lens, you have 30 seconds before
the earth's movement starts to bend the star's image. In just a
few minutes, a significant amount of arc is revealed to film or sensor.
Stay Focused
Focusing on a star is like focusing on a blank wall. Where is it? Twisting your
lens barrel to the end isn't the same as focusing at infinity. I like
to pre-focus, on the moon, or use a bright planet or a distant light that my
camera's autofocus can lock on. Then I turn off the autofocus and take
care not to disturb the focus ring. A bit of experimenting will show you where
the focus point is for any particular lens. It would be a shame to spend hours
trying to make an image only to discover that you have bloated trails and a
fuzzy foreground.
Because a stack of star trails is going to accumulate light over a period of
time, stopping down just a little, to between f/4 and f/5.6, will control a
tendency for the final image to be overly bright. Middling ISO settings, 200-400,
seem to work best.
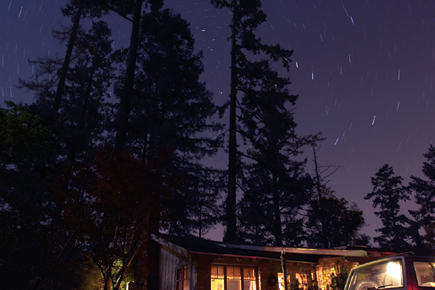
Layer Three |
|
 |
|
|
One of the points of stacking images is to avoid noise. Ten 6-minute exposures
will be far less noisy than one 60-minute exposure. A good result will need
minimum or no noise reduction software in post-processing. Digital noise increases
with ambient heat, so cool nights can be better than warm nights for this work.
Other shooting tips are a matter of common sense. If you live half a block from
Yankee Stadium on game night, don't expect to see good star trails. Light
pollution or an overly bright moon can limit the number of stars visible to
your sensor. A lens hood can help eliminate distracting light from other sources.
If a lens hood isn't available, fashion a tube of black construction paper;
just make sure it doesn't get into your field of view.


